ta name="google-site-verification" content="LnUtT_d1nKFEi6qCVRa2VtURKXcUowdpcm2UMwFTZUk" /> hummus recipes: August 2009

Thursday, August 27, 2009

Chicken with mushrooms and zucchini

Last one. I'm not exactly sure which blog site I got this off of, but I'm pretty sure it was either The Sisters' Cafe or My Kitchen Cafe. We liked this one a lot and the only adjustment I made was increasing the amount of sauce. I have posted the recipe with the changes.


Chicken with mushrooms and zucchini:

1 lb chicken, cut into 1" chunks
cornstarch for dusting
1 Tbl vegetable oil
1 Tbl sesame oil
4 Tbl soy sauce
2 Tbl balsamic vinegar
4 garlic cloves, minced
2 tsp ground ginger
2 Tbl oyster sauce (the original recipe doesn't call for this)
1 package of fresh button mushrooms
3-4 small zucchinis, cut into 1" chunks

Lightly dust chicken with cornstarch. Heat oils in large skillet or wok and fry chicken until golden brown. Remove from pan and drain on paper towels. Add zucchini and mushrooms to pan and stir fry for a few minutes. Add soy sauce, vinegar, garlic, ginger, and oyster sauce, and stir fry until veggies are fully cooked. Add the chicken back to pan and stir to coat with sauce. Serve over hot rice. I also through some cashews on top.

Chocolate zucchini bread

Yet, another zucchini bread recipe. This recipe is adapted from one I found on allrecipes.com

Chocolate zucchini bread:
Mix:
1/2 c. butter, softened
1 1/2 c. sugar

Add:
3 eggs
2 tsp vanilla
1/2 c. sour cream (I use light sour cream) or plain yogurt
1/2 c unsweetened applesauce

Sift in:
2 c. flour
3/4 c. cocoa
1 tsp baking soda
1 tsp salt

Add:
2-2 1/2 c. grated zucchini
3/4 c semi sweet choc chips

Pour into two greased loaf pans. Bake at 325-350 for 50-60 min (or until toothpick comes out clean. Don't over bake). Let cool before removing from pan.

*since originally posting this recipe, I have found a way to cut out 1/2 of the butter and some of the sugar without sacrificing flavor. I think it may even be better than before (crazy). I have changed the recipe to the newer, healthier version.

Pumpkin zucchini bread

Here are a few more zucchini recipes for that plethora of zukes... oh wait, Luke keeps picking all of mine before they are longer than 4 inches, so I don't have a mountain of zucchini like I should. First one, you guessed it: zucchini bread. I like pumpkin bread and I like zucchini bread, so I decided to make a two in one.


Pumpkin zucchini bread:
Cream:
3/4 c. oil or butter, softened
1 3/4 c sugar

Add:
1/2 c. milk
3 eggs
2 tsp vanilla
1 c pumpkin puree
2 c grated zucchini

Sift in:
3 c flour
1 1/2 tsp salt
11/2 tsp baking soda
3 tsp cinnamon
1/2 tsp nutmeg
few dashes cloves

Add 3/4 c semi sweet choc. chips (optional). Pour into 2 greased loaf pans. Bake at 325-350 for 45-60 min (take out as soon as that toothpick comes out clean... don't over bake). Let cool before removing from pan. For muffins: fill greased or lined tins almost to the top and cook at 350 for 16-20 min. for reg. muffins or 12-16 min. for mini muffins.

Wednesday, August 26, 2009

Coconut Meyer Lemon Muffins

My last two attempts at gluten-free baking didn't come out so successfully. So I did some research (aka googling) and found out that I shouldn't use more than a couple of tablespoons of chickpea flour or other bean flour at a time because it has very distinct flavor. I also found out that in most gluten-free flour mix, people use about a third starch. It's usually a combination of corn starch, potato starch and/or tapioca starch.

Hmmm... I'm not super excited about all these highly processed starches. They can't be good for you. Right?

But I pressed on.

Another important ingredients to gluten-free baking is Xanthan Gum. It's used to replace gluten in wheat which gives that chewy feel in baked goods.

So I bought Xanthan Gum. It cost me a small fortune. But I'm already in too deep. I have to go all the way.


Although they are still dense, these muffins are not so bad. They don't fall apart. They taste good - slightly sweet - with a bit of crunch from coconut flakes - perfect for quick breakfast or afternoon snack.

Ingredients
  • 2/3 cup rice flour

  • 2/3 cup masa flour

  • 2/3 cup potato starch

  • 1 teaspoon baking soda

  • 1 teaspoon Xanthan gum

  • 1/2 teaspoon salt

  • 1 cup unsweetened coconut flakes

  • 1/3 cup extra light tasting olive oil

  • 1/2 cup Agave nectar

  • Juice from a Meyer lemon and zest from 2 of them

  • 1 cup soy milk

Directions
  1. Preheat the oven to 350 degrees. Grease a muffin pan.

  2. Combine rice flour, masa flour, potato starch, baking soda, salt and coconut flakes in a clean bowl.

  3. In a separate bowl, whisk eggs, oil, Agave nectar, lemon juice, zest and milk together.

  4. Stir the wet ingredients into dry until just combined. Drop by tablespoons into the prepared pan. Bake for about 20 minutes.

Wholewheat Sandwich Bread

I just baked a perfect loaf of bread from Peter Reinhart's Whole Grain Breads: New Techniques, Extraordinary Flavor. The bread is soft with nutty wholewheat taste. Perfect for sandwiches.


Grilled cheese with fresh arugula sandwich


To re-print the recipe will do the bread injustice. The book contains about 100 pages explaining the reasoning and science behind the suggested technique. I absolutely love this cookbook and would encourage everybody who's interested in baking 100% whole grain bread to get one.


Fresh out of the oven


The bread dough was fermented in multiple steps. First, flour, salt and some liquid are combined and let fermented for many many hours to promote enzymes process with the flour. More flour, yeast and some liquid are mixed, kneaded and let fermented separately in the refrigerator for many many many hours to develop flavor and gluten. Then the two fermented doughs are combined and kneaded with more flour, oil and sugar. It's raised twice. Once after a vigorous kneading and again after shaping.


Sounds like a lot of work but it's really not. It just needs a little bit of planning ahead. And I say it's well worth it.

Sunday, August 23, 2009

California Grilled Veggie Sandwiches

It looks like Liz has beat me to it, but if your counter is covered with the same vegetables mine is right now, you can never have enough zucchini recipes.

I made these last week and told Dave, "Call me crazy, but I really love these sandwiches." To which he replied, "I really love these sandwiches too." I turned up my hearing aid and asked for a repeat, but he really did use the word "love" in connection with vegetable sandwiches. I think that's a fair endorsement.

  • 1/4 cup mayonnaise
  • 3 cloves garlic, minced
  • 1 tablespoon fresh lemon juice
  • 2 tablespoons olive oil
  • 1 red bell peppers
  • 1 small zucchini
  • 1 red onion
  • 1 small yellow squash
  • loaf of foccaccia bread, or other artisan bread, sliced however you prefer for sandwiches
  • sliced or shredded Swiss or Provolone cheese
Combine mayonnaise, garlic and lemon juice in a small bowl. Cover and refrigerate while other ingredients are prepared.

Preheat grill to high heat.

Slice zucchini and squash lengthwise, a little thinner than a quarter inch. Slice bell peppers and onions the same thickness as the squash. Toss in a bowl with olive oil. Arrange on hot grill with zucchini and pepper near the middle and onions and squash around. Grill for about 3 minutes each side, or until they start to blacken. Remove from grill.

To assemble sandwiches. Spread each side of bread with mayonnaise. Layer vegetables as desired, top with cheese, and 2nd slice of bread. You may want to use toothpicks to hold it together. Place assemble sandwich on grill over low heat and cook until cheese is melted.

Recipe from allrecipes.com

May I also recommend, for your zucchini eating pleasure:

Pineapple Zucchini Bread, Prudence Pennywise's version that is a bit healthier and less cake-like, so when you eat it for breakfast you don't have to feel guilty, and

Pasta with Squash and Garlic, just a simple, fast way to cook up some zukes on a busy night.

Zucchini couscous


In honor of the plentiful vegetable we know and love, I am posting not one but two recipes to help you use up some of your zucchini. Actually, I happen to really like the taste of zucchini so I like to use it in dishes that do not combine it with chocolate chips. Don't get me wrong, I love the sweet breads from zucchini but I also like the more "vegetable" type recipes too. I came up with this recipe after watching a similar dish on the Food Network. I did a little tweaking and came up with this. I think other vegetables could be used in place of the zucchini too. Think, chopped broccoli, peas, or squash maybe?

1 1/2 c. chopped zucchini
2 green onions, thinly sliced
1-2 cloves garlic, minced
1 Tbsp. olive oil
3/4 c. plain couscous
1 c. chicken broth

In a skillet heat olive oil on med. high heat. Add green onions, garlic and zucchini. Saute until zucchini becomes softened and garlic and onions are cooked. Add chicken broth and bring to a boil. Next, stir in couscous and cover with a lid. Remove pan from heat. Let sit for five minutes or until all of the chicken broth is absorbed. Fluff couscous with a fork and serve.

Friday, August 21, 2009

Chocolate chip zuchinni muffins


These muffins are a great change from the usual zucchini bread. They have just enough sweetness to make them kid friendly. Last time I made them I baked up a bunch in my mini muffin tin so they were the perfect size for little hands. Emily even suggested that I could make for her to take in her cold lunch. I found this recipe last year on this blog. Last time I checked she had 19 zucchini recipes so this website might be a good spot to check if you have a crazy amount of zucchini to get rid of.

1 ¾ cups unbleached all-purpose flour
¾ tsp baking soda
½ tsp baking powder (I upped it to 1 1/2 tsp)
1 tsp ground cinnamon
½ tsp salt
2 large eggs
1 cup granulated sugar
½ cup canola oil
1 tsp vanilla extract
1 cup finely shredded zucchini
1 cup semi-sweet chocolate chips
¾ cup coarsely chopped walnuts (optional, I didn't do the nuts)

Preheat oven to 350°F. Line 12 muffin tin cups with paper liners. Spray the paper liners with nonstick spray. (This is key, or the muffin will stick to the liner)In a medium bowl, stir the flour, baking soda, baking powder, cinnamon, and salt together. Set aside. In a large bowl, whisk the eggs and sugar to blend them smoothly. Whisk in the oil and vanilla until blended. Use a large spoon to stir in the flour mixture just until incorporated. Stir in the zucchini, then stir in chocolate chips and walnuts (if using) until evenly distributed. Pour about 1/3 cup of the batter into each paper liner. Bake until the tops are light brown and a toothpick inserted in center of a muffin comes out clean, about 23 minutes. If the toothpick penetrates a chocolate chip, test another spot.Cool muffins in pan on a wire rack for 5 minutes. Using pot holders to protect your hands, invert the muffin pan onto a wire rack and tap the bottom to release the muffins. Turn the muffins right side up to cool for about 15 minutes and serve warm, or let cool completely, about 45 minutes.

Thursday, August 20, 2009

Blackened Corn Salsa

I got this recipe from Prudence Pennywise. Has anyone tried it yet? If you haven't, you really need to! I made chicken enchilada's last night for dinner. My kids are REALLY picky and like them pretty plain. Rocky and I like actual flavor in our food, so I thought I would give this a try. I put it in our enchilada's and it really added flavor! Rocky ate a little bit with tortilla chips and really liked it. Check out her website for a picture. I didn't get a picture of it, sorry!


Blackened Corn Salsa


1 tablespoon olive oil
1 large onion, chopped
2 cups corn fresh or thawed, if frozen
2 tomatoes, chopped
1 jalapeno or serrano pepper, minced
1 clove garlic, minced
juice of one lime
1/2 cup chopped cilantro


Heat oil in a skillet over high heat. Add corn and onion and cook, stirring from time to time, until corn and onion are blackened in places. Combine with other ingredients in a medium bowl and serve.

Tuesday, August 18, 2009

Blackberry Banana Ice Cream

I used corn syrup to make ice cream for the first time last month. Now I'm hooked. I'll save the Agave nectar for yogurt ice cream. For ice cream with real cream, I'll use corn syrup from now on.


This is just a slight variation from the banana ice cream. I just added about a cup of frozen blackberries to the food processor and used 2 teaspoons of vanilla extract instead of vanilla bean.


Perfect Summer dessert

Honey Nut Granola

I had two staples breakfast during my trip in Mexico: scrambled eggs with tortillas and beans, or granola with fresh fruit and yogurt. Here's how they served me the yogurt-granola-fruit combo: HUGE bowl of delicious fresh fruit (all kinds of fruit including pineapple and watermelon...), a tablespoon of yogurt, and about a teaspoon of granola sprinkled on top.

I guess that's a good and healthy way to eat. But I couldn't help missing a big bowl of granola with tons of yogurt and three pieces of fruit. So the first thing I baked when I got to my kitchen was this:


This granola is different from what I usually make as it contains a lot more nuts and is sweetened by honey. The result is super crunchy and slightly sweeter granola.

Ingredients
  • 4 cups rolled oats

  • 1/2 cup oat bran

  • 1/4 cup ground flax seeds

  • 1 cup sliced almonds

  • 1 cup chopped pecans

  • 1/2 cup honey

  • 1/3 cup light tasting olive oil

  • 2 teaspoon vanilla extract

Directions
  1. Adjust the oven racks to the upper 3rd and lower 3rd of the oven. Preheat the oven to 350 degrees.

  2. In a large bowl, combine oats, bran, flax, and nuts together.

  3. In a small bowl, whisk honey, oil and vanilla together. Pour into the dry ingredients. Stir until everything is wet.

  4. Distribute evenly on 2 greased or non-stick baking sheets (I used silicone mats) and bake for 10 minutes or until golden brown. Stir and rotate pans after 5 minutes.

  5. Let cool completely and store in air-tight containers.

Saturday, August 15, 2009

How to make fried rice

Enjoy cooking Recipes & learn how to make fried rice dish on Youtube.


Save and share this recipe

Want to share this recipe with your family and friends? Click the button below to send them an email or save this to your favorite social network.

Shrimp Fried Rice Recipe

Enjoy cooking shrimp fried rice. This easy dish is great to make with leftover rice and whatever you have in the fridge.


Ingredients:

4 cups of Left-Over Rice
1 pack of frozen Shrimps
1 Onion
1 Stick of Celeri
1 cup of Green peas
1/2 Red Pepper
2 to 3 Bulbs of Garlic
100 grams of sliced cooked ham
1 egg
2 sticks of green onion
handful of cilantro
Oil
Salt & pepper
Dark mushroom soy sauce

Preparation:

Oil a pan or wok at high heat. Sprinkle salt and add onions, red peppers, garlic, green peas and celery. Mix for two to three minutes then take it off the heat and place in a plate.

Oil the pan/wok again and cook the shrimp at high heat for two to three minutes, then take it off the heat and put aside.

Put rice in pan/wok at high heat and add the vegetables, shrimp, cooked ham, green onions, cilantro and raw egg. Add salt, pepper and dark soy to taste. Mix and serve

Source: www.itsyourturntocook.com

Save and share this recipe

Want to share this recipe with your family and friends? Click the button below to send them an email or save this to your favorite social network.

Wednesday, August 12, 2009

Spinach and lemon rice


This is a beautiful side dish when hot, but is also delicious served cold - just cool the rice before adding the spinach and parmesan.

Ingredients

2 cups (400g) basmati rice
3 1/4 cups water
1 large onion, finely chopped
1 tablespoon olive oil
black pepper 1/2 teaspoon
1 teaspoon salt
1 tablespoon lemon zest
300g spinach, finely chopped
1/2 cup grated parmesan cheese

Instructions

In a large saucepan, gently fry the onion in the oil for 5 minutes, until golden.

Add the black pepper, salt and lemon rind to the saucepan, along with the rice and water. Bring it to the boil, then lower the heat and cover with a lid. Simmer on a very low heat for 10-15 minutes or until the rice is tender and the water is absorbed.

Add the spinach and parmesan cheese and mix well. Leave it for 5 minutes, then transfer to a serving dish.

Source: Healthy Food

Save and share this recipe

Want to share this recipe with your family and friends? Click the button below to send them an email or save this to your favorite social network.

Tuesday, August 11, 2009

Add a little Spice to your chicken

Grilled Southwestern Chicken

4-(5-6 oz) boneless chicken breasts
1/3 cup canola oil
3 Tb cider vinegar
1 Tb chopped fresh cilantro
2 tsp chili powder
1 tsp garlic powder
1 tsp Italian seasoning
1/2 tsp cumin
1/2 tsp salt
1/4 tsp ground pepper

Flatten chicken to even thickness and set aside. In a small bowl, combine all other ingredients an mix well. Place chicken and marinade in resealable plastic bag. Refrigerate 1-2 hours. Remove chicken and discard marinade. It is VERY important to grill this on low heat. The marinade will scorch otherwise. That is also why it is important to flatten the chicken.

Serve with salad greens and ranch dressing. YUMMY!

Also, if anyone out there has any great ideas for healthy, filling on the go breakfasts, it would be appreciated. Happy cooking!

Sunday, August 9, 2009

A couple of quick dinners

Okay, Danielle, I've got a couple of quick dinners that come to my mind, but I'm almost embarrassed to post them because they aren't very exciting/creative. But, they both take less than 30 minutes, without being spaghetti, so here you go:

1. Taco plate/taco salad... whatever you want to call it:
1/2 - 1 pound hamburger (whatever your preference)
1 can drained kidney beans
1 can semi-drained pork and beans (I know, sounds lame, but I think it works. If you don't stock your cupboards with pork and beans though, it's not a vital ingredient)
1-2 can tomato sauce (I use 1, if you like it more tomato-y, you may want more)
taco seasoning to your liking (I usually use about 1/2 a packet)

Brown burger, salt and pepper it, add all other ingredients and simmer a bit. We usually eat ours like this: layer of tortilla chips, meat, cheese, lettuce, ranch, etc... whatever you like on a taco salad.

2. Chicken and black bean quesadillas:
1-2 chicken breasts, cut up
1/2 - 1 can of drained/rinsed black beans
1 can green chillies
taco seasoning to your liking

Cook chicken completely in a little oil with salt and pepper, add the rest of the ingredients and heat through. Make quesadillas: tortilla, cheese, chicken, cheese, tortilla. Serve with sour cream, guacamole, salsa... whatever you like. I also like to use this for a taco salad for yet another change.

Not in my kitchen...

.... in Mexico

Quick Dinner Quest

Okay ladies, I am on a quest. I'm looking for new ideas for quick, on-hand dinners for those nights when its 5:00 and I haven't started dinner (or just plain don't want to). You know those nights when you don't want to order out, but don't want to resort to Ramen noodles or cold cereal. I'm not the only one who has those nights, am I?

I'm not coming empty handed. Here are a couple things I do:

I try to have frozen ravioli/tortellini on hand that I can cook, pour a bottle of sauce over and serve with a quick salad-I'll admit, sometimes the salad doesn't happen.

I also like to freeze chicken in a ziplock with marinade. I just freeze it in amounts that make one dinner for our family. (Be sure to label it) Then I can thaw it, grill/cook it, and serve it up with frozen veggies and one of those quickie rice dishes in a box.

I tried this Lemon and Garlic Grilled Chicken marinade last night. I found it on My Kitchen Cafe. Its totally easy and super yummy. It even passed the Hannah-test, which is MAJOR.

See, I'm not looking for gourmet. In fact, quite the opposite, the easier the better. Don't be shy. What may seem totally mundane and basic to you is probably something I haven't even thought of. Come on...who doesn't need some quickie-dinner ideas?

Japanese rice and egg


Serves 4

Ingredients:

400 gm (2 cups) sushi rice (see note)
4 egg yolks
300 gm sashimi tuna, diced
1 bunch of chives, finely chopped
To serve: Seaweed salad (see note), pickled ginger, bonito flakes, salmon roe, and soy sauce

Preparation:

1. Rinse rice under cold running water, drain and place in a large saucepan, cover with 3 cups of cold water and bring to the boil over high heat, reduce heat to low, cover and cook for 12-14 minutes. Remove from heat and stand, covered, for 5-10 minutes.

2. Spoon rice into bowls, make a hollow in the centre of each and place an egg yolk in it. Place remaining ingredients in piles around the egg yolk and serve immediately, with soy sauce passed separately.

Note Sushi rice is available from supermarkets. Seaweed salad is available from Japanese grocery stores and selected fishmongers.

Save and share this recipe


Want to share this recipe with your family and friends? Click the button below to send them an email or save this to your favorite social network.

Thursday, August 6, 2009

Blueberry Burst

Before I received my ice cream maker, I started searching the internet and cutting out recipes from magazines. One internet recipe that I couldn't wait to make was this one from the Simply Recipes blog for Blueberry Frozen Yogurt.


It starts out with a lot of blueberries - 3 cups - to which you add sugar, lemon juice, and a small amount of cinnamon. Already it was starting to look and smell like like blueberry pie, which to me was an indicator that this was going in the right direction. The fruit and sugar gets cooked down to a beautiful purple compote-like thing, cooled, and then whole milk and whole milk yogurt are added. Whole milk yogurt was a bit challenging to find, but I finally ended up with some from Strauss Family Creamery, bought at nearby Andronico's. I did as the recipe suggested and did not blend the blueberries after cooking in order to leave some chunks and bits of fruit in the mix for texture. I did give it a quick whirr with the immersion blender just to incorporate the yogurt thoroughly, but not enough to break up the blueberries. I also added the least amount of sugar called for, because I love a good, tart yogurt taste.


Once cooled, I couldn't wait to churn it and see how the color and consistency turned out. It was GREAT, and the taste was amazing - really fresh and bursting with fruit. The texture was a bit more icy and less smooth than the vanilla ice cream, and it definitely got very firm upon freezing, but overall I would not change a thing.


Vanilla Ice


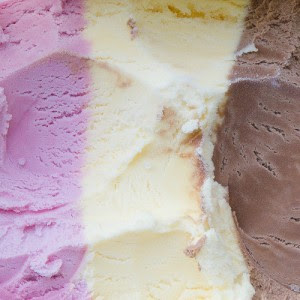
Ice cream starts with eggs. Egg yolks, to be exact. Most traditional flavors (vanilla, chocolate, strawberry) are created by making a cooked custard, which consists of eggs, sugar, milk, cream, and flavoring, cooling it down, and freezing it.

Ice cream production is somewhat labor intensive, but mostly it's time intensive. Depending on your ice cream maker, you may have to freeze the chamber for 12-15 hours before churning. Once you make the custard, it has to be refrigerated for 8 hours before churning, and then after churning it has to go into the freezer for another few hours to firm up. For this reason, it's best to start the night before and let everything sit overnight. I wanted to master the basics, so for my first project I chose simple, classic Vanilla Ice Cream.


Making the custard is the most difficult part. You want to heat it without burning it, then you pour it into the egg yolks and back into the pan to avoid cooking the egg yolks and making scrambled eggs. Once you get it into the ice bath, you begin the important cooling down process. Luckily for me, this all worked out right the first time around. I owe all thanks to David Lebovitz, whose instructions were so thorough that I could not help but succeed. In the case of vanilla ice cream, it includes an extra step of infusing a vanilla bean into the cream, so you have to allow extra time for that.


Once everything is prepared and cooled, you get to do what I think is the most fun part - churning. An important step is to get the dasher of the machine started before pouring in the custard, otherwise it will start to freeze immediately and might get stuck.


I watched the entire 30 minute process standing right over the bowl. It was magic! Right before my eyes, the custard started getting thicker and thicker, until, lo and behold, we had ice cream!


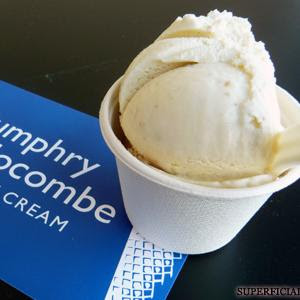
I ate so much of it off of the dasher, I am surprised that any of it made it into the container. What I learned is that it expands during the freezing process, so despite what I ate, there was plenty to put into the freezer. This was a proud moment for me:


The taste was very pure, simple vanilla. Not something to knock your socks off, but just a good and wholesome taste. Knowing that it was made without preservatives, chemicals, additives, or thickeners made every spoonful that much better. Or maybe that the joy of sharing it with friends, with my friend Jude's homemade Scharffen Berger chocolate sauce on top.


Wednesday, August 5, 2009

Yogurt-spiced chicken with almond & coriander rice


Make a midweek chicken supper a stylish affair with this quick and easy dish of Yogurt-spiced chicken with almond & coriander rice.

Easy Recipe
Serves 2
Ready in 30 minutes

Ingredients

150ml natural yogurt
1 tbsp Madras or other Indian curry paste
2 chicken breasts
butter
1 onion , halved and sliced
3 cardamom pods , squashed
150g brown basmati rice
350ml chicken stock
1 tbsp flaked almonds , toasted
1 red chilli , finely chopped (optional)
½ bunch coriander , chopped

Method

1. Mix the yogurt and curry paste and toss with the chicken breasts. Heat a knob of butter in a wide shallow pan with a lid. Cook the onion and cardamom for 5 minutes then tip in the rice and stock. Bring to a simmer, cover and cook until all the stock is absorbed and the rice is tender (you might need to add a little more stock).

2. Griddle or grill the chicken breasts until golden and cooked through. Stir the almonds, chilli and coriander through the rice. Slice the breasts and sit on top of the rice.

Nutrition Per serving

591 kcalories, protein 53.2g, carbohydrate 67.4g, fat 14.1 g, saturated fat 3.9g, fibre 3.5g, salt 1.7 g

Recipe from olive magazine, December 2008.

Save and share this recipe

Want to share this recipe with your family and friends? Click the button below to send them an email or save this to your favorite social network.

We Scream


I am beginning to feel like the Brenda Dickson of cooking. "Hello, and welcome to my home. Let's teleport into my closet!" Just as she was obsessed with herself, I feel obsessed with anything that I can learn to make that is beautiful and tastes good. Hence my new all-consuming hobby: ice cream.

Apparently, homemade ice cream is something that a lot of people grew up with. Even my husband has memories of turning the hand crank in his grandmother's back yard to churn some fresh peach ice cream for the evening meal. This would have been as foreign to my family as milking a cow - ice cream was something that you bought from the grocery store in a cardboard-covered rectangle (Neopolitan was a favorite), or if you were very lucky, from the local ice cream parlor. Baskin-Robbins was the cool kid on the block in those days, with its trendy flavors and coveted ice cream cakes.


Today, it's all about foodie flavors. Local, handmade, organic, and creative iced treats have become the sought-after cones of choice, blurring the lines between sweet and savory with flavors like Peppercorn, Olive Oil, and Strawberry Balsamic. In San Francisco, one of my favorite places is Humphry Slowcombe which features flavors as exotic as Foie Gras as as local as Blue Bottle Vietnamese Coffee. It's not only the coasts that are embracing this trend - places like Jeni's Ice Cream in Columbus, OH are churning out flavors like Cayenne and Goat Cheese and Roasted Red Cherries. With these kinds of flavors, you could skip the meal and go right to dessert!


I was lucky enough to find an unused gift card a couple of weeks ago, and used it to purchase the ice cream attachment for my KitchenAid stand mixer. To go with it, I bought "The Perfect Scoop" from frozen-treat master David Lebovitz, and it has been my Bible so far in learning to make my own ice cream.

I always like to start things from the ground up, so my first experiment was with vanilla ice cream. To start, it calls for some simple ingredients: whole milk, sugar, heavy cream, salt, a vanilla bean, eggs yolks, and vanilla extract. With that, I was off and running...

Monday, August 3, 2009

Mexican Red Rice


A Mexican meal is not truly complete without Red Rice. While there are many ways to prepare it, the following recipe is what you’ll find served in many homes throughout Mexico. Although the Serrano Chile and vegetables are marked as optional, they really do contribute to making this a delicious side dish.

Ingredients:

1 1/2 Cups Rice
Onion, quartered
4 Cloves Garlic
1 Serrano Chile Pepper, optional
1/2 Cup Tomato puree
1/2 Cup oil
2 Cups water
1 Cube Chicken Bouillon
1 Carrot, peeled and finely chopped, optional*
1/2 Cup peas, optional*
1/2 Cup corn, optional*
Salt to taste

Note: You can use 1 cup frozen mixed vegetables instead of fresh vegetables if you’d prefer.

Preparation:

Soak the rice in hot water for 15 minutes. Then drain thoroughly.

In a blender, combine the onion, garlic, serrano chile, and tomato puree and blend until smooth.

Heat the oil in a large saucepan over medium heat. Add the rice, stirring continuosly to coat the rice with the oil so it doesn’t clump. Fry well until golden brown. Drain oil.

Add tomato mixture and stir to combine with rice. Fry a minute longer.

Dissolve the chicken bouillon in the water and add the rice. Add the carrot, peas, corn, and salt. Stir to combine with rice. Cover tightly with a lid and reduce heat to low. Cook rice until there’s no more liquid remaining. This should take about 20 minutes, but you’ll want to check and taste the rice to make sure it’s done. Turn off the heat and let stand 5 minutes.

Use as a side dish to accompany anything from Carne Asada to Lentils.

Serves 4-6

Source http://mexicofoodandmore.com

Save and share this recipe

Want to share this recipe with your family and friends? Click the button below to send them an email or save this to your favorite social network.

Jammy Doughnut Muffins


This month’s recipe is Jammy Doughnut Muffins. I am reminiscing of seaside holidays where warm jammy doughnuts covered in sugar and then passed warm from the vendor in a paper bag are abundant. I have in the past challenge Mr R (hubby) to eat a sugared doughnut without licking his lips until he had finished eating. It’s more difficult than it sounds believe me......lol.

We are going a little healthier with this recipe by making Jammy Doughnut Muffins! No oil in sight to fry them as with the real McCoy of doughnuts, and I have pleasure in saying these muffins are quick and simple to make and delicious, just what Sweet and Simple Bakes is all about! There is a buttery sugared topping on your initial bite with a soft vanilla sponge and then followed by a delightful jam interior, you could even ring the changes by using different flavoured jams. You may have some delectable homemade jam(s) you wish to use or what about the sublime Dulce de Leche, (“toffee sauce”) even a thick vanilla custard or stewed apples. We can’t wait to see what variations you come up with. These little beauties are superb to add to your repertoire if family or friends happen to call by unannounced for afternoon tea! *If you have any queries or questions, please leave a comment under the recipe and we will endeavour to reply to you as soon as possible.*


Showing the lush jammy inside


Please Note: - The posting date for Jammy Doughnut Muffins on your Blog is 1st September 09.


Please ensure you send in your email to us to make certain you are listed in the round up. The round-up will be posted here on 2nd September 09.

If you are a food blogger, we kindly ask that you write a post about your bake and link back to Sweet and Simple Bakes. Please feel free to add our Sweet & Simple Bakes Monthly Baking Event Badge to your post. Let us know that you have completed the bake.

Please send an email to sweet2simple[at]googlemail[dot]com
Add in subject: [Name of bake] for the round up
Your Name:
Your Blog Name:
Your Blog Link to the Baking Post:
A picture of your bake 200x200 pixels (if you’re not sure how to resize a photo we can do this for you.)

Non-bloggers may send in a picture of their bake to the above email address and we will include it in the round-up for that month.

The posting date for Jammy Doughnut Muffins on your blog is 1st September 09. The round-up will be 2nd September 09 to ensure all entries have been sent in via our email – we wouldn’t wish to miss any of your creations.

We are looking forward to seeing everyone’s entry here at S&SB!

Happy muffin baking!

Rosie & Maria xx

Sunday, August 2, 2009

Strawberry Cupcakes


I am so addicted to these right now I am going to have a strawberry cupcake caboose pretty soon. They taste like summer! I got the recipe from this site and I have loved everything I have made from her. This is a must try. This is also a fun recipe for kids to help with.


Wild Strawberry Cupcakes
Makes 24 plus-the recipe said 36 but I got about 28
16 oz Strawberries Destemmed
4 eggs
1 3/4 Cup Sugar
1/2 Cup Butter
1 t. Vanilla
1 1/2 t. Baking Powder
1/2 tsp. salt
3 Cups Flour
Place first four ingredients in blender. Blend until fully pureed.Pour into large bowl and mix with remaining ingredients. Spoon into cupcake wrappers. Bake at 325 degrees for 18-20 minutes, or until tops spring back when touched. Allow to cool. Frost with recipe below.
Sweet and Pure Strawberry Buttercream
3/4 Cup fresh Strawberries destemmed
1/2 Cup Butter
1 tsp Vanilla
2 lb Powdered Sugar
Over a large bowl crush the strawberries in your hands(I just used a fork in the bowl). Allow juice and pulp to fall into bowl. Add remaining ingredients and beat well with an electric mixer. Frost cooled cupcakes. Allow to set at room temperature. I have found you have plenty leftover after frosting cupcakes to eat with a spoon-or your fingers!


The Only Thing Little is the Name


I was doing an errand in South San Francisco on Friday, when I saw out of the corner of my eye the legendary Little Lucca Sandwich Shop. I had read about this place for years, but had never been there, so I decided that fate had led me to it and therefore the time had come for me to finally experience their well-known sandwiches. So I got in line. And waited. And waited.

They go pretty fast considering the amount of product that they get out the door during the lunch rush. I studied the menu and watched the people in front of me to see what to do. There was no small talk. There were no friendly exchanges. You stepped up to the person who said "Next" and stated your order. When your sandwich was finished, you stepped down to the cashier to pay.

I made two faux pas during my time at the counter. The first was when I was asked what kind of bread I wanted. "Oh, just the regular roll," I said, casually. I was met with a look that almost morphed into an eye roll. She started to recite, "Sourdough. Whole Wheat. White. Dutch Crunch..." "Dutch Crunch!" I said, a little too cheerfully. I held my tongue while she made the sandwich, until I realized that I didn't want a lot of mustard. "Mustard only on one side, please" I interrupted. I got a look, but she did what I asked. "Both sauces?" she asked, now very aware that I had no idea what I was doing. "Yes, yes!" I said, in a voice that was more high pitched than I would have liked. I watched as she slathered their homemade hot sauce, then the famous garlic sauce, on the bread. I am sure I fogged up the protective glass with my heavy breathing. I moved to the cashier on cue, and payed my $5.95, dropping a dollar in the tip jar to try to make up for my foolishness.

When I got home, I unwrapped my sandwich as if it were fine china wrapped in bubble paper. A waft of garlic hit me...mmm. I had ordered the Little Lucca Ultimate Sub - turkey, ham, bacon, cheese, lettuce, pickles, mayo, hot sauce, garlic sauce. It was delicious. It was garlicy. It was so full of meat that I could barely get my mouth around it. Would it have been a great sandwich without that sauce? Probably not. But that combination was addictive, and I started dreaming of the next time that I would find myself in the neighborhood.

Sweet & Simple Bakes Monthly Round-Up ~ Carrot Cake with Cream Cheese Frosting.

It happens to be our Fifteenth Baking Challenge here at Sweet and Simple Bakes and what a great success it has been once again! We have many spectacular entries of Carrot Cakes to view in our round-up this month and to tickle all your taste buds!

We have beautiful moulded carrots, sprinkles, sugar flowers, nuts, M & M’s adoring the tops of individual cakes, also stunning shapes in a sunflower, a heart and little Whoopie Pies not forgetting all those gorgeous loaf cakes – WOW - what an array of divine cakes and such a magnificent feast for our eyes!!!

*We would like to give a huge round of applause to K.J’s little daughter @ Cooking The Books who baked and decorated the heart shaped carrot cake- bravo, we bow down to you!! We have one little star baker here at S&SB!!*

We would like to thank all our S&SB bakers for your continual support each month, and you are what makes S&SB the success it is today and hopefully continues to be in the future.

We would also like to send a very warm welcome to new bakers who have joined us this month. I hope you enjoyed your first bake with us and continue to bake along with us :0)


*If there are any late entries, I will endeavour to add you to the round up as soon as possible.*


Edit: we have one extra entry below by Wonk

Wonk @ The Land of Wonk

Edith @ Precious Moments


Rekha @ PLANTAINLEAF(ANDHRA RECIPES)


Jaya @ Jayaspace


Helen @ Half a pot of cream


Pari @ Foodelicious


Shri @ Tastytouch


Natalie @ Snooky doodle cakes


Tamil @ Sweet

The Girl @ Living With A Boy


Divya @ Dil Se..


Kelly-Jane & Daughter @ Cooking The Books


Lucie @ Cooking At Marystow


Maria @ The Goddess’s Kitchen


Chaya @ Chaya's Comfy Cook Blog


Dips @ Centaur Cooks


Lynn @ Bites and Pieces


Rosie @ Baking Cakes Galore


Joanne @ Apple Crumbles


A huge round of applause please for all our Sweet & Simple bakers this month.

*Could we please ask that we all take time to visit each other’s blogs and leave feedback – thank you.*

Rosie & Maria xx