ta name="google-site-verification" content="LnUtT_d1nKFEi6qCVRa2VtURKXcUowdpcm2UMwFTZUk" /> hummus recipes: January 2009

Wednesday, January 28, 2009

Beef Curry with Thai Eggplants and Chinese String Beans

What the heck are Thai eggplants and Chinese string beans, you ask. I got pictures for you.


Thai eggplants


We use these eggplants a lot in curry. In Thailand, we call them striped tomatoes. We call all eggplants some kind of tomatoes. For example, purple tomatoes for the purple Chinese eggplants. What do we call tomatoes? Red tomatoes... Duh.. I didn't like eating them so much for they were a little bitter. But now whenever I see them in Chinatown, I get extremely excited. Not that I like eating them any better, I just get excited.


Chinese string beans


Actually, these are the only kind of string beans I had until I came to the U.S. Don't they make much more sense than American string beans? They take less time to trim and clean. They taste much more like string beans to me. And because they are so long, I can tie them up into pretty knots. Also, nuts and beans are the same word in Thai. I guess we don't have too many words to call things. We just keep reusing them and add adjective to identify what we actually mean.


When you say curry, Thai people will assume you mean red curry. Therefore, when I was asked to make beef curry, I made this.

Ingredients (Make 10 to 15 servings)
  • 4 pounds beef - any flavorful cut - I used London Broil - cut into strips

  • 2 pounds Thai eggplants - quartered - or any firm eggplants

  • 1 pound Chinese string beans or normal string beans - cut - and if you are like me, tie them into knots

  • 3 cans coconut milk

  • 1 tablespoon cooking oil

  • 1 cup red curry paste

  • 1 head garlic

  • About 2 inches knob of ginger

  • 6 shallots

  • 3 stalks of lemongrass

  • 1 tablespoon dry red pepper flakes

  • 1 tablespoon brown sugar

  • Fish sauce

  • 1 cup Thai basil

Directions
  1. Peel garlic, ginger and shallots. Discard a few outer layers of lemongrass. Trim away its head and about 2/3 from its tail. Keep the middle 1/3. Chop all the spices together (I used food processor.)

  2. Heat oil in a large stock pot. Stir in chopped spices and curry paste. When fragrant, add the first can of coconut milk and beef. Let cook. Stir occasionally until the meat is almost cooked.

  3. Add the rest of coconut milk. Season to taste with red pepper, sugar and fish sauce. Let simmer. Add water if necessary.

  4. When the meat is tender, add eggplants and string beans. Let cook for 5 more minutes or until the vegetables have desired texture. I like mine soft but still a little crunchy.

  5. Before serving, tear Thai basil and sprinkle on the curry. Serve with rice.

Tuesday, January 27, 2009

Slow Down, You Move Too Fast


Ahh, Simon & Garfunkel, macrame and the indespensible Crock Pot. If you are a child of the 70's, your mom had one of these, probably with some kind of stenciled flower design on it to make it look "homey". It gave the illusion of something simmering on the stove all day, while the lady of the house was out working, practicing yoga, or buying new bark-cloth curtains for the living room. In our kitchen, it sat right alongside the yogurt-maker and (unused) waffle iron.

Slow-cookers have made a comeback, right in time for the recession. You can find different varieties in various price ranges from brands like the original Rival or Cuisinart. The reasons for their new found popularity are most likely the same as they were 40 years ago - they are easy to use, save hours of hands-on time, and can make even the most humble of ingredients taste wonderful.

We recently bought the Hamilton Beach "Stay or Go" model at Best Buy, for a modest $39.99. I was happy with the way it looked out of the box - clean, modern, and without a flower stencil in sight. It has a couple of different programming modes to allow for cooking at different temperatures, and a probe that you can insert to test the doneness of your recipe without having to remove the lid. Both the ceramic insert and lid go into the dishwasher, which makes for easy cleanup, too.


Last night I tried a recipe for "Taco Chili" (well it was actually called "Taco Soup" but I think that sounds terribly unappetizing). It was pretty good - a breeze to prepare, inexpensive, and tasty. I would add more spices next time, but as is it makes a good meal for a family and each person can doctor it according to their tastes. It's from Paula Deen, so it's tailored for the average American palate, using ingredients that can be found at almost any grocery store. She drives me nuts, but she does have a handle on quick and easy home cooking. I changed a few things, like added hot sauce and put the chips on top rather than underneath the chili.

One thing to note about slow cookers is that they retain a lot of liquid, so it may look like you don't have enough, but you do. If you are adapting a regular stove top recipe to a slow cooker, decrease the amount of liquid used. Next up....BRAISING!


Taco Chili

Ingredients

  • 2 pounds ground beef
  • 2 cups diced onions
  • 2 (15 1/2-ounce) cans pinto beans
  • 1 (15 1/2-ounce) can pink kidney beans
  • 1 (15 1/4-ounce) can whole kernel corn, drained
  • 1 (14 1/2-ounce) can Mexican-style stewed tomatoes
  • 1 (14 1/2-ounce) can diced tomatoes
  • 1 (14 1/2-ounce) can tomatoes with chiles
  • 2 (4 1/2-ounce) cans diced green chiles
  • 1 (4.6-ounce) can black olives, drained and sliced, optional
  • 1/2 cup green olives, sliced, optional
  • 1 (1 1/4-ounce) package taco seasoning mix
  • 1 (1-ounce) package ranch salad dressing mix
  • a few healthy shakes of hot sauce - my addition
  • Corn chips, for garnish
  • Sour cream, for garnish
  • Grated cheese, for garnish
  • Chopped green onions, for garnish
  • Pickled jalapenos, for garnish

Directions

Brown the ground beef and onions in a large skillet; drain the excess fat, then transfer the browned beef and onions to a large slow cooker or a stockpot. Add the beans, corn, tomatoes, green chiles, black olives, green olives, taco seasoning, and ranch dressing mix, and cook in a slow cooker on low for 6 to 8 hours or simmer over low heat for about 1 hour in a pot on the stove. Top with tortilla chips, sour cream, cheese, green onions and jalapenos.

Monday, January 26, 2009

Lemon Ginger Cupcakes


I needed an "adult" cupcake after the Bacon Cupcake explosion. In the middle of the night last week, I had the idea that I wanted to make something lemon-y (and I had an abundance of organic lemons for some reason, as well as a full jar of candied ginger), and found the recipe for these on the Cooking Light website. Delicious. I forced the batter into 24 cupcakes rather than 36, because that is how many my pan holds. Minis are just the right amount for a civilized little bite, perfect with tea or champagne.

Lemon Ginger Cupcakes

4 oz. (1 cup plus 3 Tbs.) sifted cake flour
1 tsp. ground ginger
1/4 tsp. freshly grated nutmeg
1/4 tsp. table salt
1/4 tsp. baking soda
1/8 tsp. baking powder
3 oz. (6 Tbs.) unsalted butter, at room temperature
2/3 cup granulated sugar
1/2 tsp. pure vanilla extract
1-inch cube (3/4 oz. peeled piece) fresh ginger, finely grated (plus any juice)
4 tsp. lightly packed, finely grated lemon zest
1 large egg, at room temperature
1/2 cup sour cream (not low-fat), at room temperature
1/4 cup (about 1 oz.) finely chopped crystallized ginger


Position a rack in the center of the oven and heat the oven to 350°F. Line three miniature muffin pans (with 12 cups each) with miniature paper cupcake liners.

Sift the cake flour with the ground ginger, nutmeg, salt, baking soda, and baking powder. Whisk to ensure thorough mixing. Using a stand mixer fitted with the paddle attachment (or a hand mixer), beat the butter in a medium bowl on medium speed until smooth, about 1 min. Add 3 Tbs. of the sugar, the vanilla, grated ginger and lemon zest; beat on medium speed for 1 min. Add the remaining sugar, about 2 Tbs. at a time, beating for a few seconds after each addition. Scrape the bowl and beat for another 2 min. Scrape the bowl again. Add the egg and beat on medium-high until very smooth, about 1 min.

Add about one-third of the flour mixture and stir gently with a rubber spatula only until incorporated. Add half the sour cream and stir until incorporated. Repeat with half the remaining flour mixture, the rest of the sour cream, and ending with the last of the flour mixture. Stir in the crystallized ginger.

Divide the batter evenly among the prepared muffin cups, filling each cup about three-quarters full. (Use two regular teaspoons: one to pick up the batter, one to push it off.) Don't smooth the batter.

Arrange the pans in the oven so that there's a bit of space between them and bake until the cupcakes are pale golden and spring back when gently pressed in the center, 17 to 20 minutes. Let the cupcakes cool in the tins on wire racks for 5 minutes and then invert the pans onto the racks to remove the cupcakes. Immediately turn the cupcakes right side up on the racks and let cool completely.

Lemon Zest Cream Cheese Frosting

5 oz. cream cheese (not low-fat or whipped), at room temperature

2 Tbs. unsalted butter, at room temperature

2 Tbs. lightly packed, finely grated lemon zest
4 tsp. fresh lemon juice
1/2 tsp. pure vanilla extract
5 oz. confectioners' sugar (1-1/4 cups, spooned and leveled)

In a medium bowl, beat the cream cheese with a hand-held electric mixer on medium speed until very smooth, about 30 seconds. Add the butter and beat until smooth, about 30 seconds. Beat in the lemon zest, lemon juice, and vanilla. On low speed, gradually add the confectioners' sugar, beating until smooth. Increase the speed to high and beat for just a few seconds, until the frosting is smooth and fluffy. Don't overbeat or you may thin the frosting.

Spoon a heaping teaspoonful of frosting onto the center of each cupcake and spread and swirl it with the back of the teaspoon. If you like, garnish with sliced crystallized ginger or strips of lemon zest.

Friday, January 23, 2009

Chocolate Cupcakes with Green Tea Pistachio Frosting

I missed making cupcakes. I don't remember the last time I made them. Something about repetitive motion of frosting and decorating cupcakes is meditative and calming. I have been thinking about this combination - chocolate, green tea and pistachio - for a while. How decadent would that be? Finally, I have an occasion/excuse - a birthday party.


I followed old fashioned chocolate cupcake recipe from Cupcake Bakeshop. I had some trouble with overflowing cupcakes in the oven but these cupcakes are the best chocolate cakes I have ever tasted - although not the pretties. They are light and fluffy with the most delicious crumbs and intense chocolate flavor.


After the cupcakes cooled, I whipped up green tea cream cheese frosting. My apartment is so cold this winter that even when I left butter and cream cheese out for hours, they are still hard. So whipping them took a bit of time.

Green Tea Cream Cheese Frosting
  • 1 8oz package cream cheese

  • 1 stick butter

  • 1 1/2 cups confectioner sugar

  • 3 teaspoons Matcha powder

  • 1 teaspoon vanilla extract


Right after frosting the cupcakes, I dipped them in a bowl of chopped raw pistachios... I think I will be the most popular guest at the party tomorrow.

Wednesday, January 21, 2009

God Bless America Bacon Cupcakes


Exciting day yesterday: Barack Obama was inaugurated as the 44th President of our United States. We celebrated with a gathering of friends at our friend Mike's house, with a big BBQ pot luck dinner and plenty of food and drink. My contribution was to bring Bacon Cupcakes, which I realized I had to somewhat invent, as all of the recipes online didn't seem right to me. (How "right" are Bacon Cupcakes, anyway?) I thought about the flavors that I like together...bacon and chocolate (like Mo's Bacon Bar), bacon and maple...

I finally came up with something that seemed palatable. It's a combination of a lot of different recipes, and I ate no fewer than 4 cupcakes to come up with just the right balance of salty and sweet. I still don't think it's perfect, but everyone seemed to like them a lot. The best was when our friends' 2-year old son Josh took his cupcake in hand and said, "There's bacon in it!" That's right, lad. There is a new president, and there is bacon in your cupcake. God bless us, everyone.


Bacon Cupcakes
- 10 slices bacon
- best quality maple syrup
- 1 C. unsalted butter
- 1/2 C. cocoa powder
- 3/4 C. water
- 2 C. granulated sugar
- 2 large eggs
- 1/2 C. buttermilk, well-shaken
- 2 T. vanilla
- 2 C. all-purpose flour
- 1/2 t. baking soda
- 1 t. baking powder
1/4 t. salt

1. Preheat oven to 350F. Place cupcake liners in 24 muffin tins.
2. Prepare bacon. Either chop into 1/2 in pieces and cook until brown & crisp OR put on wire racks on a baking sheet and cook for 35-40 min at 350F. Brush with maple syrup when almost done cooking. Drain on paper towels. Set aside a small portion of the bacon pieces to top the cupcakes later.
3. Melt butter in a heavy saucepan over moderately low heat. Whisk in the cocoa. Add water and whisk until smooth. Remove from heat and let cool slightly.
4. Whisk in one at a time: sugar, eggs, buttermilk and vanilla.
5. Sift flour, baking soda, baking powder and salt into the cocoa mixture and whisk until just combined (it will be lumpy). Stir in bacon.
6. Fill muffin tins about 2/3 full (note, this is a very drippy batter. I didn't use my usual cookie scoop but filled a measuring cup with a spout with batter and poured it in)
7. Bake 20-25 minutes.
8. Cool cupcakes on a wire rack

Maple Frosting
- 1 lb. (2 sticks) unsalted butter, at room temperature
- 1 8oz. package cream cheese, at room temperature
- maple syrup
- 1 box Confectioners sugar
- best quality coarse sea salt
- Demerara sugar (if you don't have this, use Sugar in the Raw)

1. In a stand mixer with the paddle attachment, beat butter and cream cheese until smooth (5 min)
2. Add the maple syrup, about 2 T.
3. Add about 3/4 of the box of confectioners sugar, and beat until smooth and fluffy.
4. Frost cupcakes and sprinkle with a little bit of coarse salt, and a little bit of Demerara sugar.
5. Top with a piece of cooked maple bacon, and a tiny drizzle of maple syrup.


Monday, January 19, 2009

For Every Season, Churn, Churn, Churn

Last week I was invited to a very special tasting event - my friend Claire has been teaching herself to make ice cream, and she decided to give Michael and me a tasting of her latest creations. Oh, and what a tasting it was! She carefully planned the order in which we sampled the different flavors, and gave us the background on each one. It was marvelous - we were impressed and delighted with each sweet treat that passed our lips.

There was nothing at all commercial about these flavors - they were much more dense and flavorful than the best store brand could ever aspire to be. Amazingly, she made all of these by hand with a manual ice cream maker rather than the electric ones that most home cooks use. Her elbow grease paid off - I am still dreaming of our afternoon in Ice Cream Paradise.

Up first, Apricot/Pistachio. This ice cream had a very creamy taste, without the use of an egg custard in the base. Strong apricot flavor and subtle pistachio giving it an earthy nuttiness and texture. I had not known that ice cream could taste like this - the fruit just filled your mouth in a way that almost seemed that you were eating something healthy.


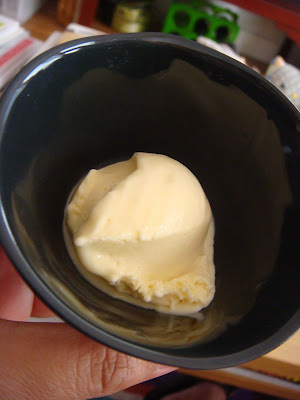
Second was Saffron/Coconut. This is another one that tasted unbelievably creamy, this time from the coconut milk. It was smooth and velvety, with the beautiful deep yellow color of the saffron. The savory/spice element along with the sweetness made it very adult in flavor, definitely for the sophisticated palate.


The next flavor was not for the faint of heart: Aztec Hot Chocolate - a peppered version of classic chocolate with a great kick. The flavor progression was unique - first, chocolate, then the bite of the chili pepper. It was intense and a pleasure to eat.


The next flavor, Roasted Banana, could easily be an "everyday" flavor for me. I love bananas, and roasting them gives them a more complex, caramelized flavor. This one had a texture that was most similar to commercial ice creams, from the way your spoon would drag over it.


And last but not least, Zabaglione. Zabaglione is one of my favorite desserts in the world, an Italian whipped custard made with egg yolks, sugar, and plenty of Marsala wine - in the finest restaurants, they will make it tableside for you. This ice cream captured it perfectly, with a silky custardy smoothness and the wonderful taste and aroma of Marsala. Like the wedding dress at the end of a fashion show, it was a step up in elegance and sophistication.


For great gourmet recipes like this, the definitive bible is David Lebovitz's "The Perfect Scoop". He also has an entertaining blog that he writes from his home in Paris, which is a celebration of food and technique, and living in a foreign country. Any of these recipes is guaranteed to leave you with a smile on your face, and the churning desire for more (sorry, couldn't resist!)

Taste of Africa


I have been back from South Africa for almost 2 weeks now, and it is still so present in my mind - the sights, the smells, and the colors. Yesterday I woke up longing for a Moroccan soup called Harira, a delicious and fragrant bowl of goodness that warms you like no other. When I used to go to New York every February, I would go to a restaurant called Bar 6 with my friends Harold and Barbara, and slurp huge spoonsful of the stuff until my frozen insides felt human again. It was the only thing that worked to thaw out my weak California blood.

I was feeling ambitious enough to attempt a new recipe, so I found one online that didn't involve any overnight prep and reasonably common ingredients. This soup is traditionally used to break the fast over Ramadan, so it is chock full of flavor and hearty ingredients. It's not heavy, though, which is why you can eat a huge bowl of it and not feel sick.

Below is the recipe that I used, which I had to adjust a bit (there was no salt in the original recipe - no salt??). It was easy and came out very well. For the cubed lamb, I had my butcher cut up some lamb tenderloin for me, and he left on some of the fat which helped to make a hearty stock.

The best part of all was the smell - all of those beautiful spices and aromatics filling the house with their heady aroma. It was wonderful in our sunny San Francisco kitchen - I can only imagine how much better it would be in a cold climate. You will want to use fresh spices if possible to get the full effects of this beautiful and fragrant dish.

Harira
- 1 lb cubed lamb meat
- 1 t. ground turmeric
- 1 1/2 t. ground black pepper
- 1 - 2 t. salt (to taste)
- 1 t. ground cinnamon
- 1/4 t. ground ginger
- 1/4 t. ground cayenne pepper
- 2 T. butter
- 3/4 C. chopped celery
- 1 onion, chopped
- 1 red onion, chopped
- 1/2 C. chopped fresh cilantro
- 1 (29 oz) can diced tomatoes
- 7 C. water
- 3/4 C. green lentils
- 1 (15 oz) can garbanzo beans, drained
- 4 oz. vermicelli pasta
- 2 eggs, beaten
- 1 lemon, juiced

1. Place the lamb, spices, butter, celery, onion and cilantro in a large soup pot over low heat. Stir frequently for 5 minutes.
2. Drain tomatoes, reserve juice. Pour tomatoes into the mixture and let simmer for 15 min.
3. Pour tomato juice, 7 cups of water, and the lentils into the pot. Bring the mixture to a boil, then reduce the heat to simmer. Let the soup simmer, covered, for 2 hours.
4. About 10 minutes before serving, turn the heat to medium-high, place chickpeas and noodles into the soup, let cook about 10 minutes.
5. Stir in lemon juice and eggs, let eggs cook 1 minute
6. Correct seasonings and serve.


Sunday, January 18, 2009

Red Wine Quinoa Risotto with Mushrooms and Bacon

Encouraged from my last cooking success, I tried something more exciting and complicated this time. I had a leftover red wine from the Middle Age and a box of Quinoa. So I figured I would try making risotto with them. A whole grain version of risotto.

And it turned out really good! Maybe it's the bacon, garlic and cheese combination. Maybe it's just me. I'm hungry all the time so everything tastes delicious.


Ingredients
  • 1/2 onion - chopped

  • 5 cloves garlic - peeled and chopped

  • 3 strips bacon - diced

  • 1 cup Quinoa

  • 2 cups vegetable or chicken stock

  • 1 cup red wine

  • 2 cups water

  • 1/2 pound of mixed mushrooms - cut (I used a combination of Cremini, Shitake, and Oyster mushrooms. They came in a mixed mushroom package from Trader Joe's.)

  • 1 teaspoon dry oregano

  • Salt and pepper

  • 1/2 cup grated Parmesan cheese

Directions
  1. In a large pot or deep pan, cook bacon on medium high heat for half a minute until bacon fat coats pan's bottom. Add garlic and onion. Let cook and stir occasionally until the onion starts to brown - about 2 minutes.

  2. Add red wine and Quinoa. Let cook until bubbly. Add vegetable or chicken stock. When the dish comes to boil, reduce heat to simmer. Add oregano.

  3. Add half a cup of water at a time when Quinoa absorbs all the liquid. Let simmer for about 20 minutes or until Quinoa becomes clear without white center.

  4. Stir in mushrooms. Cook for 30 more seconds. Turn of the heat. Stir in grated cheese and season with salt and pepper.

  5. I would sprinkle chopped spring onion or parsley before serving but I didn't have any. I think it will give a nice crunch and refreshness to the dish.

Friday, January 16, 2009

Walnut Cranberry Raisin Bread

My stock pot is awesome. Not only that it doubles as a wok, it can also bake bread! No-knead bread that is. This bread is so easy to make even I didn't mess it up. It came out crusty, dense and full of flavor. It tastes just like professional bread I buy at the farmer's market. No more spending $5 a loaf for me!


Original recipe is from King Arthur Flour. I increase the amount of whole wheat flour to 2 cups and water to 2 1/4 cups because I felt like my dough wasn't wet enough.


I can't believe baking bread can be this easy. So basically you stir all the ingredients together. Cover and leave for at least 8 hours. Ball the dough and move to a greased pot. Let rise for 2 more hours. Cover and bake.

Note to self: don't forget to grease and flour the pot with corn meal. The first time I tried this recipe I forgot just that. The the bread was stuck to the pot. Stuck so bad that I ate the entire loaf of bread (over a few days) out of the pot...

Tuesday, January 13, 2009

Stir Fried Kale with Garlic and Bacon

My new year's resolution: cook more real food. Use my stove top more. Give the oven some break. And what would be more natural to me than stir fry? After all I'm Chinese, genetically. I do not own a wok as all my kitchen cabinet space (and other space in the apartment) is occupied by baking stuff. I find my stock pot works just fine. Actually it has one advantage over a wok: bubbly heated grease doesn't spill out and soil the stove because of its tall edges.

So here goes: my stir fry. I started off being easy with myself. I used bacon. And lots of garlic. What would be bad that those? Even kale came out tasty.


Ingredients
  • About 1 pound of kale

  • 5 cloves garlic - peeled and chopped

  • 1/2 onion - peeled and chopped

  • 3 strips of bacon - diced

  • 1/2 cup water

  • A pinch of dry red pepper

Directions
  1. Clean the kale. Discard tough stems and roughly chop the leaves.

  2. Heat up a wok or, in my kitchen, a stock pot. Stir in bacon and garlic. Stir occasionally for one to two minutes until the garlic softens. Add onion. Stir and let cook until the onion starts to brown.

  3. Add kale. Stir occasionally until the leaves wilt about 1 minute during which if the bottom of the pan brown, add water and scrape off the brown goodness.

  4. Sprinkle red pepper flakes and add salt to taste. (I didn't add any more salt. My bacon gave enough.) Serve immediately.

Friday, January 9, 2009

100% Wholewheat bread

I love eating bread. I haven't started baking bread until recently. I was discouraged by the many steps of bread making. But this is kind of fun. It's a new realm of baking that I have to explore. Plus bread is the perfect low fat, low sugar, almost guilt-free baking.

My latest attempt: 100% wholewheat bread turned out great.


To (unsuccessfully) control my portion, I formed the dough into a long log before baking instead of baking it in a loaf pan. This way I got more but smaller slices. The bread was great toasted or untoasted with butter, jam, peanut butter, lemon curd, etc... You see how portion control didn't work?

Monday, January 5, 2009

Mini Lemon Tarts

I made too much dough for these lemon-lime shortbread cookies. Now that the holiday season is over, I don't get that many orders on the site anymore. So I decided to dress it up a little for our New Year's Eve party.


I cut out the cookies with my biggest flower cookie cutter - about 4 inches in diameter and lined them in muffin pans. They went into 350 degrees oven for about 5 minutes. I forgot to fork the dough before baking so they puffed up a little....


For the filling, I dropped a teaspoon of lemon curd which Hannah prepared while I rolled out the cookies. The cookies went back into the oven for about 7 more minutes.


These cookies/tarts came out so pretty I couldn't stop taking their pictures. They are also deliciously creamy/flaky/sweet/tart. Somebody said they are like the spring exploding in your mouth (in a good way.)

Update: Salted lemon-lime shortbread cookie recipe here.