Wednesday, September 30, 2009
Coconut rice with pears & coconut-caramel sauce
Spoonfuls of creamy rice and caramelised pear make a soothing after-dinner treat.
Preparation Time 10 - 40 minutes
Cooking Time 50 minutes
Ingredients (serves 4)
60g butter
70g (1/3 cup, firmly packed)
brown sugar
2 William Bartlett pears, peeled, quartered, cored, halved length ways
80ml (1/3 cup) light coconut milk
Ground cinnamon, to dust
Coconut rice
400ml light coconut milk
400ml reduced-fat milk
70g (1/3 cup) caster sugar
110g (1/2 cup) medium-grain rice
Method
1. To make the coconut rice, place the coconut milk, milk and caster sugar in a saucepan over medium heat. Bring to the boil. Stir in the rice and cover. Reduce heat to low. Cook, stirring occasionally, for 40 minutes or until the rice is tender and the mixture is creamy. Set aside, covered, for 30 minutes to cool.
2. Transfer the coconut rice to a bowl. Cover with plastic wrap and place in the fridge to chill.
3. Heat the butter in a large frying pan over medium heat. Stir in the brown sugar. Add the pear and cook, turning occasionally, for 4 minutes or until the sauce is golden and the pear is tender and light golden. Remove from heat. Carefully stir in the coconut milk.
4. Divide the coconut rice among serving bowls. Top with the pear and drizzle over the sauce. Dust with cinnamon to serve.
Notes & tips
With a twist: Caramelised pear crepes: Omit the coconut rice. Divide pears and sauce among 8 frozen crepes, thawed. Dust with cinnamon and serve with vanilla ice-cream.
Source
Good Taste - February 2009, Page 22
Save and share this recipe
Want to share this recipe with your family and friends? Click the button below to send them an email or save this to your favorite social network.
Stir-fried rice with chilli tuna recipe
Dinner will be fast, fabulous and easy tonight if you follow this recipe for fried rice with a twist.
Ingredients (serves 4)
350g long grain rice (or use 4 cups leftover cooked rice)
2 tbs olive oil
8 bacon rashers, rind removed, diced
1 garlic clove, crushed
1 cup fresh or frozen peas
210g can tuna in chilli oil*, drained
1/2 cup spring onions, finely sliced, plus extra to serve
1/4 cup (60ml) light soy sauce, plus extra to serve
Method
1. Cook rice in salted, boiling water until cooked, then drain and refresh.
2. Heat oil in a wok over high heat, add the bacon and fry until crisp. Remove and drain on kitchen paper.
3. Add rice and garlic to the wok, stir-fry for 1 minute, then add the peas, tuna, spring onions, cooked bacon and soy sauce. Stir-fry quickly until heated through.
4. Serve with extra soy sauce and spring onions.
Notes & tips
If you can't find tuna in chilli oil, add 1 finely chopped chilli, seeds removed, with the rice and garlic.
Source
delicious. - March 2004, Page 72
Recipe by Valli Little
Save and share this recipe
Want to share this recipe with your family and friends? Click the button below to send them an email or save this to your favorite social network.
Easy fried rice recipe
Even kids will love this quick and easy fried rice, perfect for a Tuesday night meal.
Ingredients (serves 4)
1 cup long grain white rice
2 eggs
2 teaspoons vegetable oil
2 bacon rashers, chopped
1 carrot, peeled and grated
2 shallots, trimmed, finely sliced
1/2 cup frozen peas, thawed
1 tablespoon soy sauce, plus extra to serve
Method
1. Cook the rice in a large saucepan of boiling water for 12 minutes or until tender. Drain and leave to cool.
2. Using a whisk, lightly beat eggs in a small bowl. Heat oil in non-stick wok or large frying pan over medium heat. Add eggs. Swirl over base to form an omelette. Cook 2 minutes. Turn over. Cook 2 minutes until set. Transfer to a chopping board. Set aside to cool slightly. Cut into short strips.
3. Add bacon to wok. Cook 4 minutes until light golden. Add carrot. Stir fry 1 minute. Add shallots, peas and rice. Cook, stirring, 3-4 minutes. Add egg and soy sauce. Stir until heated through. Serve immediately, with extra soy.
Source
Fresh Living - 6 September 2004, Page 6
Recipe by Tracy Rutherford
Save and share this recipe
Want to share this recipe with your family and friends? Click the button below to send them an email or save this to your favorite social network.
Tuesday, September 29, 2009
Rice-paper fish parcels with lemon-grass rice
Cooking Time 30 minutes
Ingredients (serves 4)
200g (1 cup) basmati rice
1 stem lemon grass, pale section only, bruised
2 tbs shredded coconut
1 red capsicum, halved, deseeded, thinly sliced
1 carrot, peeled, cut into batons
4 green shallots, ends trimmed, thinly sliced lengthways
8 square (16cm) rice-paper sheets
8 small (about 400g) ocean perch fillets
1/3 cup loosely packed fresh coriander leaves
1 tbs kecap manis
Method
1. Cook rice, lemon grass and coconut in a saucepan of boiling water until tender. Drain and remove lemon grass. Return to pan along with capsicum, carrot and shallots. Cover and set aside.
2. Meanwhile, soak a rice-paper sheet in a bowl of warm water until soft. Drain on paper towel. Transfer to a clean work surface. Place 1 fish fillet, skin-side down, in the centre of rice paper. Top with 2 coriander leaves. Fold rice paper to enclose fish and form a parcel. Repeat with remaining rice paper, fish and coriander.
3. Place the fish parcels in a steamer over a saucepan of boiling water and steam for 2-3 minutes or until the fish is just cooked through. Spoon rice among plates and top with fish parcels. Drizzle with kecap manis and sprinkle with remaining coriander.
Source
Good Taste - March 2004, Page 60
Recipe by Jane Charlton
Save and share this recipe
Want to share this recipe with your family and friends? Click the button below to send them an email or save this to your favorite social network.
Japanese rice recipe
Not just for sushi, this lightly seasoned short-grain rice topped with toasted sesame seeds is the perfect side for Japanese dishes.
Preparation Time 5 - 45 minutes
Cooking Time 20 minutes
Ingredients (serves 8)
2 tbs sesame seeds
645g (3 cups) koshihikari rice
60ml (1/4 cup) sushi seasoning
1 tbs caster sugar
1/2 tsp salt
875ml (3 1/2 cups) water
Method
1. Place the sesame seeds in a medium frying pan over low heat and cook, stirring, for 2 minutes or until toasted. Transfer to a small heatproof bowl.
2. Place the rice in a large fine sieve. Rinse under cold running water until the water runs almost clear. Set aside for 30 minutes to drain.
3. Meanwhile, place the sushi seasoning, sugar and a pinch of salt in a small bowl and stir until the sugar dissolves.
4. Place the rice and water in a large saucepan. Bring to the boil over high heat. Cover with a tight-fitting lid. Reduce to the lowest heat possible, moving the pan to a smaller hot plate if necessary. Cook, covered, for 15 minutes. Set aside, covered, for 10 minutes.
5. Add the sushi seasoning mixture to the rice. Use a flat-edged wooden spoon to stir gently until combined. Transfer to a serving bowl.
6. Sprinkle the sesame seeds over the rice to serve.
Notes & tips
- Also known as sushi rice, koshihikari is a short-grain white rice.
- Time plan tip: Prepare this recipe to the end of step 1 up to 1 day ahead. Store the sesame seeds in an airtight container. Continue to the end of step 3 up to 2 hours ahead. Continue from step 4, 45 minutes before serving. Cover the cooked rice with foil to keep warm.
Source
Good Taste - March 2008, Page 74
Recipe by Cynthia Black
Save and share this recipe
Want to share this recipe with your family and friends? Click the button below to send them an email or save this to your favorite social network.
Stuffed baby capsicums Recipe
Tomato-flavoured rice is the trick to filling these sweet baby capsicums.
Preparation Time 15 minutes
Cooking Time 20 minutes
Ingredients (serves 4)
Olive oil, to grease
8 baby red capsicums
1 x 250g pkt Sun Rice Mediterranean-Style Tomato Rice in 90 Seconds
2 shallots, ends trimmed, thinly sliced
1 tbs shredded fresh basil
Method
1. Preheat oven to 180°C. Brush a baking tray with oil to lightly grease.
2. Cut the tops from the capsicums and reserve. Cut around the seeds and white membrane and discard. Place the capsicums on the prepared tray.
3. Cook the rice following packet directions. Transfer to a bowl. Stir in the shallot and basil. Divide the rice mixture among the capsicums and replace the tops.
4. Bake in oven for 15 minutes or until the capsicums are tender and the rice is heated through.
Notes & tips
- Serves 4 as an accompaniment
- Make it ahead: Prepare this recipe to the end of step 3 up to 1 day ahead. Cover with plastic wrap and store in the fridge. Continue from step 4, 15 minutes before serving.
- Swap it: For a change, swap capsicums for 4 vine-ripened tomatoes. In step 2, use a teaspoon to remove the flesh from the tomatoes, leaving a 1cm-thick border, and reserve. Stir the reserved tomato into the rice with the shallot in step 3.
Source
Good Taste - March 2009, Page 72
Recipe by Emma Braz
Save and share this recipe
Want to share this recipe with your family and friends? Click the button below to send them an email or save this to your favorite social network.
Tuna rice salad recipe
Light and tasty tuna rice salad recipe.
Cooking Time 17 minutes
Ingredients (serves 4)
250g packet 90-second brown rice
1 cup doongara clever rice
1/2 cup frozen peas
2 Moraitis gourmet tomatoes, diced
3 green onions, thinly sliced
2 x 185g cans tuna in springwater
2 large lemons
1 tablespoon olive oil
Method
1. Cook brown rice following packet directions. Spread on a tray and set aside to cool. Place doongara rice and 1 1/2 cups cold water in a saucepan. Bring to the boil over high heat. Reduce heat to low. Cover and simmer for 12 minutes or until rice is tender. Remove pan from heat and add peas. Cover and stand for 5 minutes. Drain rice and peas. Refresh in cold water. Set aside to cool.
2. Combine brown and white rice, peas, tomatoes and green onions in a large bowl. Drain tuna and flake into large chunks. Add to salad and toss gently to combine.
3. Juice 1 lemon. Cut remaining lemon into wedges. Combine 1/4 cup lemon juice, oil and salt and pepper in a screw-top jar. Secure lid and shake to combine. Pour over salad and toss gently to coat. Serve with lemon wedges.
Notes & tips
To increase the protein, make a 2-egg omelette. Cut into long, thin strips and stir through salad in step 2 with tuna.
Source
Super Food Ideas - February 2007, Page 34
Save and share this recipe
Want to share this recipe with your family and friends? Click the button below to send them an email or save this to your favorite social network.
Orange & cherry rice custard
Creamed rice gets a Christmas makeover with festive fruit and cinnamon flavours.
Cooking Time 10 minutes
Ingredients (serves 4)
1 x 430g can creamed rice
1 tbs finely grated orange rind
1 x 425g can cherries in syrup
1 x 7cm cinnamon stick
Method
1. Combine the rice and orange rind in a bowl. Divide among four 185ml (3/4-cup) capacity serving glasses. Cover with plastic wrap and place in the fridge to chill.
2. Meanwhile, place the cherries and syrup, and cinnamon stick in a medium saucepan over medium-low heat. Cook, stirring, for 2 minutes or until heated through. Use a slotted spoon to transfer the cherries to a heatproof bowl.
3. Increase the heat to medium-high. Simmer for 6 minutes or until the syrup thickens. Set aside for 5 minutes to cool slightly. Discard the cinnamon.
4. Pour the syrup over the cherries and toss to coat. Spoon the cherry mixture over the rice mixture to serve.
Notes & tips
Preparation: 5 mins (+ chilling & 5 mins cooling time)
Source
Good Taste - December 2007, Page 128
Recipe by Abi Ulgiati
Save and share this recipe
Want to share this recipe with your family and friends? Click the button below to send them an email or save this to your favorite social network.
Boston Cream Pie Cupcakes
I went to Boston and ate its cream pie (which is not actually a pie but a cake -- America is so confusing.) It was at that place that people waited 30 minutes in line just to buy pastries. I wasn't impressed. I thought I could do better. So I tried. I wanted to make the big cream pie but it will be for a party with 25+ people. A cake is too messy to eat. Cupcakes would do.
Not to brag, but I think my cupcakes taste better than the real thang....
I started with Creme Patissiere/Pastry Cream from JoyOfBaking.com. It made creamy, not too sweet and very vanilla scented cream. By itself, it tasted kind of bland but I trusted the people at Joy. So I pushed on. With all those steps and ingredients, the "creme patissiere" was actually pretty easy to manage and whisk out.
While waiting for the pastry cream to cool down, I baked a batch of my favorite vanilla cupcakes - recipe below.
After letting the cupcakes cool, I cut out cone-shaped hole from each cupcake. Filled the hole with about a teaspoon of pastry cream. Removed the 3/4 bottom of the cone and capped the top back on the cupcake.
I doubled this recipe for Satiny Chocolate Glaze. After letting the glaze cool down a bit so that it's not so runny, I spooned about a scant tablespoon on top of each filled cupcakes. The glaze hardened (but not like a rock) after it completely cooled and kept its shape and place on top of the cupcakes.
To quote a comment on my Facebook the day after the party from a friend:
Best Vanilla Cupcakes Ever!
Directions
Not to brag, but I think my cupcakes taste better than the real thang....
I started with Creme Patissiere/Pastry Cream from JoyOfBaking.com. It made creamy, not too sweet and very vanilla scented cream. By itself, it tasted kind of bland but I trusted the people at Joy. So I pushed on. With all those steps and ingredients, the "creme patissiere" was actually pretty easy to manage and whisk out.
While waiting for the pastry cream to cool down, I baked a batch of my favorite vanilla cupcakes - recipe below.
After letting the cupcakes cool, I cut out cone-shaped hole from each cupcake. Filled the hole with about a teaspoon of pastry cream. Removed the 3/4 bottom of the cone and capped the top back on the cupcake.
I doubled this recipe for Satiny Chocolate Glaze. After letting the glaze cool down a bit so that it's not so runny, I spooned about a scant tablespoon on top of each filled cupcakes. The glaze hardened (but not like a rock) after it completely cooled and kept its shape and place on top of the cupcakes.
To quote a comment on my Facebook the day after the party from a friend:
Those were the BEST cupcakes I've had in my life.
Best Vanilla Cupcakes Ever!
- 2 3/4 cups all-purpose flour
- 1 teaspoon baking powder
- 1/2 teaspoon baking soda
- 1/2 teaspoon salt
- 2 sticks butter at room temperature
- 2 cups sugar
- 4 eggs
- 1 teaspoon vanilla extract
- 1 cup buttermilk
Directions
- Preheat the oven to 350 degrees. Line 2 muffin pans with paper liners.
- Combine flour, baking soda, baking powder and salt in a large bowl.
- With an electric mixer, beat butter and sugar at high speed for 2 to 3 minutes until light and fluffy. Add eggs one at a time. Beat well after each addition. Add vanilla extract.
- Sift a third of flour mixture alternately with a third cup of buttermilk into the wet ingredients. Stir (the lowest mixer setting) until just combined after each alternation. Scrape the bowl if needed.
- Fill the prepared muffin pans up to 2/3 full as the cake will rise. Bake for 22 to 25 minutes. Rotate and switch the pan half way through baking. Let cool in the pans for a minute, then remove and cool on cooling racks. Make 32 cupcakes.
Monday, September 28, 2009
Spiced chicken with rice & crisp red onions
Low-cholesterol diets don't have to be boring as this curried chicken from Mary Cadogan proves
Ingredients
2 boneless skinless chicken breasts, about 140g/5oz each
1 tbsp sunflower oil
2 tsp curry powder
1 large red onion , thinly sliced
100g basmati rice
1 cinnamon stick
pinch saffron
1 tbsp raisins
85g frozen peas
1 tbsp chopped mint and coriander
4 rounded tbsp low-fat natural yogurt
Method
1. Heat oven to 190C/fan 170C/gas 5. Brush the chicken with 1 tsp oil, then sprinkle with curry powder. Toss the onion in the remaining oil. Put the chicken and onions in one layer in a roasting tin. Bake for 25 mins until the meat is cooked and the onions are crisp, stirring the onions halfway through the cooking time.
2. Rinse the rice, then put in a pan with the cinnamon, saffron, salt to taste and 300ml water. Bring to the boil, stir once, add the raisins, cover. Gently cook for 10-12 mins until the rice is tender, adding the peas halfway through. Spoon the rice onto two plates, top with the chicken and scatter over the onions. Stir the herbs into the yogurt and season, if you like, before serving on the side.
Nutrition Per serving
495 kcalories, protein 45g, carbohydrate 63g, fat 9 g, saturated fat 2g, fibre 5g, salt 0.39 g
Recipe from Good Food magazine, February 2008.
Save and share this recipe
Want to share this recipe with your family and friends? Click the button below to send them an email or save this to your favorite social network.
Yellow pepper rice
Perfect with salmon or white fish, this makes a great change from plain rice
Ingredients
1 tbsp olive oil
1 onion , finely chopped
1 red pepper , deseeded and chopped
thumb-size piece fresh root ginger , finely chopped
250g basmati rice
1 tsp turmeric
600ml vegetable stock
25g flaked almonds , toasted
Method
1. Heat the oil in a wide pan with a lid, then cook the onion, pepper and ginger together for 5 mins, stirring, until softened. Stir in the rice and turmeric for 1 min more, then pour over the stock. When the stock begins to simmer, cover with the lid.
2. Cook for 12 mins until the rice is tender and stock has been absorbed. If the rice is tender but a little stock remains, turn off the heat, cover again, then leave for 2-3 mins. Season and stir through the almonds to serve.
Tip
Also delicious served cold with leftover roast chicken, or stir through quartered boiled eggs and some smoked mackerel.
Nutrition Per Serving
309 kcalories, protein 7g, carbohydrate 58g, fat 7 g, saturated fat 1g, fibre 0g, salt 0.2 g
Recipe from Good Food magazine, October 2008.
Save and share this recipe
Want to share this recipe with your family and friends? Click the button below to send them an email or save this to your favorite social network.
Friday, September 25, 2009
Pumpkin Bliss Cupcakes
Fall is here Hallelujah! If you only do one thing to celebrate make these.I am serious, if these cupcakes were a religion I would be tempted to convert.
3 Cups Flour
1 T plus 1 t pumpkin pie spice ( I just make my own with spices I already have and google the recipe)
2 t baking soda
1 t salt
3 Cups Sugar ( I know seriously..it makes alot of cupcakes...does that make the sugar content okay?)
1 15oz can pumpkin puree
4 large eggs
1 cup vegetable oil
3/4 cup orange juice
Preheat oven to 350 degrees. Line muffin pans with liners or spray with baking spray. Sift together Flour, spice, soda, and salt. In a large bowl, combine sugar, pumpkin and eggs. Whisk until smooth. Whisk in the oil and orange juice until smooth. Add flour mixture and fold together until incorporated-do not over mix. Bake 20-25 minutes and frost with cream cheese frosting.
Cream Cheese Frosting
4 oz unsalted butter, softened
8 oz cream cheese, softened
1 T Vanilla(I you can find it with vanilla bean specks it makes these soooo pretty)
5 Cups Confectioners Sugar
Cream butter and cream cheese until fluffy. Add vanilla and beat. Add sugar one cup at a time and continue to beat an additional five minutes.
Monday, September 21, 2009
Martha Stewart's Black-bottom Coconut Bars
After all the disastrous gluten-free baking experience, I still needed to bake something to bring to a party. I looked through my del.icio.us and found the perfect candidate: Marthe Stewart's Black-Bottom Coconut Bars. After all, she's the queen of sinful desserts (well, I guess after Paula Deen but I don't want to kill my friends yet.)
I still didn't have all purpose flour and still didn't learn my lesson about substitution and so-called genius moments. I used whole-wheat flour and unsweetened coconut flakes in Martha's recipe. But to my credit, I did increase the amount of sugar even though I knew that Martha liked her sweets really really super sweet.
And it was a success! I love you Martha Stewart. <3 <3 <3
The bottom part wasn't so sweet which perfectly offset the sweet, crunchy and flavorful top part. Plus the whole thing was made from whole wheat flour!
Hmmmm.... Maybe I will try this with gluten-free flour... :P
Gluten-Free Disasters
I needed to bake something to bring to a party but I ran out of flour. Out of necessity, I came up with genius moment. I would bake treats with gluten-free flour! So I looked through my brand new cookbook, Gluten-Free Baking Classics, and found a recipe for brownies.
The recipe calls for 2/3 cup of flour mix which is 2 parts rice flour and 1 part starch. Usually, I would just measure out what I need. But I don't know how to measure 2/9 cup of starch... So I came up with another genius idea. I would mix up more flour mix than I need and use the rest for muffins!
The recipe was for chocolate ricotta muffins. I only had cottage cheese. That's an acceptable substitute, right?
As you can tell from the post title, those genius moments weren't so genius after all. The muffins overflowed and made a mess. Both the muffins and brownies came out gritty and weird. I guess my rice flour is not as finely ground as recommended. Or my baking angel was just not with me...
Sunday, September 20, 2009
Good Things Come to Those Who Wait
Dear Loyal Readers,
Please accept these freshly made cheesecakes from Zanze's as an apology for being SO lax with my blog posts lately. I have a plethora of experiences and recipes to share, and I am feeling the writing bug tickling my brain again, so they will be forthcoming shortly. I promise, it will be delicious!
Tastefully Yours,
Liz
Fig Bran Muffins
Ummm..hmmm.... I made a lot of muffins lately. But since the week leading to the Labor Day when I baked cookies for 3 hours every single night to make party favors for a friend's wedding, I haven't felt a need to bake anything sweet. But I do want convenient snacks/breakfast, so I bake muffins.
These I tried because I saw this recipe here. I was so excited because I have a box of oat bran I want to use. But the recipe doesn't use any bran. And I didn't have dates.
So I made these.
I put all the things healthy I have in my cupboards: oat bran, ground flax seeds, figs, sliced almonds, agave nectar, olive oil. Plus these are gluten free. I used my last cup of almond flour.
I'm not putting the recipe here because they didn't come out super delicious. They tasted "healthy" - kind of gummy I think because my figs were dry and old. The texture of sliced almond and figs don't really go together.
If I have to do this again I'll skip sliced almond and will chop figs into smaller chunks.
Thursday, September 17, 2009
Whole Wheat Bread
I have tried 4,975 different whole wheat bread recipes. Liz told me that she heard this one was good so I gave it a go. It is by far the very best and easiest bread recipe. Start to finish one hour. Try it you will not be disappointed.
Whole Wheat Bread
makes 2 loaves
3 Cups Whole Wheat Flour
1/3 Cup gluten flour or Vital Wheat Gluten
1 1/4 T. instant yeast(or quick rising)
2 1/2 C very warm tap water
1 T salt
1/3 Cup Oil (I used Olive Oil)
1/3 C honey or 1/2 C Sugar ( I used honey)
1 1/4 T Bottled Lemon Juice
2-2 1/2 C Whole Wheat Flour
Mix together the first three ingredients in mixer with a dough hook. Add water all at once and mix for 1 minute; cover and let rest for 10 minutes. Add salt, oil, honey or sugar and lemon juice and beat for 1 minute. Add last flour, 1 cup at a time, beating between each cup. Beat for 6-10 minutes until dough pulls away from the sides of the bowl. This makes a very soft dough.
Preheat oven for 1 minute to lukewarm and turn off. Turned dough onto oiled counter top; divide, shape into loaves, place in oiled bread pans. Let rise in warm oven for 10-15 minutes until dough reaches the top of pan. Do not remove bread from oven;turn oven to 350 degrees F and bake for 30 minutes. Remove from pans and cool on racks.
Tuesday, September 15, 2009
Eggplant Chocolate Chip Muffins
During the past few weeks, my CSA gave me so many eggplants that I figured it wouldn't hurt trying something new with them. I might need to make eggplant ice cream next if there are more eggplants this week.
These muffins sound weird but they are actually not bad. My friend, Jaka, said if you put enough sugar and butter in anything, they will taste good. It is quite true in this case.
Based on zucchini muffin recipe on Simply Recipes, I pretended that my eggplants are zucchinis, substituted and changed a few things. And I got my weirdly fantastic eggplant muffins. They smell like eggplant but taste like chocolate!
Ingredients
Directions
These muffins sound weird but they are actually not bad. My friend, Jaka, said if you put enough sugar and butter in anything, they will taste good. It is quite true in this case.
Based on zucchini muffin recipe on Simply Recipes, I pretended that my eggplants are zucchinis, substituted and changed a few things. And I got my weirdly fantastic eggplant muffins. They smell like eggplant but taste like chocolate!
Ingredients
- 1 1/2 cups all-purpose flour
- 1 1/2 cups whole wheat flour
- 2 teaspoons baking soda
- 1/2 teaspoon salt
- 2 eggs
- 1 stick of butter - melted
- 3/4 cup Agave nectar
- 2 teaspoons vanilla extract
- 3 cups peeled and chopped eggplants (I used two small eggplants. Even after 25 minutes in the oven the eggplants didn't totally disintegrate. They gave a little veggie crunch to the muffins which I like. If you don't want that crunch, I would recommend process them in a food processor.)
- 1 generous cup of chocolate chips
Directions
- Preheat the oven to 350 degrees. Grease a muffin pan. I used silicone muffin cups so I skipped the greasing.
- In a large bowl, combine all purpose flour, whole wheat flour, baking soda and salt together.
- In a separate bowl, whisk eggs, butter, Agave nectar and vanilla extract.
- Pour the wet ingredients onto the dry ingredients. Stir until just wet. Fold in eggplants and chocolate chips. The ingredients will be very sticky. Don't over mix.
- Spoon into the prepared pan. Bake for 25 minutes.
Fresh peach pie
The highlight of peach season for me: fresh peach pie. As far back as I can remember there was always the debate in my home over fresh v. cooked peach pie. My vote is fresh, so here is the recipe.
Fresh Peach Pie:
2 c. boiling water
1/2 c. cold water
1 3/4 c. sugar
3/4 c. cornstarch (or Ultragel works great)
1/8 tsp. salt
1 pkg (3 oz) orange or peach jello (I like orange better)
1/4 c. lemon juice
4 c. ripe, peeled, and sliced peaches
Bring 2 c. water to a boil in saucepan. Make a paste with the cold water, sugar, starch, and salt. Pour into the pan of boiling water. Cook over medium heat, stirring constantly until mixture becomes thick-about 5 minutes. Add jello and cook 1 more minute. Remove from heat and add lemon juice. Cool a bit, then stir in peaches. Pour into baked pie shells and put in fridge to set up. Makes 2 pies. Whipped cream (the real kind) is great on top.
Monday, September 14, 2009
Oat Bran Bread
This bread is from Artisan Bread in Five Minutes a Day. It's basically a variation of the no-knead bread. The idea is that you can mix up the dough and store it for weeks in the refrigerator. When it's time to bake, you just take a portion, let rise and bake.
It worked amazingly. This is the second loaf I baked from this batch, 4 days after mixing the dough.
I also love the idea of baking smaller loaf at a time so that I can always have fresh baked bread.
The only complaint I have was that it took a couple of hours for the dough to get to room temperature and rise properly. So if I want to go to sleep before midnight, I have to get home by 8pm to thaw the dough. :)
Simple Carrot Cake with Cream Cheese Frosting
adapted from My Kitchen Cafe
We had this cake yesterday, and it was delicious. I don't have a food processor, so I just used a fine grater for the carrots. If you like bigger carrot chunks, use the courser grater. The frosting is super smooth and creamy. I didn't use the nuts on top because I am not a nut fan, but I used MKC's picture because we had already devoured half the cake before I thought to take one.
Cake Ingredients:
2 1/2 c. unbleached all-purpose flour
1 1/4 tsp baking powder
1 tsp baking soda
1 1/4 tsp ground cinnamon
1/2 tsp ground nutmeg
1/8 tsp ground cloves
1/2 tsp table salt
1 lb. medium carrots (6 to 7 carrots), peeled
1 1/2 c. granulated sugar
1/2 c. packed light brown sugar
4 large eggs
1 1/2 c. vegetable oil , safflower oil, or canola oil
Adjust oven rack to middle position; heat oven to 350 degrees. Grease and flour a 13 by 9-inch baking pan or two 9-inch round pans. This step is key as I found out the hard way.
Whisk together flour, baking powder, baking soda, cinnamon, nutmeg, cloves, and salt in large bowl; set aside. In a food processor shred carrots, you should have about 3 cups shredded carrots. Use a large shredding disk for bigger carrot chunks or a fine shredding disk for smaller carrots pieces. Transfer carrots to bowl and set aside.
Beat granulated and brown sugars and eggs on medium-high until thoroughly combined, about 45 seconds. Reduce speed to medium; with mixer running, add oil in slow, steady stream, being careful to pour oil against inside of bowl (if oil begins to splatter, reduce speed to low until oil is incorporated, then resume adding oil). Increase speed to high and mix until mixture is light in color and well emulsified, about 45 seconds to 1 minute longer. Turn off mixer and stir in carrots and dry ingredients by hand until incorporated and no streaks of flour remain.
Pour into prepared pan(s) and bake until toothpick or skewer inserted into center of cake comes out clean, about 40 minutes, rotating pan halfway through baking time (I didn't rotate my 9-inch pans). Cool cake to room temperature in pan on wire rack, about 2 hours (Mine didn't take quite that long).
Frosting: (She recommended doubling this for two 9-inch layers, but I had way too much frosting left over, and I love frosting. Next time I'll try doing a 1 1/2 recipe)
8 oz cream cheese, softened but still cool
5 Tbsp unsalted butter softened, but still cool
1 Tbsp sour cream
1/2 tsp vanilla extract
1 1/4 c. confectioners' sugar (4 1/2 ounces)
When cake is cool, mix cream cheese, butter, sour cream, and vanilla at medium high speed in mixer with whisk attachment (or in large bowl using hand held mixer) until well combined, about 30 seconds, scraping down bowl with rubber spatula as needed. Add confectioners’ sugar and mix until very fluffy, about 1 minute. Frost and eat!
Saturday, September 12, 2009
Bleberry Muffins/Pudding
They were meant to be muffins - gluten-free even... But I think they came out more like pudding because they were so super moist that I had to eat them with spoon. Good thing I baked them in individual silicone cups.
While browsing for filler books (any books that can make my order over $25 so I get free delivery) I found The Gluten Free Almond Flour Cookbook" and eventually found the author's blog.
My last few experiments with gluten-free baking turned out not super impressive. I got a hummus for muffins once. The last attempt wasn't so bad but I am still not too crazy about all those starches in the flour mix.
This would be an interesting alternative: baking with almond flour.
So I tried this recipe: Cranberry Lemon Muffins. I substituted a cup of frozen wild blueberries for the dry cranberries.
My muffins/pudding sank in the middle and rose over the baking cups making a bit of a mess. But they were the most delicious intentionally gluten-free baked goods I have ever baked. I shall keep this as my go-to pudding recipe.
Wednesday, September 2, 2009
St Clement's Drizzle Cake
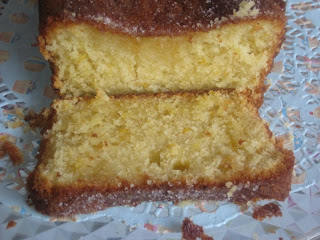
This month’s recipe is a traditional British favourite and a cake you will find in most tea rooms over Britian, St Clement’s Drizzle Cake. I can only presume that the name of this cake originates from the poem about execution turned nursery rhyme Oranges and Lemons! I remember playing the singing game associated with this nursery rhyme in Primary school. Only recently did I realise its origins but maybe the lines “Here comes a Chopper to Chop off your Head, Chip chop chip chop - the Last Man's Dead”, should have given it away! This quick cake recipe produces a very light and moist sponge that is bursting with those wonderful citrusy flavours soaked through, finished with a crunchy sugary top. The perfect refreshing afternoon teatime cake!
*If you have any queries or questions, please leave a comment under the recipe and we will endeavour to reply to you as soon as possible.*
Please Note: - The posting date for your St Clement's Drizzle Cake on your Blog is 1st October 09.
Please ensure you send in your email to us to make certain you are listed in the round up. The round-up will be posted here on 2nd October 09. If you are a food blogger, we kindly ask that you write a post about your bake and link back to Sweet and Simple Bakes. Please feel free to add our Sweet & Simple Bakes Monthly Baking Event Badge to your post. Let us know that you have completed the bake.
Please send an email to sweet2simple[at]googlemail[dot]com
Add in subject: [Name of bake] for the round up
Your Name:
Your Blog Name:
Your Blog Link to the Baking Post:
A picture of your bake 200x200 pixels (if you’re not sure how to resize a photo we can do this for you.)
Non-bloggers may send in a picture of their bake to the above email address and we will include it in the round-up for that month.
The posting date for St Clement's Drizzle Cake on your blog is 1st October 09. The round-up will be 2nd October 09 to ensure all entries have been sent in via our email – we wouldn’t wish to miss any of your creations.
We are looking forward to seeing everyone’s entry here at S&SB!
Happy Baking!
Maria and Rosie xx
Tuesday, September 1, 2009
Sweet and Simple Bakes Monthly Round-up ~ Jammy Doughnut Muffins
Wow I can't beleive this is our sixteenth baking challenge here at Sweet and Simples Bakes and I must say it's been another amazing success with so many yummy Jammy Doughnut Muffin entries!! All your muffins look amazing and simply delectable! I hope you have enjoyed baking this recipe and will be joining us in our next Sweet and Simple Bakes.
We would like to thank all our S&SB bakers for your continued support each month and a very warm welcome to new bakers who have joined us this month.
*If there are any late entries, I will endeavour to add you to the round-up as soon as possible*.
Rekha @ PLANTAINLEAF(ANDHRARECIPES)
Kelly @ Cooking the Books
Natalia @ gatti fili e farina
Rosie @ Books and Bakes
Jaya @ Jayaspace
Chele @ Chocolate Teapot
Caroline @ Cake, Crumbs and Cooking
Lynn @ Bites and Pieces
Lucie @ Cooking at Marystow
Brenda @ Tea and Wheaten Bread
Julie @ Little Bit of Everything
Natalie @ Snookys Recipe Doodles
Priya @ Priya's Easy N Tasty Recipes
Tamil @ For Sweet Tooth
Becky @ Living with a Boy
Edith @ Precious Moments
Dips @ Centaur Cooks
Joanne @ Apple Crumbles
Minu @ Chettinad Fiesta
Bimmer @ My Baking Blog
Katie @ Katiecakes
Rosie @ Baking Cakes Galore
Maria @ The Goddess's Kitchen
A huge round of applause please for all our Sweet & Simple bakers this month.
Unfortunately our dear Rosie has done her back in again and asked me to do this month's round-up. She will visit everyone's blogs in due time!
*Could we please ask that we all take time to visit each other’s blogs and leave feedback – thank you.*
Maria and Rosie xx
We would like to thank all our S&SB bakers for your continued support each month and a very warm welcome to new bakers who have joined us this month.
*If there are any late entries, I will endeavour to add you to the round-up as soon as possible*.
Chaya @ Chaya's Comfy Cook Blog
Rekha @ PLANTAINLEAF(ANDHRARECIPES)
Kelly @ Cooking the Books
Natalia @ gatti fili e farina
Rosie @ Books and Bakes
Jaya @ Jayaspace
Chele @ Chocolate Teapot
Caroline @ Cake, Crumbs and Cooking
Lynn @ Bites and Pieces
Lucie @ Cooking at Marystow
Brenda @ Tea and Wheaten Bread
Julie @ Little Bit of Everything
Natalie @ Snookys Recipe Doodles
Priya @ Priya's Easy N Tasty Recipes
Tamil @ For Sweet Tooth
Becky @ Living with a Boy
Edith @ Precious Moments
Dips @ Centaur Cooks
Joanne @ Apple Crumbles
Minu @ Chettinad Fiesta
Bimmer @ My Baking Blog
Katie @ Katiecakes
Rosie @ Baking Cakes Galore
Maria @ The Goddess's Kitchen
A huge round of applause please for all our Sweet & Simple bakers this month.
Unfortunately our dear Rosie has done her back in again and asked me to do this month's round-up. She will visit everyone's blogs in due time!
*Could we please ask that we all take time to visit each other’s blogs and leave feedback – thank you.*
Maria and Rosie xx
Subscribe to:
Posts (Atom)