ta name="google-site-verification" content="LnUtT_d1nKFEi6qCVRa2VtURKXcUowdpcm2UMwFTZUk" /> hummus recipes: January 2010

Friday, January 29, 2010

Green Tea Shortbread Cookies

The first time I had matcha tea I thought it tasted like dirt. I guess it's one of those acquired taste. And I have acquired it alright. I tried putting the stuff not only in my drinks but also in cake, cookies, ice cream, pudding, and even my oatmeal breakfast. Some turned out great, so not so much. But this is the winner. Matcha + shortbread cookies = so-delicious-you-convince-yourself-it-is-healthy cookies.

The bitterness and subtle flavor of the tea complimented the simplicity of shortbread cookies perfectly. None of the ingredients overpower the other. I use enough tea in this recipe so that cookies taste and smell like tea but are not overly bitter.


The recipe is simple. I just basically add 1 tablespoon of matcha and a teaspoon of vanilla extract to my normal shortbread cookies.

Ingredients
  • 2 1/2 cup all purpose flour

  • 1 tablespoon matcha (I got mine in a Korean supermarket for $9/2 oz.)

  • 1/2 teaspoon salt

  • 1/2 cup sugar

  • 2 sticks (1 cup) chilled butter

  • 1 teaspoon vanilla extract


Directions
  1. With a food processor, pulse flour, matcha, sugar and salt together.

  2. Cut butter into cubes and add to the mixture. Add vanilla extract. Pulse until butter is cut into the dough and the mixture is crumbly. Stop the machine just before the dough totally stick together and ride up the bowl.

  3. Gather into 2 balls. Flatten and wrap in plastic wrap. Refrigerate for 30 minutes or more until the dough is hard enough to roll out and cut without sticking. If refrigerate overnight, set the dough at room temperature for about 20 minutes before rolling.

  4. If rolling and cutting out cookies seems like too much work, just roll the dough into logs about 1 inch in diameter. Wrap and refrigerate.

  5. Adjust oven racks to the upper third and lower third. Preheat the oven to 300 degrees and line 2 baking sheets with parchment paper.

  6. Roll out the dough to about 1/4 to 1/3 inch thick and cut out with cookie cutter. Or if using the log method, use a sharp knife to cut the dough out into 1/4 inch thick. Arrange in prepared cookie sheets. These cookies don't expand much so just give them maybe 1/2 inch space between each other.

  7. Bake for about 25 minutes or until the edges start to brown. Rotate and switch sheet position half way through.

  8. Let cool on the baking sheets for a minute then transfer to cooling racks. Let cool completely before storing or serving. The cookies develop more flavor and better texture when they are cold. They stay for about 1 to 2 weeks in cookie jars (not air-tight).

Tuesday, January 26, 2010

Pulled Pork BBQ Sandwiches

So, this isn't really a recipe - just yet another idea for that pork roast. I just wanted to include it because it is one of my boys favorites. All I do is: Cook a pork roast in a crock pot (in beef broth) on low all day, take it out and shred it. Dump the juices, put the pork back in and add bbq sauce. I think the most important part is to use a really good bbq sauce - not the cheap stuff. Once again, I would like to promote Danielle's bbq sauce on this blog - it's great. If I use a bottled sauce, I usually add some apricot preserves to my liking (Danielle's recipe is usually sweet enough). Also, I know some people add a little pop (i.e., sprite) to their sauce, which is also good. Serve on a yummy role and I'm sure your kids will love it (or are mine the only ones obsessed with bbq sauce?).

Southwestern Pulled Pork

I got this recipe from Taste of Home. It's another one we all like. I'll have to add a picture later.

Southwestern Pulled Pork
adapted from tasteofhome

3 lb-ish pork roast
1 c. barbecue sauce (make sure it's a good one. I suggest trying the one Danielle posted - it's fantastic!)
1 can (8 oz) tomato sauce
2 cans chopped green chiles
1 sweet onion, thinly sliced
2 Tbl chili powder
1 tsp cumin
1/2 tsp oregano

Cook the roast in 1-2 cups of beef broth, with some S&P and garlic powder in a crock pot on low for 6-8 hrs (or you can just cook the roast in all of the ingredients, if you don't care about draining off the drippings). Remove pork and shred. Remove juices from crock pot and add the rest of ingredients. Add shredded pork and continue to cook for about 2 more hours. Serve on tortillas with lettuce, cheese, tomatoes, sour cream, etc.

Sweet Pork

I got this recipe from the Sister's Cafe. I am a sucker for sweet + pork anything, so it's one of my favorites.

Sweet Pork
adapted from the Sister's Cafe

3 lb pork roast
1/2 c worcestershire sauce (the original recipe calls for 1 c. - I think it's unnecessary to use an entire cup)
1/2 c beef broth (to make up for the above)
1 c brown sugar
1 tsp oregano
1 tsp powdered ginger
1 tsp chili powder
1 tsp garlic powder
2 Tbl minced onions

Cook all ingredients in a crock pot on low for 6-8 hrs. One hour before serving, remove roast and shred it. Dump out juices, reserving about a cup. In crock pot mix 1 c. red enchilada sauce and 1 cup brown sugar, then add shredded pork. Add 1/2 - 1 cup of juices to your liking (the original recipe doesn't have you add any of the juice back in, but I think it adds to the flavor). Serve on tortillas with beans and rice, sour cream, cheese, etc.

Chile Verde

Okay. So I LOVE pork loin roasts. They are yummy, cheap (we buy the huge ones at Sam's and divide them into 3-4 smaller roasts), easy and the possibilities are endless. And, since about half our meals end up being some form of pork loin, I decided to list a few of the regulars... sorry, if it's a bit much pork to swallow.

First up, chile verde (or my americanized version anyway).


Chile Verde

3-4 lb pork roast
1 lrg can (28 oz) green chile enchilada sauce
1 large red pepper, chopped
1 onion, chopped
1 or 2 cans of green chiles (when I'm in a good mood, I like to roast, peel and chop my own)
1/2 - 1 tsp garlic powder
1/2 tsp cumin
chicken boullion to taste (about 2 tsp)

To cook the roast you could just combine everything in a crock pot, add the roast and cook all day, but I prefer to cook the roast first without the other stuff, so that I can drain off all the fat drippings and gunk. I cook my roast in the crock pot on low with about a cup or two of beef broth, with some S&P and garlic powder on the roast, for 6-8 hrs. A couple of hours before eating, combine the rest of the ingredients in a med. sauce pan and simmer, so that the veggies are soft. About an hour before serving, shred the pork, return to crock pot, and add the sauce . Serve on tortillas with beans and rice, sour cream, guacamole, cheese, etc.

Monday, January 25, 2010

Umami Eggs

Several months ago, I had breakfast with a friend at Out the Door restaurant in Pacific Heights, the second location of a casual Vietnamese restaurant belonging to local favorite chef Charles Phan, of Slanted Door fame. Of the various dishes that we tried, our favorite was the very simple Soft Scrambled eggs.

What made them truly delicious was the addition of soy sauce. While not something I would ever think to add to eggs, it is really a pairing made in heaven. Not only does it add incredible umami (while not overshadowing the natural flavor of the eggs), it also breaks down the eggs to give them a very pleasingly soft consistency. Chives add just a bit of bite and texture, as well as beautiful color contrast.

I have been making these at home for about a month now. All you do is add in a few shakes of soy sauce about 2/3 of the way through your normal scrambled egg cooking process, as well as some snipped chives. If you don't have chives, green onion will do just fine, added to the pan at the beginning of the cooking time. You don't need to add salt or pepper at all, as the seasoning is taken care of with the soy sauce.


They are perfect in the morning with some fruit, mid-day with vegetables or a salad, or for a light breakfast-for-dinner meal with some toasted french bread. The incredible savory taste just leaves you wanting more - hence the magical properties of umami. In fact, I think that word is a spelling error - it should really be YUMami.

Friday, January 22, 2010

Vanilla Custard Apple Cake

At The Tea Lounge in Park Slope last weekend, I had an absolutely lovely apple cake. It looked like a crumb cake but the gentle hipster behind the counter said it's an apple pie. True enough, it had pie crust at the bottom. The middle were chunks of apples swimming in creamy sweet custard and topped with substantial layer of streusel.

So I made it my mission to replicate the cake at home. My attempt number one came out almost on the mark. Almost. The cake was moist and deliciously creamy. Chunks of apples were still intact and gave nice crunch. And it was perfectly sweetened - not too sweet but sweet enough to keep you (me) wanting more. Almost.... It just needs more steusel. Something more hefty to stand up to the pie crust and creamy chunky apples.


I started with an olive oil pie crust just because it only involved mixing and pressing the dough on to a baking dish. There's no need for fancy pie crust because it will soak up all the liquid at the bottom anyway. I used a combination of Granny Smith, Gala and Golden Delicious apples. Gala stays chunky after cooking while the other two become soft. Sour Granny Smith balances off all the other sweet and creamy ingredients.


Ingredients
  • 1 recipe olive oil pie crust

  • 6 apples (I used 2 Granny Smith apples, 2 Gala and 2 Golden Delicious.)

  • 1 1/2 cups low-fat yogurt

  • 3 eggs

  • 1/4 teaspoon salt

  • 2 tablespoons instant tapioca (or just all purpose flour)

  • 1 vanilla bean

  • For Steusel

  • 2/3 cups all purpose flour

  • 4 tablespoons cold butter

  • 1/3 cup sugar

  • 2 tablespoons milk

Directions
  1. In an 8 inch square pan, mix all the dry ingredients for the crust together. Sprinkle oil and milk over. Use finger tips to mix until just wet and press onto the pan. Cover and refrigerate.

  2. Prepare the streusel by mixing 2/3 cup flour and 1/3 cup sugar together in a medium bowl. Rub in cold butter and sprinkle milk over until you get coarse crumbs. Cover and refrigerate.

  3. Preheat the oven to 350 degrees. Clean, peel, core and cut the apples into chunks. Whisk yogurt, eggs, salt and tapioca together. Split the vanilla bean and scrape it seeds into the yogurt mixture. Pour over apples. Stir.

  4. Pile apples on top of the pie crust. Pour any extra liquid into the pan. Sprinkle the streusel on top. Place the pan on a cookie sheet (in case of juice overflow) and bake for 60 minutes or until the top is golden. Rotate the pan half way through cooking. Let cool before serving.

Molasses Chocoate Caramel Candy

My brother asked me to buy him some caramel candies from Jacques Torres. I said: "Why?" Who eats caramel candies anyway? It's just burnt sugar and it sticks to my teeth forever. But because I am a good sister, I got him two huge boxes ($16 for 18 pieces!)

Then I tried one. Then two. Then three. And I couldn't stop. I ended up eating a third of the box...

I guess being forever sticky has its own appeal.

Not wanting to spend almost a dollar a piece for caramel candy, I set out for my own caramel candy recipe to make at home.

Here's my first try: chocolate caramel candy. I picked this one because it didn't require a candy thermometer (which is my mistake number 1.)


I cooked everything according to the recipe except that I didn't know how to check for the right consistency under cool water and ended up burning my index finger. Up to the index-finger-burning point everything was pretty easy.

I was very excited to cut and wrap the candies up. I was dreaming of mailing them to brother to surprise him.


But it was a mess. The brick of caramel doesn't quite harden enough. I guess I should have cooked it a little longer. I muscled through a few wrappings and got about 20 candies before giving up. They were soft sticky candies that tasted more like burnt molasses than chocolate. Not quite the quality I want to airmail to Thailand yet...

Thursday, January 21, 2010

Qatayef Asafiri - Qatayef Asafiri Recipe


Qatayef Asafiri Recipe (قطايف) is an Arab dessert commonly reserved for the Muslim holiday of Ramadan, a sort of sweet crepe filled with kishta. This dessert dish is served cold. Learn how to make the best Qatayef Asafiri.

Preparation time : 15 minutes
Cooking time : 10 minutes

Ingredients
1 tin NESTLÉ® Cream or 170 g
2 cups milk or 500 ml
½ cup corn flour or 60 g
1 tablespoon blossom water
40 small ready-made qatayef slices or 600 g
½ cup ground pistachio nuts or 50 g, for garnishing
2 cups sugar syrup or 500 ml

Preparation
  1. In a saucepan mix the NESTLÉ® Cream , milk liquid and corn flour. Bring to boil with constant stirring until it thickens. Stir in the blossom water and set it aside to cool to room temperature.
  2. Place 1 full teaspoon of the cooled prepared cream on each qatayef slice and seal firmly halfway keeping the cream shown from one side.
  3. Dip each qatayef piece from the open side in the ground pistachio.
  4. Arrange in a large platter and serve with the sugar syrup.
Serving tips : Garnish the qatayef with orange blossom in syrup.

Save and share Qatayef Asafiri Recipe
Want to share this recipe with your family and friends? Click the button below to send them an email or save this to your favorite social network.

Umm Ali - Umm Ali Recipe


Easy recipe for Umm Ali also called om Ali. Umm Ali is a delicious traditional Egyptian dessert equivalent to North America's bread pudding.

Preparation time : 15 minutes
Cooking time : 20 minutes

Ingredients
8 pieces croissant or 600 g, medium size, cut into small pieces
3 tablespoons raisins
3 tablespoons desiccated coconut
3 tablespoons flaked almonds, toasted
3 tablespoons pistachio nuts, cracked
1 tin NESTLÉ® Sweetened Condensed Milk or 397 g
1 teaspoon vanilla essence
4 cups water or 1 liter
1 cup liquid cream or 250 ml, whipped

Preparation
  1. Combine croissant pieces, raisins, coconut, almonds and pistachio in a baking dish.
  2. Place NESTLÉ® Sweetened Condensed Milk , vanilla and water in a large saucepan and bring to boil then remove from heat and pour immediately over the croissant mixture in the baking dish and set them aside for 5 minutes or until croissants absorb the maximum of the liquid.
  3. Place whipped cream in a piping bag and pipe the cream over the prepared mixture in the baking dish.
  4. Place the baking dish in a preheated oven at 200°C using the grill part of the oven and grill for 5 minutes or until the cream topping is golden color. Serve it immediately.
Save and share Umm Ali Recipe Recipe
Want to share this recipe with your family and friends? Click the button below to send them an email or save this to your favorite social network.

Chicken Tikka Masala


We really, really enjoy Indian food. Since we live at least an hour from a decent Indian restaurant, I've been trying to learn to make some of my favorites at home. I've been tweaking this recipe for a few months. To be REAL Tikka Masala you would need a tandoor oven, but this comes pretty darn close. This makes enough for all of us, with a little bit for me to have for lunch the next day.

Adapted from My Kitchen Cafe

Marinade and Chicken:
1 cup plain yogurt (I like the 2% Greek variety, but regular is fine)
1 tablespoons lemon juice (bottled is fine)
2 teaspoons ground cumin
1 teaspoon ground cinnamon
2 teaspoons paprika
2 teaspoons black pepper
1 tablespoons minced fresh ginger
1 teaspoon salt
3 large boneless, skinless chicken breasts; cut in half or quarters to cook faster

Combine all ingredients except chicken. Pour sauce over chicken and refrigerate for one hour. Grill chicken or cook chicken in frying pan, then cut into bite-size pieces. I prefer the taste of grilled chicken, so I grill it on my panini maker. Also, it's faster. Discard marinade. While the chicken is grilling, make the sauce.

Sauce:
1 tablespoon olive oil
1 clove garlic, minced
2 teaspoons ground cumin
2 teaspoons paprika
1/2 teaspoon salt
3 8-oz cans tomato sauce
1 1/4 cup cream (I use plain soy milk)
1/4 cup chopped cilantro for garnish

Heat oil in large skillet over medium heat. Saute garlic for one minute. Stir in cumin, paprika and salt, and stir until fragrant (I have learned this is one of the secrets to Indian food. It really brings out the flavors). Stir in tomato sauce and cream. Simmer on low heat until sauce thickens, about 20 minutes. Add chicken pieces and simmer for another 10 minutes. Garnish with fresh cilantro. Serve over hot rice. We like jasmine or basmati rice.

Adapted from My Kitchen Cafe (and I swiped her photo)

Wednesday, January 20, 2010

Italian rice pie - Italian rice pie recipe


Wonderful recipe for Italian rice pie. These colourful wedges are a summer freezer stand-by for a picnic or easy family meal.


Preparation Time 30 - 70 minutes
Cooking Time 60 minutes

Ingredients (serves 6)

1 tbs olive oil
1 brown onion, finely chopped
100g sliced prosciutto, cut into thin strips
2 garlic cloves, crushed
220g (1 cup) arborio rice
375ml (1 1/2 cups) salt-reduced chicken stock
150g (1 cup) frozen peas
Olive oil, to grease
100g semi-dried tomatoes, coarsely chopped
40g (1/2 cup) finely grated parmesan
3 eggs, lightly whisked
1/3 cup shredded fresh basil
1/3 cup chopped fresh continental parsley
Baby rocket leaves, to serve
Balsamic vinaigrette, to serve

Method

1.Heat the oil in a large heavy-based saucepan over medium heat. Add the onion, prosciutto and garlic and cook, stirring occasionally, for 5 minutes or until the onion softens slightly.

2.Add the rice and stock. Cover and bring to a simmer. Reduce heat to low. Cook, covered, for 10 minutes. Remove from heat. Place the peas on top of the rice. Set aside, covered, for 5 minutes. Use a fork to separate the grains and combine. Set aside, covered, for a further 5 minutes. Transfer to a large bowl. Set aside for 20 minutes to cool.

3.Preheat oven to 180°C. Brush a round 20cm (base measurement) cake pan with oil to lightly grease. Line the base and side with non-stick baking paper. Add the tomato, parmesan, egg, basil and parsley to the rice mixture and stir until well combined. Season with pepper. Spoon the rice mixture into the lined pan. Use the back of a spoon to smooth the surface.

4.Bake in oven for 40-45 minutes or until the pie is set and light golden. Set aside in the pan for 10 minutes to stand before turning out onto a chopping board. Cut into wedges. (To freeze, see note.)

5. Divide the wedges among serving plates. Top with the rocket leaves and drizzle over the balsamic vinaigrette to serve.

Notes
To freeze: At the end of step 4, line a shallow airtight container with plastic wrap, allowing the sides to overhang. Arrange the wedges between pieces of non-stick baking paper in the lined container. Place in the fridge, uncovered, for 3-4 hours to chill. Fold over the plastic wrap and seal. Label, date and freeze for up to 3 months.

To thaw: Place individual portions in the fridge overnight or until thawed.

To reheat: Preheat oven to 200°C. Line a baking tray with non-stick baking paper. Place the pie wedges on the lined tray and cover with foil. Bake in oven for 15 minutes. Remove the foil and bake for a further 5 minutes or until heated through. Continue from step 5.

Source
Good Taste - December 2007, Page 136
Recipe by Alison Roberts

Italian rice with chicken recipe - courgette rice with feta & olives - asian brown rice pie

Save and share Italian rice pie recipe
Want to share this recipe with your family and friends? Click the button below to send them an email or save this to your favorite social network.

Festive rice - Festive rice recipe


The Rice recipes site invites you to try this delicious Festive rice dish. This rice stars irresistibly delicious Chinese Barbecue Pork.

Preparation Time 20 - 30 minutes
Cooking Time 5 minutes

Ingredients (serves 6)
1 tsp light soy sauce
1 1/2 tsp oyster sauce
1 tsp sesame oil
1 tsp Chinese rice wine or dry sherry
1/2 tsp caster sugar
300g medium green prawns, peeled, deveined
2 1/2 tbs peanut oil
3 eggs, lightly whisked
2 garlic cloves, finely grated
2.5cm-piece fresh ginger, peeled, finely grated
300g (11/2 cups) jasmine rice, cooked following packet directions, cooled
100g Chinese barbecue pork (see related recipe), finely chopped
6 shallots, ends trimmed, thinly sliced diagonally
2 tbs light soy sauce, extra

Method
1. Combine the soy sauce, oyster sauce, sesame oil, Chinese rice wine or dry sherry and sugar in a glass or ceramic bowl.
2. Add the prawns to the soy sauce mixture and stir to combine. Cover and set aside for 10 minutes to marinate.
3. Heat 2 teaspoons of peanut oil in a wok over high heat. Tilt the wok to coat. Add the egg. Tilt the wok until the egg covers the base. Cook for 30 seconds. Use a wooden spoon to stir and break up the egg. Cook for a further 30 seconds or until the egg is just set. Transfer to a large plate.
4. Heat 1 tablespoon of remaining peanut oil in the wok over high heat. Drain the prawns, reserving the marinade. Add the prawns, garlic and ginger to the wok and stir-fry for 1-2 minutes or until the prawns curl and change colour. Transfer to the plate.
5. Heat the remaining peanut oil in the wok. Add the rice, extra soy sauce and reserved marinade, and stir-fry for 2 minutes. Add the egg, prawn mixture, Chinese barbecue pork (see related recipe) and shallot, and toss until just combined and heated through. Serve.

Notes
Time plan tip: Make up to 1 day ahead. Cool and store in fridge. Ten minutes before serving, reheat in a wok over medium heat, tossing frequently, for 5 minutes.

Source
Good Taste - February 2008, Page 82
Recipe by Anneka Manning

Chinese Mushroom Rice - Oriental egg fried rice - sweet & sour chicken with brown rice

Save and share festive rice recipe
Want to share this recipe with your family and friends? Click the button below to send them an email or save this to your favorite social network.

Minimalist Pork


I was at the library yesterday, which happens to be right down the street from San Francisco Meats & Deli , so I stopped in and bought this lovely pork loin. I hate those ones that you get at the grocery store, that are so lean that it's impossible to keep them from drying out. That layer of fat on the top - that's the flavor!


I checked out Mark Bittman's The Minimalist Cooks at Home, which is no longer in print - a shame, because I really like what I have read so far. Bittman explains in detail why he created each recipe, and how it works to achieve the desired result. There are some black and white photos to illustrate some technique, but other than that there are no pictures - usually a turn-off for me, but with this book I make an exception.


It just so happened that there was just the pork recipe inside that I was looking for, "Roasted Pork with Applesauce". I almost didn't realize it (no picture!). I must have read it at least 6 times before taking the plunge to go ahead and make it, and even so, I cut the pork loin in half so there would be some left in case it didn't turn out.

But I kept liking what it said. This was a recipe that Bittman came up with because while he liked the taste of using jam or marmalade on roasted pork, he didn't like the sugary sweetness. Through experimentation, he found that creating a "crust" of applesauce yielded a sweet, but not too sweet, result. In theory, perfect. But roasting applesauce on pork? Weird? Mushy? Like baby food meets meat?

I had nothing to fear. The recipe was as simple as can be, and did everything that it said that it would. The high heat caramelized the applesauce, and it kept the meat incredibly moist. I cooked it longer than the 45 minutes that the recipe called for - maybe even 20 minutes longer, at 400, to make sure that some of that fat melted down and that the sauce browned and blackened a bit (the best part!) I also liberally salted and peppered it, because I love the contrast of salt and sweet. And seriously, 2 ingredients (besides salt and pepper) - you can't get more minimalist than that.

This is for 4 servings, 15 minutes work time, 60 minutes estimated total.

Roast Pork with Applesauce
  • One 1.5 to 2 lb pork loin
  • 2 C applesauce, preferably unsweetened
  • salt and freshly ground black pepper
Preheat the oven to 500. Set the oven rack as close to the oven is as practical (take the thickness of the roast into account).
Meanwhile, put the applesauce in a fine strainer over a bowl or in the sink to allow excess liquid to drain.
Line a roasting pan with a double thickness of aluminum foil and brush the foil with a little oil.
When the oven is hot, sprinkle the roast with salt and pepper, then spread an even layer of the applesauce all over it, using up all of the applesauce. Sprinkle with a little more salt and pepper and roast, checking every 15 minutes or so to make sure that the applesauce doesn't burn. It's ok if it darkens and browns, or even turns dark brown, as long as the top doesn't blacken. (my note: i liked a little bit of blackening)
Begin checking the pork with an instant-read thermometer after 45 minutes. When the internal temperature reaches 155 degrees, remove from the oven. Let rest 5 minutes before carving.

Yoghurt rice pudding - Yoghurt rice pudding recipe


The Rice recipe site invites you to try an easy recipe for Yoghurt rice pudding. Learn how to make the best Yoghurt rice pudding dish.

Ingredients (serves 4)

115g medium-grain rice
700ml milk
50g caster sugar
1 vanilla bean, split
1 cinnamon stick
500g thick Greek-style yoghurt
Berries or poached rhubarb, to serve

Method

1. Bring rice, milk, sugar, vanilla and cinnamon to the boil over medium heat. Reduce heat to low (a simmer mat, from supermarkets and kitchenware shops, is best for this) and simmer for 30 minutes, stirring occasionally to prevent sticking. Cool slightly. To serve, remove vanilla pod and stir in yoghurt. Serve with fruit.

Source
delicious. - October 2004, Page 112
Recipe by Valli Little

Milk rice pudding - Baked rice pudding - Chocolate rice pudding

Save and share yoghurt rice pudding recipe

Want to share this recipe with your family and friends? Click the button below to send them an email or save this to your favorite social network.

Saturday, January 16, 2010

Mini-Me!


What a treat - my friend Jude visited the new cupcake shop Mission Minis and brought me 2 of them to sample. Delicious!

Mission Minis is so smart - offering a variety of unusual and traditional flavors...Ruby Red Velvet to Cinnamon Horchata...and all minis for $1 apiece! Everyone else seems to have cornered the market on the $3 cupcake, which in this economy feels like a once-in-awhile luxury. But $1? That's an everyday price in the size of a guiltless treat.

Bravo to Mission Minis to finding a new niche in a cupcake-saturated city.

Basquing in the Glow


Last week I was watching an episode of Check, Please! Bay Area, and one of the chosen restaurants was at the Basque Cultural Center in South San Francisco. The tv show made it look really appealing, with traditional home cooking and a family style atmosphere.

My dad was going to be landing at SFO with a layover on Friday night for a couple of hours, so I thought, what a perfect time to try the Basque restaurant, given that it was only a few miles from the airport, and offered many of the hearty dishes that he loves, but does not get to have often.

I made a reservation, and we arrived on time to find the place packed with people...old people. We almost felt like we had stumbled upon dinner at a retirement home. There was also a wedding party and a lot of families, which was keeping the staff busy.

Upon ordering our food, it was easy to see the draw. While most entrees were around $18-20, which isn't exactly cheap, that price included soup and salad which made for a very hearty meal.

They bring out the soup in a huge metal tureen which is left on your table. This definitely set the standard for the rest of the meal - no sooner than we took our first bite, it was "pass the salt, pass the pepper" for the rest of the evening. The soup was very watered down, so that while the quantity was impressive (at least 2 bowls worth per person), the taste was not interesting enough to make you want to go back for more.


We ordered 2 of the 3 appetizers offered, the Escargot and the Pate de Campagne. The escargot were good and garlicy, but the Pate was extremely fatty and again bland.


The entrees were ok, again nothing great. My dad had veal osso bucco, my husband had pepper steak, and I had their house favorite, rack of lamb. Mine was the best of the three, well cooked and seasoned, but the potatoes and vegetables were like afterthoughts.


All in all, it was nice to see a community space and a restaurant full of people celebrating various occasions. But for the cost of the food, what appeared to be a bargain was really the result of hotel-food or institution-type preparation. They definitely cook for their clientele, so the seasonings are on the light side - but I would have loved to have seen more of traditional Basque cooking and flavoring. Ah, well, it's always nice to get out of your element once in awhile and try something different, and this certainly fit the bill.

Bran Muffins

Recipe: Nancy Silverton's Bran Muffins via DavidLebovitz.com


This is the most involved muffin recipe ever! Look at it. There's toasting wheat bran, cooking raisins and then pureeing them. It took all my will and about an hour of my morning to prepare. Well, at least I didn't have to bring out the mixer too. Look at all the dishes I have to clean afterward.


But I must say these are the most flavorful and moist bran muffins I've ever had. Plus these are no joke. Most recipes I found on the internet call for maybe a cup of bran for 2 cups of flour. This one has 2 cups of bran for only 3/4 cup of flour (and 1/4 of that whole wheat.)


I'm set for a week with breakfast.

Not in my kitchen...

... in Prague

Friday, January 15, 2010

Mushroom-stuffed chicken with lemon thyme risotto


Rice Recipes site invites you to try an Easy and tasty recipe of Mushroom-stuffed chicken with lemon thyme risotto. Learn how to make the best Mushroom-stuffed chicken with lemon thyme risotto. Ever tried risotto as a side dish? It's perfect with these chicken breasts with a rich porcini stuffing.

Preparation time 20 mins
Cook time 40 mins plus 30 mins soaking
Freezable
Gluten-free
The uncooked stuffed chicken can be frozen

Ingredients - Serves 4

FOR THE CHICKEN & STUFFING
25g dried porcini mushrooms, soaked in 250ml water for 30 mins, soaking liquid reserved
1 tbsp olive oil
1 onion , finely chopped
150g pack baby button mushrooms , finely chopped
2 thyme sprigs or lemon thyme sprigs, leaves removed and chopped
175ml white wine
4 skin-on chicken breasts

FOR THE LEMON THYME RISOTTO
1 tbsp butter
1 tbsp olive oil
2 celery sticks, finely chopped
1 small onion , finely chopped
140g risotto rice
600ml hot chicken stock
2 thyme sprigs or lemon thyme sprigs, leaves removed and chopped
juice and zest ½ lemon
50g Parmesan , grated, plus 1 tbsp extra to serve

Method
1. Heat oven to 180C/fan 160C/gas 4. First, make the stuffing. Finely chop the soaked porcini and set aside. Heat the oil in a shallow pan, then gently cook the onion for 5 mins, stirring occasionally. Add the porcini, button mushrooms and thyme leaves, season, turn the heat up, then cook for another 5 mins until the mushrooms have softened.
2. Add the wine to the pan, then reduce fiercely until nearly dry. Add 50ml of the porcini soaking liquid, then continue to reduce for a couple of mins until you have a syrupy sauce. Allow to cool for a couple of mins, then carefully spoon between the skin and the flesh of the chicken breasts. Can be made a day ahead and chilled, or frozen for 1 month. Defrost in fridge before cooking. Season, place on a baking tray, skin-side up, then cook in the oven for 20 mins, until the chicken is cooked through and golden.
3. While the chicken is cooking, make the risotto. Heat the butter and olive oil in a saucepan. Add the celery and onion, then cook over a medium heat for 5 mins until softened. Add the rice, coat it well in the oil, then cook for 1 min. Gradually add the stock a ladleful at a time, stirring with each addition until absorbed. Continue adding the stock and stirring until the risotto is oozing and thick - about 20 mins. Stir in the thyme, lemon juice, zest and Parmesan.
4. When the chicken is cooked through and golden, remove from the oven. Spoon the risotto onto serving plates, sprinkle with the extra Parmesan and top with a chicken breast. Spoon over the juices from the chicken pan, then serve immediately.

Tip: If you can't get hold of porcini mushrooms, cook 1 finely chopped bacon rasher and add it to the stuffing to give it a real depth of flavour.

Porcini stuffing

The porcini stuffing has a robust flavour that would also be wonderful in a whole roast chicken. For a meat-free alternative, simply stir the stuffing mix through the rice instead of the lemon thyme and swap the chicken stock for vegetable to make a rich mushroom risotto.

NUTRITION PER SERVING
501 kcalories, protein 47g, carbohydrate 36g, fat 18 g, saturated fat 6g, fibre 3g, salt 1.67 g

Recipe from Good Food magazine, April 2009.

Chinese Mushroom Rice - Chicken and Rice Casserole - Green Risotto with Fava Beans

Save and share Mushroom-stuffed chicken with lemon thyme risotto recipe
Want to share this recipe with your family and friends? Click the button below to send them an email or save this to your favorite social network.

Grilled salmon teriyaki with cucumber salad


Delicious and easy recipe for Grilled salmon teriyaki with cucumber salad and rice. Learn how to make the best best dish of Grilled salmon teriyaki with cucumber salad.

Salmon fillets are cooked straight from frozen for convenience - the sticky glaze helps to keep the fish moist while it cooks.

Preparation time 10 mins
Cook time 20 mins

Ingredients Serves 4
1 tbsp sunflower oil
5 tbsp soy sauce
5 tbsp mirin or dry sherry
1 tbsp golden caster sugar
1 piece fresh root ginger , peeled and finely grated
2 garlic cloves , crushed to a paste
4 frozen boneless, skinless salmon fillets

FOR THE CUCUMBER SALAD
1 small cucumber
1 tbsp rice wine vinegar
1 tbsp soy sauce
½ tsp golden caster sugar
1 tbsp toasted sesame seeds

Method
1. Heat the grill to high and brush a sturdy baking tray with oil. In a large bowl, mix the soy, mirin, sugar, ginger and garlic together until the sugar has dissolved, then toss the frozen salmon in the soy mix until coated. Tip the remaining marinade into a small saucepan and bring to a simmer.
2. Place the tray about 4in away from the heat, then grill for 20 mins. Brush the fish every few mins with the simmering marinade until cooked through and glazed. If the fillets are thick, you may need to turn them on their sides so they cook evenly. Remove from the grill. Simmer the marinade until sticky, then pour it over the cooked salmon.
3. For the cucumber salad, use a swivel blade peeler to peel the cucumber into slices. Make the dressing by mixing the vinegar with the soy sauce, sugar and sesame seeds. Toss the cucumber with the dressing and serve with the salmon and boiled rice.

Try Frozen fish
Fish expert CJ Jackson says flash-frozen fish can be a better buy than fresh. It's often cheaper and can be 'fresher than fresh'. Plus, it's a great freezer standby and can be cooked from frozen.

Copyright: Angela Nilsen

Nutrition Per Serving
340 kcalories, protein 27g, carbohydrate 18g, fat 18 g, saturated fat 3g, fibre 0g, salt 4.23 g

Recipe from Good Food magazine, March 2009.

Salmon and rice loaf Recipe - Shrimp Rice Salad Recipe - Thai coconut rice with salmon

Save and share Grilled salmon teriyaki with cucumber salad recipe
Want to share this recipe with your family and friends? Click the button below to send them an email or save this to your favorite social network.

Thursday, January 14, 2010

Leggo my Bagel


I love a place that has their own mural, depicting people in an urban setting enjoying their product. Such is the case with House of Bagels, one of the few decent bagel places in San Francisco.


It's not exactly H & H, but this is as close as you'll probably get on the West Coast. They have a good crust, a good chew, and sometimes they are still warm when you get them. Great flavors, including the classics like Egg and Sesame, and one that was new to me and my favorite, Corn.


The place definitely has an East Coast feel - no frills, no nonsense, a little cheek (note the Ramones T-shirt on the employee - yay!). They also do deli sandwiches and carry some of my favorite items like whitefish and chopped liver. The best flashback to NYC came to me when I was browsing while waiting for my order...the black and white cookie! The symbol of unity, elevated to mythic status by Seinfeld, and a treat loved by almost all people. Where there is the black and white cookie, things must be all right in the world. At least for a few sugary moments.


Darn good chocolate cake

I got this recipe from my sister, Steph, a while ago but since then I have seen it on various blogs as well. I'm sure it has made it into most people's recipe box's, but just in case any of you don't have the recipe, here you go. I normally steer clear of cake mixes. Not that I am too good for simplicity - I just think they're weak. But, there are two recipes that I have that use them, and doctor them up terrifically... this is one. It's super easy, and SUPER yummy.


Darn good chocolate cake:

1 box dark chocolate cake mix
1 pkg 4 oz instant chocolate pudding
4 large eggs
1 c sour cream
1/2 c. water
1/2 c. oil
1 1/2 semi sweet choc. chips

Mix everything together very well, add choc chips. Cook in greased and floured bundt pan (12 cup?... whatever the bigger one is). Bake at 350 for 45-50 min, or until toothpick comes out clean... just don't overbake. Cool about 30 min before removing. Sprinkle with powdered sugar, or use a chocolate glaze. Here is what I use:

Chocolate glaze:
On stove, melt 1 pkg chocolate chips, one can sweetened condensed milk and 2 tbl butter together. Remove from heat, then add 1 tsp vanilla. You may want to add a couple tablespoons of milk as well, if it is thicker than you want. Drizzle over cooled cake. Also, I usually only use half of the amount that this makes and just save the rest for something later.

** A couple of side notes:
A yummy variation of this is to use butterscotch pudding and butterscotch chips instead of the chocolate. I know that sounds weird (or yucky), but my sister did this when she didn't have chocolate pudding one time, and it was quite yummy.

Another variation I've tried is to substitute 1 (15 oz) can of pumpkin puree for the oil and 3 of the eggs. Again, it sounds odd. I saw this on the Today show and decided to give it a try. The lady said to replace the oil and eggs in a cake mix recipe for the pumpkin. Cake mix recipes call for 3 eggs and this one uses 4, so I did still added one egg (impressive math skills, right?). Now, I'm not going to say that it tasted exactly the same, or that it was as good as the normal recipe (because I hate when people claim you can't tell the difference). But, I was pleasantly surprised. However, I did notice that it took just a bit longer to cook. I took mine out just a bit too early, and it was a little doughy.

Wednesday, January 13, 2010

Tandoori lamb with rice salad


Enjoy a tasty recipe for Tandoori lamb with rice salad. Learn how to make a delicious dish of Tandoori lamb with rice salad.

Ingredients (serves 4)
1/3 cup medium tandoori paste
1/4 cup plain yogurt
1 tablespoon lemon juice
8 (880g) lamb midloin chops
canola oil cooking spray
mini naan breads, to serve

Rice salad
1 cup basmati rice
1/4 teaspoon ground turmeric
1 small red capsicum, finely chopped
1/3 cup roughly chopped fresh mint leaves
1/4 cup flaked almonds, toasted
1/4 cup raisins, chopped
2 tablespoons olive oil
2 tablespoons lemon juice

Method
1. Combine tandoori paste, yoghurt and lemon juice in a bowl. Add lamb. Turn to coat. Cover and refrigerate for 30 minutes.
2. Make rice salad: Bring 6 cups of cold water to the boil in a saucepan over high heat. Add rice and turmeric. Cook, covered, for 10 to 12 minutes or until tender. Drain. Combine rice, capsicum, mint, almonds and raisins in a bowl. Combine oil and lemon juice in a jug. Pour over rice mixture. Toss to combine.
3. Spray a barbecue plate or chargrill with oil. Heat over medium-high heat. Remove lamb from tandoori mixture. Cook for 4 to 5 minutes each side for medium or until cooked to your liking. Serve with rice salad and naan.

Tip: To heat naan breads, wrap in foil and cook for 5 minutes, turning halfway, or until heated through.

Source
Super Food Ideas - February 2008, Page 77
Recipe by Cathie Lonnie

Tandoori chicken with coconut and coriander rice - Middle Eastern Rice & lamb salad - indian rice capsicums with mint yoghurt

Save and share Tandoori lamb with rice salad recipe
Want to share this recipe with your family and friends? Click the button below to send them an email or save this to your favorite social network.

Salmon and rice loaf Recipe


Easy recipe for a delicious dish of Salmon and rice loaf.

Ingredients (serves 4)
250g packet 90-second white rice
410g can red salmon, drained, bones removed, flaked
1/2 cup grated tasty cheese
4 green onions, thinly sliced
1/2 cup flat-leaf parsley leaves, chopped
1 tablespoon dijon mustard
2 eggs, lightly beaten

Method
1. Preheat oven to 180°C. Grease a 6cmdeep, 9cm x 19cm (base) loaf pan. Line base and sides with baking paper, allowing a 2cm overhang at both long ends.
2. Cook rice following packet directions. Combine salmon, cheese, green onions, parsley, mustard and rice in a large bowl. Add eggs and season with salt and pepper. Stir until well combined.
3. Spoon mixture into prepared pan. Smooth surface. Bake for 18 to 20 minutes or until set. Allow to cool in pan. Cut loaf into 4 thick slices.

Notes & tips
To freeze: Wrap each slice in plastic wrap. Place slices in an airtight container. Freeze for up to 2 months. Remove from freezer the night before. Place slices in individual airtight containers and refrigerate. Transfer to work bag or school bag in the morning.

Source
Super Food Ideas - February 2007, Page 50
Recipe by Claire Brookman

Thai coconut rice with salmon - japanese rice and egg - Black Rice Curried Meatloaf

Save and share Salmon and rice loaf recipe
Want to share this recipe with your family and friends? Click the button below to send them an email or save this to your favorite social network.

Tuesday, January 12, 2010

Pumpkin carrot bread/muffins

I like veggie/fruit breads. I like them a lot. I make them a lot. For some reason, my mind has justified these as being 'healthy', as opposed to cakes or cookies or other baked goods. But, that's probably not quite the case, since I end up eating a good half loaf of bread or half dozen muffins vs. a couple of cookies. Anyways, since I eat them a lot, I like to come up with new combos, or new ways of cutting out some lard, while keeping in some moisture, or adding more hidden veggies in them so that I can use the word 'healthy' with less guilt. So, here is a recipe that I came up with that is moist and 'healthy'. I guess it's very similar to the pumpkin zucchini bread I posted, but it's more on the pumpkiny side and even more moist.


Mix:
2 cups pumpkin puree
3 eggs
1/2 c milk
1/2 c oil
1 3/4 c sugar

Add:
2 c shredded carrot

Add:
3 c flour
3 tsp cinnamon
1/2 tsp nutmeg
1/2 tsp cloves
1 1/2 tsp salt
1 1/2 tsp baking soda

You can also add 1 cup of choc. chips for some extra yumminess. For bread (makes 2 loaves): grease loaf pans and bake at 325 for 50-65 min, or until toothpick comes out clean, cool for about 10 minutes before removing from pans. For muffins (makes about 24): grease muffin tins, fill almost to top and bake at 350 for 18-22 min, or until set, cool for a few minutes before removing. For mini muffins (makes about 48): grease tins, fill almost to top and bake at 350 for 12-16 min, or until set.

Power Up


Behold the main reason I went to Rainbow Grocery last week. I wanted to get all of the ingredients for Heidi Swanson's Power Bars recipe, a recipe I have been wanting to make for years, but have never bothered to attempt because it's too hard to find all of those ingredients at just one store - Rainbow is the only place where I would be guaranteed to hit everything on my list. Well, it was totally worth it. These are delicious bars, very similar in texture to a sweet, sticky rice crispie treat, and just as enjoyable, without any of the guilt. I think it would be easy to make substitutions, too - dried cherry and pistachio, apricot and pecan - you could go on and on.

One suggestion that I would make is not to make them in the 9 X 13 pan - that was how I made them the first time, and while delicious, they were much too "loose", totally falling apart at the touch and not really bars. Go for the 8 X 8 size. But other than that, a great recipe.


DO-IT-YOURSELF POWER BARS
- makes 16 to 24 bars -

Ingredients
1 tablespoon coconut oil

1 1/4 cups rolled oats

1 1/4 cups chopped toasted walnuts

1/2 cup oat bran

1 1/2 cups unsweetened crisp brown rice cereal

1 cup dried cranberries, coarsely chopped

3 tablespoons finely chopped crystallized ginger

1 cup brown rice syrup*

1/2 cup natural cane sugar

1 teaspoon pure vanilla extract

1/2 teaspoon fine-grain sea salt


Procedure
1. Grease a baking pan with the coconut oil. If you like thick power bars, opt for an 8 by 8-inch pan; for thinner bars, use a 9 by 13-inch pan.

2. Mix the oats, walnuts, oat bran, cereal, cranberries, and ginger together in a large bowl and set aside.

3. Combine the rice syrup, sugar, vanilla, and salt in a small saucepan over medium heat and stir constantly as it comes to a boil and thickens just a bit, about 4 minutes. Pour over the oat mixture and stir until the syrup is evenly incorporated.

4. Spread into the prepared pan and cool to room temperature before cutting into whatever size bars you desire.


*The second time I made these bars, I decreased the brown rice syrup to 2/3 cup and it was far less gooey and easier to manage.

Monday, January 11, 2010

Persimmons Two Ways


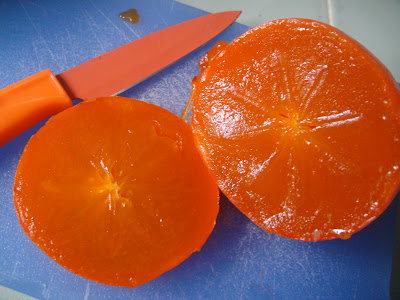
It seems like you wait forever for persimmons to ripen, and then when they finally do, there is this short period of time between the ripe stage and the rotten stage. I found myself at the end of this window, so I decided to try 2 different recipes.

The first was for Persimmon Pudding. An interesting dish, which seems to have originated in Indiana, persimmon pudding is more like a pancake than anything else. I thought it was ok, but not great - the whipped cream part was good, though.


The second recipe I received from my friend Kristina - Persimmon Cookies from the Fanny Farmer Cookbook. These turned out great - similar to a pumpkin cookie, with walnuts and raisins and a nice spice glaze. It gave me a chance to use my Mace, a spice which does not often see the light of day, and they were very good.


The thing about using persimmons in recipes is that they seem to get stuck in a rut in much the same way that pumpkin does - always paired with cinnamon/ginger/clove-type spices, so that everything you make with time tastes pretty much the same. That said, this is definitely a good cookie recipe, and worth a try. I found that letting the spice glaze cool with the cookies, then brushing on a bit more later gave a nice whitish appearance, since otherwise the glaze just disappears into the cookie.

PERSIMMON COOKIES

Source:-The Fanny Farmer Baking Book

1 cup vegetable shortening
3/4 cup brown sugar
3/4 cup sugar
1 egg
1 cup peeled and chopped persimmon (about 2 large or 3 or 4 small
persimmons)
2 cups flour
1 tsp salt
1 tsp baking soda
1 tsp cinnamon
1/2 tsp powdered ginger
1/2 tsp ground cloves
1 cup chopped walnuts
1 cup raisins
Spice Glaze (below)

Preheat the oven to 350 F and grease some cookie sheets.
Combine the shortening and sugars and beat until thoroughly blended.
Add the egg and beat well, then beat in the persimmon pulp.
Stir and toss together the flour, salt, soda, cinnamon, ginger, and cloves.
Add to the first mixture, and beat until completely mixed.
Stir in walnuts and raisins.
Drop by rounded teaspoonfuls onto the prepared cookie sheets and bake for about 10 minutes, or until the cookies have puffed & browned slightly.
Brush each with the Spice Glaze, then transfer to racks to cool.