ta name="google-site-verification" content="LnUtT_d1nKFEi6qCVRa2VtURKXcUowdpcm2UMwFTZUk" /> hummus recipes: November 2009

Monday, November 30, 2009

Almond Apple Crumble

Golden Delicious are my new favorite baking apples. They are not as tart as Granny Smith so I don't have to use as much sugar. And they bake up soft and fast without too much liquid.

I ran out of oatmeal and couldn't make my usual crisp with oatmeal and nuts. So I came up with this and have already baked it 3 more times within 2 weeks. I love eating the stuff. I heard somewhere that apples are good for you and almonds are some kind of a super food. I hope that's true. Plus this is flour-free, butter-free and with minimal added sugar!


Ingredients
  • 5 apples - peeled, cored and sliced

  • Juice from half a lemon

  • 1 cup almond flour

  • 1/2 teaspoon baking powder

  • 1/2 teaspoon salt

  • 2 tablespoons packed brown sugar

  • 2 tablespoons almond butter

  • 1/4 cup soy milk

Directions
  1. Preheat the oven to 350 degrees.

  2. Toss sliced apples with lemon juice and pile onto an 8x8 inch baking dish.

  3. In a large bowl, combine flour, baking powder, salt and sugar together. Rub in almond butter by hands until the mixture is crumbly (it looks like dirt at this point.)

  4. Sprinkle soy milk over the dough and mix until you get a wet but not soggy dough. Crumble on top of the apples.

  5. Bake for 40 minutes.

Salted Lemon Lime Shortbread Cookies

I don't know why I didn't post this recipe before. (Update: It's because these cookies are basically the same as these.) A lot of people came to this site for these mini lemon tarts which used lemon-lime shortbread cookie dough for crust. I was asked a couple of times for the recipe and each time I would just write back with full recipe from my head (I made them so many times I have the recipe memorized both by volume and by weight.)


These cookies are just a tiny bit sweet with a little tang from lemon/lime juice and refreshing citrus scent from both lemon and lime zest. It's also have a kick from extra salt sprinkled on top to balance out all the flavors. They are possibly the most perfect cookies ever. Salt part came as a happy accident. I forgot to add salt in the dough one time so just sprinkled it on top of the cut cookies. It turned out way better than the original. Somehow, the salt brought out more of the citrus and buttery goodness in them.


Ingredients
  • 2 1/2 cups all purpose flour

  • 1/2 cup sugar

  • 1/8 teaspoon salt

  • 2 sticks chilled butter

  • Zest from 1 lemon and 2 limes

  • Juice from the lemon and limes (not more than 1 tablespoon)

  • Extra sea salt for sprinkle and extra flour for rolling out the cookies


Directions
  1. With a food processor, pulse flour, sugar and salt together.

  2. Cut butter into cubes and add to the mixture. Add zest and juice. Pulse until butter is cut into the dough and the mixture is crumbly.

  3. Gather into 2 balls. Flatten and wrap in plastic wrap. Refrigerate for 30 minutes or more until the dough is hard enough to roll out and cut without sticking. I usually do this the night before.

  4. If rolling and cutting out cookies seems like too much work, just roll the dough into logs about 1 inch in diameter. Wrap and refrigerate.

  5. Adjust oven racks to the upper third and lower third. Preheat the oven to 325 degrees and line 2 baking sheets with parchment paper.

  6. Roll out the dough to about 1/4 to 1/3 inch thick and cut out with cookie cutter. Or if using the log method, use a sharp knife to cut the dough out into 1/4 inch thick. Arrange in prepared cookie sheets. These cookies don't expand much so just give them maybe 1/2 inch space between each other.

  7. Sprinkle with extra sea salt.

  8. Bake for 25 minutes or until the edges start to brown. Rotate and switch sheet position half way through.

  9. Let cool in the baking sheets for a minute then transfer to cooling racks. Let cool completely before storing or serving. The cookies develop more flavor and better texture when they are cold. They stay for about 1 to 2 weeks in cookie jars (not air-tight) but I assure you they definitely won't last that long.


Note: If you want light color and good looking cookies with smooth surface and perfect cut-out shape, bake longer in lower temperature (say 300 degrees for 30 minutes.) But if you don't care about how they look, you just want to eat them, bake them at 350 for 15 to 18 minutes. 325 degrees is the middle ground. You get reasonably good looking cookies in reasonably short baking time. I personally like crisp and dry cookies fast and prefer the higher temperature.

Sugar Cookies


This is a great sugar cookie recipe that I got from my sister-in-law, Dolly. Jessica, tell Taylor I'm sorry it took me so long to get this posted :)

Sugar Cookies:

Cream:
1 c. butter or shortening
1 1/2 c. sugar

Add:
2 eggs
2 tsp vanilla
1/2 c. sour cream

Add:
4 c. flour (more if needed)
1 1/2 tsp b. soda
1 tsp salt

If your dough is really sticky/tacky, then you may need to add a little more flour... just don't add too much. Chill dough for at least an hour. Roll dough out to about 1/4 inch (or a little thicker) on a floured surface (helps to make sure you rolling pin stays floured as well). Bake at 350 for 7-9 minutes - DO NOT OVER BAKE! They will taste like any other dry sugar cookie, if you do. Error on the side of under cooked - they shouldn't really have any brown on them.

It's just as important to use a good frosting recipe as it is to use a good cookie recipe - so that you end up with a great sugar cookie. Here's the one I use, in case you don't have one:

Frosting:
1/2 c butter, softened
1/2 c shortening (or use all butter if you don't care for shortening)
2 tsp vanilla
2 Tbl milk
5 - 6 c powdered sugar (I'm not exactly sure how much I use - I just add a little at a time until it's at the consistency that I like)
A few dashes of salt

Beat butter and shortening together. Add powdered sugar about a half cup at a time until it's smooth and stiff. Add milk, vanilla, and salt, and mix well. Add a bit more p. sugar to get it back to the right consistency, if needed.

Sunday, November 29, 2009

Fattoush Recipe - How to Make Fattoush


You are invited to try the best Lebanese Fattoush recipe. Learn how to make Fattoush. It's made from toasted or fried pieces of pita bread and other vegetables.

Ingredients (serves 6)

2 cups olive oil
2 pieces Lebanese bread, each cut into 4 pieces
500g cherry tomatoes, halved
2 Lebanese cucumbers, halved lengthways, deseeded, chopped
1 red capsicum, chopped
3 small radish, trimmed, thinly sliced
4 green onions, chopped
1 cup flat-leaf parsley leaves, coarsely chopped
1/2 cup mint leaves, coarsely chopped
1 tablespoon sumac (see note)

Dressing
1/4 cup olive oil
1/2 cup lemon juice
2 teaspoons sumac

Method
Make dressing: Combine all ingredients in a screw-top jar. Secure lid. Shake until well combined.

Heat oil in a saucepan over medium heat. Cook bread, in 4 batches, turning, for 1 to 2 minutes or until crisp and golden. Transfer to a wire rack to drain. 3 Place tomatoes, cucumbers, capiscum, radish, onions, parsley and mint in a large bowl. Sprinkle with sumac. Drizzle with dressing. Toss gently to combine. Break bread into pieces. Add to salad. Toss gently and serve.

Notes & tips
Sumac is a cherry-red spice that's dried and ground and has a slightly sour, lime-like taste. You can find it in the spices aisle of your supermarket.

Source
Super Food Ideas - November 2006, Page 52
Recipe by Abi Ulgiati

Save and share this recipe
Want to share this recipe with your family and friends? Click the button below to send them an email or save this to your favorite social network.

Tabbouleh Recipe - How to make Tabbouleh


Learn how to make best Lebanese tabbouleh. You are invited to try a delicious & easy tabbouleh recipe.

Fine bulgur might seem like a specialty ingredient, but it is actually in most supermarkets under the name Near East Taboule Wheat Salad Mix — just toss away the seasoning packet.

yield: Makes 4 to 6 side-dish servings

Active time: 40 minutes
Total time: 40 minutes

Ingredients

1/2 cup fine bulgur
3 tablespoons olive oil
1 cup boiling-hot water
2 cups finely chopped fresh flat-leaf parsley (from 3 bunches)
1/2 cup finely chopped fresh mint
2 medium tomatoes, cut into 1/4-inch pieces
1/2 seedless cucumber*, peeled, cored, and cut into 1/4-inch pieces
3 tablespoons fresh lemon juice
3/4 teaspoon salt
1/4 teaspoon black pepper

Method
Stir together bulgur and 1 tablespoon oil in a heatproof bowl. Pour boiling water over, then cover bowl tightly with plastic wrap and let stand 15 minutes. Drain in a sieve, pressing on bulgur to remove any excess liquid.

Transfer bulgur to a bowl and toss with remaining ingredients, including 2 tablespoons oil, until combined well.

* These long, narrow cucumbers are often marketed as "European" and are usually sold in plastic wrap to protect their thin, delicate, unwaxed skin.

Save and share this recipe
Want to share this recipe with your family and friends? Click the button below to send them an email or save this to your favorite social network.

Hummus with Yogurt Recipe


Who doesn’t adore hummus. This easy hummus recipe replaces most of the traditional tahini with yogurt. This is a great alternative for those who are watching their weight.

Ingredients

1 15 oz can of chickpeas or garbanzo beans, drained (save liquid)
1-2 cloves garlic, crushed
1 tablespoon lemon juice
1 tablespoon tahini, or low fat peanut butter if you prefer (optional, but if you do not use, increase yogurt by 1 TBLS
1/2 cup plain yogurt
1 teaspoon salt

Preparation
In a food processor combine beans, tahini (if desired), yogurt, garlic, and lemon juice. Blend well. Add salt and cumin and blend to a smooth and creamy dip.

If you hummus is too thick, add a little bit of the liquid from the chickpeas - about a teaspoon at time. Other ways to thin out hummus is by using warm water or olive oil also.

More hummus recipes

Roasted Garlic Hummus
Reduced-fat Hummus Recipe
Hummus & falafel on Pita Bread
How to Make Hummus without Tahini
Hummus Dip - Hummus with Tahini
Hummus Pita - Hummus Pita SandwichRecipe

Save and share this recipe
Want to share this recipe with your family and friends? Click the button below to send them an email or save this to your favorite social network.

Pea, asparagus and rice soup with Romano sticks

Pea, asparagus and rice soup is a delicious way to eat more greens. Enjoy rice soup.

Preparation Time 20 minutes
Cooking Time 30 minutes

Ingredients (serves 4)
60g butter
1 large leek, white part only, sliced
2 garlic cloves, crushed
1 cup (220g) arborio rice
1L (4 cups) vegetable stock
1 cup (250ml) water
1 cup (150g) fresh-shelled or frozen peas
1/2 bunch (about 100g) thin asparagus, trimmed, cut into 4cm pieces
100g Romano cheese
1 sheet (25cm) ready-rolled frozen puff pastry, just thawed
2 tbs chopped flat-leaf parsley

Method
1. Preheat oven to 200°C. Melt the butter in a large saucepan over medium heat. Add leek and garlic, and cook, stirring, for 5 minutes or until soft. Add rice and stir. Add stock and water and bring to the boil. Reduce heat to medium-low and simmer for 12 minutes or until rice is almost tender. Stir in peas and asparagus, and cook for 3 minutes or until tender.

2. Meanwhile, to make the Romano sticks, use a vegetable peeler to shave half the cheese. Finely grate remaining cheese. Cut pastry in half, then each half into 8 slices. Place slices on an oven tray lined with baking paper. Sprinkle with grated cheese. Bake in preheated oven for 10 minutes or until puffed and golden.

3. Stir parsley into soup. Ladle soup into serving bowls. Sprinkle with shaved cheese. Serve with the Romano sticks.

Notes & tips
Chopped prosciutto can be added to this soup, which is based on an Italian dish, risi e bisi (literally rice and peas).

Source
Notebook: - September 2007, Page 144
Recipe by Cynthia Black

Save and share this recipe
Want to share this recipe with your family and friends? Click the button below to send them an email or save this to your favorite social network.

Rice salad with turkey, celery and grapes


Ingredients (serves 4)

1 cup (200g) long-grain white rice
1 bunch thick asparagus, (woody ends trimmed), cut into 4cm lengths
2 tbs white wine vinegar
1 tbs rice bran or sunflower oil
1 tsp Dijon mustard
250g thinly sliced cooked turkey breast, roughly torn
1 yellow capsicum, thinly sliced
100g mixed baby salad leaves (mesclun)
12 seedless green grapes, halved
4 inner celery stalks with leaves, thinly sliced

Method

1. Cook rice according to packet instructions. Add the asparagus for the final 2 minutes of the rice cooking time. Rinse the rice and asparagus under cold running water to cool completely, then drain well.

2. Whisk together the vinegar, oil, mustard and 1 tablespoon of warm water in a large bowl. Season to taste with sea salt and freshly ground black pepper. Add the remaining ingredients, including the rice and asparagus, and toss to combine.

Notes & tips
Rice bran: Available from selected supermarkets.

Source
delicious. - December 2006, Page 216
Recipe by Kate Tait

Save and share this recipe

Want to share this recipe with your family and friends? Click the button below to send them an email or save this to your favorite social network.

Saturday, November 28, 2009

Thanksgiving, the Imperfect Perfect Meal


We hosted Thanksgiving again this year, and it was both a lot of work and a lot of fun. I was lucky to have the help of my friend Jude who made a good portion of the dishes, because cooking for 14 people is quite a feat! There were some hits and misses (misses on my part), but that's the challenge of cooking something new.

I'll share a few of the high points and low points:

Starting with appetizers, I tried a new recipe for an artichoke dip that turned out great. It was so easy to make, because you just blitz the ingredients in the food processor, put them in a baking dish, and bake for 20 minutes. What made it stand out was the texture - kind of like hummos, and very uniform. I loved that I could prepare it the night before and just heat it up the next day, too, and it did well as leftovers. This one is a keeper:


To counterbalance the heaviness of Green Bean Casserole (we had not one, but two!), I thought a nice clean side of Brussels Sprouts with Chestnuts sounded great. I bought fresh chestnuts and followed the directions on the package for roasting them, which I thought sounded much better than boiling them, as called for in the original recipe. What a huge mistake. I let them cool too much and then could not get them out of their shells, resulting in a huge crumbly mess. I got a new batch of fresh chestnuts, and boiled them instead. Again, I drained them and then tried to peel them, which went great at first, and then got progressively harder as they cooled. So finally I put them all back in the pot and removed and peeled them one at a time. Finally, I had something that I could use, but what a frustration! My dish did not look like the one in the picture, by the way. They were ok, but not worth all of the trouble - will revisit this one.


For dessert, I attempted both a Pumpkin Pie and a Bourbon Pecan Tart, thrilled because they used the same crust recipe. The Pumpkin Pie filling was a success (using Trader Joe's Organic Pumpkin - nice custard and not too sweet), but the crust was a disaster! As I baked it alongside the Pecan Tart crust, it shrunk and the butter melted and it turned into a sad pile of mush. I had to quickly recover and use a refrigerated ready-made crust, which worked out ok. The Tart crust, on the other hand, was perfect - maybe it was better suited to a tart pan - who knows. At any rate, it was a great dessert, even for people who don't normally like Pecan Pie - courtesy of Bon Apetit magazine. I served it with Creme Fraiche ice cream, which was delicious with Jude's Guinness Gingerbread cake and Bourbon ice cream. Yay, bourbon!


Of course, the best thing about Thanksgiving is being able to share all of this with people you love, and that is truly what makes this holiday one of my favorites.

Friday, November 27, 2009

Apple Dip


I got this recipe a few years ago from my sister-in-law, Kelly. It is soooo yummy.

Apple Dip:

8 oz. cream cheese
1/2 c. brown sugar
1/4 c. white sugar
1 tsp vanilla
1/2 pkg toffee bits

Whip together cream cheese and sugars until smooth. Add vanilla, then toffee chips. If you want crunchy bits, then add just before serving. If you want them more dissolved, then let them sit overnight.

Wednesday, November 25, 2009

Brined Turkey


Today we are getting ready to dunk the turkey. For the last 5 years, we have brined our turkey for Thanksgiving. I have never had a better turkey. Moist and flavorful. Some have asked us if it's too salty, but we have not noticed a huge difference. The only drawback is that you can't make homemade gravy from the drippings. So save the gibblets for gravy. This recipe is a mixture of several that Steve has perfected over the years.


Brine:

1 C Salt
1 C Brown Sugar
2 Oranges, quartered
2 Lemons, quartered
6 sprigs thyme
4 sprigs rosemary

You will also need some type of large container.
We use a 5 gallon bucket lined with a garbage bag.
To make the brining solution, dissolve the salt and sugar in 2 gallons of cold water (we do this right in the bucket). Squeeze the juice from the oranges and lemons into the water, and then throw the rinds in too. Then add the thyme, and rosemary. If you have a big turkey and need more brine than this, use 1/2 cup salt and 1/2 cup brown sugar for every gallon of water. Let the turkey sit in this brine for about 24 hrs. in the fridge or some other cold place. We leave ours in the garage - don't let it freeze though!

We Stuff the turkey with:

1 orange slice
1 yellow onion, cut into big chunks
1 stalk celery, cut into large pieces
1 carrot, cut into large pieces
2 bay leaves
2 sprigs of thyme
1/2 bunch sage
3 sprigs parsley

We Season the turkey this way:

1/4 of an orange
Room temperature butter
Salt and pepper

Rub the orange all over the turkey.
Rub butter all over the turkey - even under the skin too.
Season w/ salt and pepper as desired.

This is how we Cook the turkey:

You will need about 2-3 cups of chicken stock.

Cook at 325 degrees. Cook the turkey upside down (breasts down) for the first hour. Flip it over after that. Baste the turkey ever 45 min or so w/ a 1/2 Cup of chicken stock. As the turkey gets brown, tent it w/ aluminum foil. It took our 12lb. turkey about 3 hrs to cook.

We have cooked this in a bag before, and that works great too - it takes less time.

Tuesday, November 24, 2009

Not your Campbell's Green Bean Casserole

I've always really liked green bean casserole--even the Campbell's version, and it is a staple at Thanksgiving dinners for us. This, however, is a fresher take on it--better flavor, less mushy. It is an Alton Brown recipe from Food Network. He fries his own onions, but I still use the French's. I guess I'm not ready to give up all my processed foods. But if you are feeling ambitious the instructions are here.

Green Bean Casserole
  • 1 teaspoon kosher salt
  • 1 pound fresh or frozen green beans cooked until barely tender in salted water
  • 2 tablespoons unsalted butter
  • 8 ounces mushrooms, trimmed and cut into 1/2-inch pieces (He calls for 12 oz, but it's easier to just throw in an 8 oz package of already sliced 'shrooms .)
  • 1/2 teaspoon freshly ground black pepper
  • 2 cloves garlic, minced
  • 1/4 teaspoon freshly ground nutmeg
  • 2 tablespoons all-purpose flour
  • 1 cup chicken broth
  • 1 cup half-and-half
  • 1-1/3 cup french fried onions
Melt butter in heavy skillet over medium high heat. Add mushrooms, salt and pepper and cook until mushrooms start to release their liquid, about 4-5 minutes. Add garlic and nutmeg and cook for a minute or two more. Sprinkle the mixture with flour, stir until mushrooms are coated, and cook for one minute. Add broth and simmer for a minute more. Reduce heat to medium low and add half and half. Cook until mixture thickens, about 6-8 minutes.

Remove from heat. Stir in 1/4 of the onions and all of the green beans. Pour mixture into a casserole dish. Top with remaining onions. Bake at 400 degrees for approximately 15 minutes. Serve immediately.

Fast Food


As Thanksgiving approaches, I have slowed down my cooking and started eating more prepared foods, knowing that soon I will be anchored to the kitchen and having to turn out a variety of dishes. Today for lunch I heated up some Organic Tomato & Roasted Red Pepper Soup from Trader Joe's, and ate it with some Pumpkin Paratha and Cilantro Chutney from Sukhi's, which I bought at the Farmers Market on Sunday. It took no time at all, and was filling, healthy and delicious.

Speedy prawn fried rice

Perfect for a Monday night when the last thing you want to do is cook, this prawn fried rice dish is both filling and healthy

Serves 4 - Easily doubled
Prep 5 mins
Cook 10 mins
Low-fat

Ingredients
1 tbsp sunflower oil
1 red onion
200g pack mixed vegetable medley
200g pack large prawns , raw or cooked, defrosted if frozen
3 garlic cloves , finely chopped
2 tbsp Thai fish sauce
500g cooked, rice , use home-cooked or Tilda Rizazz basmati rice
chopped coriander and soy sauce, to serve

Method
1. Heat the oil in a large wok. Add the red onion and vegetables, then stir-fry for 2 mins until starting to wilt. Throw in the prawns, garlic and fish sauce and cook everything together for 3-4 mins until the prawns change colour and cook through. (If using cooked prawns, you just need to stir them into the rice to warm through before serving.)

2. Scatter in the rice, then carry on cooking for 3-4 mins until the rice is piping hot. Serve scattered with coriander and pass round the soy sauce bottle for those who want it.

Try
Know-how

Cold cooked rice makes a great standby ingredient and gives the best results for fried rice. To ensure that cooked rice is safe to eat, always chill it as soon as it is cool, reheat thoroughly from cold until piping hot and never leave it in the fridge for longer than 2 days. Great on the BBQ.

Nutrition Per serving (no soy)
249 kcalories, protein 14g, carbohydrate 43g, fat 4 g, saturated fat 1g, fibre 1g, salt 1.74 g

Recipe from Good Food magazine, July 2007.

More fried rice recipes

Stir-fried rice with chilli tuna recipe

Easy fried rice recipe
How to make fried rice

Save and share this recipe
Want to share this recipe with your family and friends? Click the button below to send them an email or save this to your favorite social network.

Monday, November 23, 2009

Eggy fried rice

Introduce your kids to Chinese food with this tasty, quick, fried rice recipe.

Ingredients
200g basmati rice (or use cooked rice)
85g carrots , diced
1 tbsp vegetable oil
2 eggs
25g butter
2 large spring onions , finely sliced
1 tbsp soy sauce
85g frozen peas

Method
1. Wash the rice and cook according to pack instructions in lightly salted water with the diced carrots. About 5 minutes before it's ready, tip in the frozen peas.

2. While the rice is cooking, heat the oil in as mall frying pan (about 20cm) and lightly beat the eggs with a little salt. Pour the eggs into the pan to coat the base, and cook until almost set as a thin omelette - this should take about 2-3 minutes. Flip the omelette and cook for a few seconds more, then slide it out of the pan and roll it up into a sausage shape. Keep warm.

3. Melt the butter in a wok or large frying pan and sauté the spring onions for 1 minute. Fluff up the rice mixture with a fork (there should be no cooking liquid left). Tip into the wok with the soy sauce and a little salt and freshly ground black pepper, then stir fry for 2 minutes.

4. Divide half the rice between two bowls, cut the omelette crossways into strips and scatter over the top. (Keep the remaining rice in a cool place for later.)

Nutrition Per serving
306 kcalories, protein 9g, carbohydrate 44g, fat 12 g, saturated fat 5g, fibre 2g, salt 0.92 g

Recipe from Good Food magazine, November 2003.

More fried rice recipe

Fast-fix fried rice
Spicy chicken fried rice
Stir-fried vegetable rice

Save and share this recipe
Want to share this recipe with your family and friends? Click the button below to send them an email or save this to your favorite social network.

Pineapple Pie

I took this pie to Drew's Thanksgiving play at school today. Several people asked me for the recipe so I think that qualifies it for here. I'll have to remember to take a picture when I make it again on Thursday. With such a cute first grader/acorn squash to take pictures of there was no time for food photography.

This pie is super easy and is great to add variety to the usual Thanksgiving pie selection.

Need: 2 unbaked pie shells, top and bottom
1-20 oz can crushed pineapple with juice
3 level Tablespoons tapioca
7/8 cups sugar (are you serious? use a scant cup)
3/4 teaspoon almond extract
sprinkle of salt

Mix the above together and let stand while you make the crust. Put in a pie shell and pat the top with butter. (Come to think of it, I don't think I've ever done this. I don't read instructions very well.)

Cover with top shell. Vent top crust with a fork or cut a pretty design in it. Seal edges with milk or water. Brush top crust with milk and sprinkle with sugar.

Bake in a 375 degree oven for 40-45 minutes.

Chicken Corn Chowder


It's soup night again at my house, so I decided to post this since we all loved it, and nobody else is posting anything.

I made this a couple of weeks ago when we had company for dinner. It was a huge hit, with Mark's brother having helping after helping. I was glad I doubled the recipe for guests. This soup received the hard to earn title of "Family Favorite" which means all six of us enjoyed it. I also really like how colorful it is with the celery, corn, and red pepper. PLUS...its really easy.

I'm not ashamed to say this came straight from My Kitchen Cafe, including the picture. Thanks Melanie! My notes are in italics.

*Plan Ahead: This recipe calls for cooked chicken.

2 tablespoons extra virgin olive oil
2 stalks of celery, finely chopped
1 red bell pepper, finely chopped
1 medium onion, finely chopped
1 jalapeno, finely chopped, seeds and membrane removed (I was afraid of the jalapeno, but with the seeds and membrane removed it added no heat, just a really great flavor)
1/4 cup thinly sliced or cooked chopped ham
3 cloves garlic, minced
2 (14-oz.) cans chicken broth
3 tablespoons flour
3 ears of fresh corn kernels or 1 1/2 cups frozen corn kernels
2 large chicken breasts, cooked and shredded (I grilled the chicken because I like the flavor)
4 oz. softened cream cheese (To avoid lumps, soften in microwave until almost melted)
1 cup milk (I used plain soy milk to cut down on the dairy for Sarah)
1/2 teaspoon salt
1/4 teaspoon pepper
1 cup shredded cheddar cheese (I recommend sharp or extra sharp)

Place olive oil in a large pot over medium heat. Saute celery, bell pepper, onion and jalapeno until tender, about 5 minutes. Stir in the garlic and ham; cook for another 3 minutes. Whisk the broth with the flour in a liquid measuring cup or bowl and then stir into the soup. Stir in the corn and chicken. Bring to a low boil and reduce heat. Whisk together the cream cheese and milk in a large bowl until smooth. Whisk the cream cheese/milk mixture into the soup along with the salt, pepper and cheddar cheese. Simmer on low until ready to serve.

Recipe Source: My Kitchen Cafe

Sunday, November 22, 2009

Equipment


I love home stores, and high-end cooking equipment, but often I feel that you are paying a lot for nothing. Equipment doesn't have to be fancy or have a designer name to be functional, and if you find yourself in need of some cooking supplies, but are light in cash, seek out a restaurant supply store like Forest Restaurant Supply, above. You will be surprised at what you might find there.

I went in search of buffet plates, but they didn't have them as cheaply as I wanted. No matter - it's so much fun to walk up and down the aisles and see row after row of pots and pans, condiment dishes, barware, sieves of every size, and whatever you might see at your favorite restaurant for cooking or serving, for very cheap prices.


I got some great wood skewers, $.99 stick lighters, and a bunch of those great tiny glass bowls that you always see on cooking shows. They are so perfect for filling with prepared ingredients, and make it a lot easier when you are making a recipe because the ingredients just slide right in.I used them today when making my Indian -spiced Kale and Chickpea recipe, and since it is very fast cooking, it made it really easy to have everything prepped beforehand.


So skip the Le Creuset outlets (still too expensive) and the latest sale at Macy's, and go to your local restaurant supply store for some real bargains. You'll find some useful things, and still have money left to go out to lunch afterwards!

Eat Your Greens


I blame the vegetarian. I think she jinxed me.

Today was a very strange day, food-wise, and I think it was because I spent an hour talking to a vegetarian last night. All I know is that I had great intentions, and the fates were not with me.

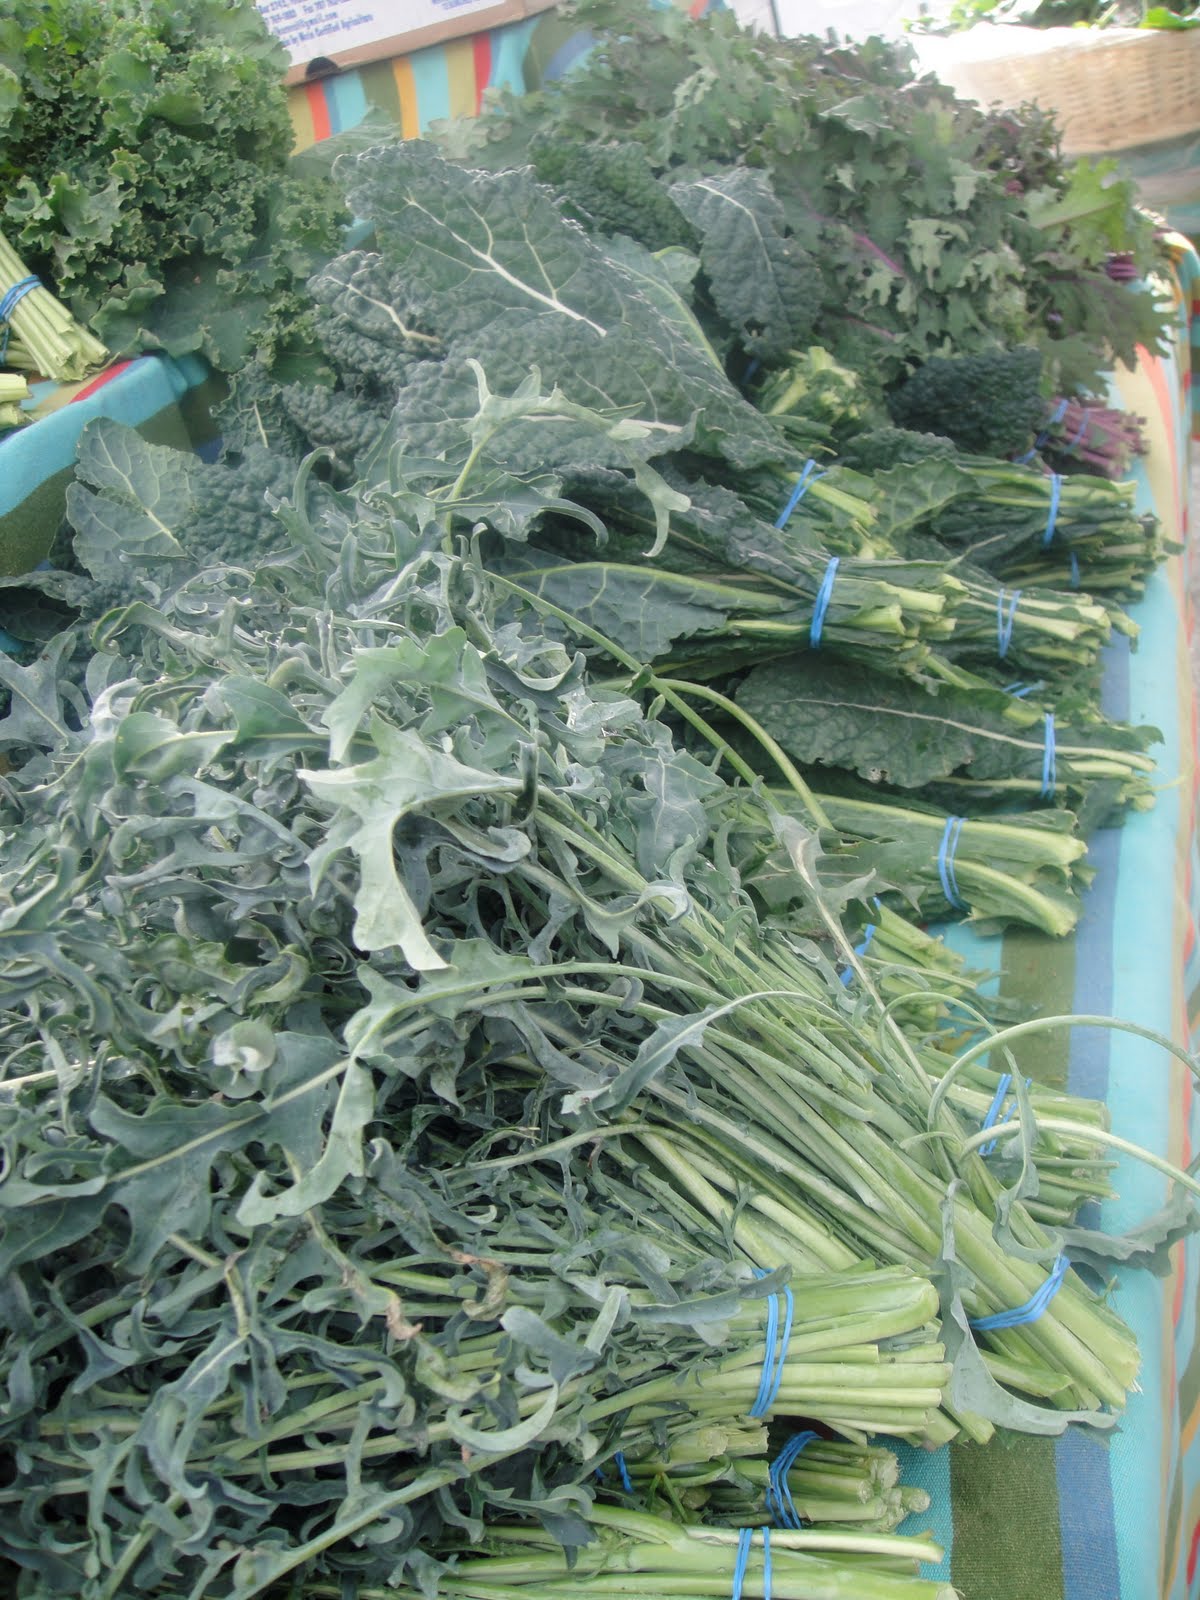
This morning I bought some nice produce at the market, including some beautiful kale, and a packet of Korma mix from a trusted vendor. When I got home, I planned a healthy Indian meal for dinner. I got started at 4:30, with a brown basmati rice on the stove, and chicken breasts simmering in a savory sauce. I then prepared a kale and chickpea dish, successfully getting everything coordinated to be ready at the same time.

When it was done, I tasted the Chicken Korma. Awful. I had my husband taste it. He made a face. It looked like watery paste and tasted like perfume, not like the silky, vibrant korma sauce we were used to. All of that work and preparation, for nothing! It was SO frustrating. Not to mention wasting a pound and a half of chicken - it was with a heavy heart that I threw it in the compost bag.

My vegetable dish, on the other hand, turned out very well, and was great over the rice. The spices were very nice and mellow. I added some roasted sweet potato chunks to the recipe but it was very tasty as is, too. I added salt to the original recipe, and altered it to use less of the broth.

As I started on dinner #2, bacon and eggs, I put some peanut butter chocolate chip cookies in the oven. Another miss! The dough was too crumbly and the cookies did not flatten properly. Some days, it's just best to stay out of the kitchen!


Indian-Spiced Kale & Chickpeas
  • 1 T. extra-virgin olive oil
  • 3 cloves garlic, minced
  • 1 lb. kale, ribs removed, coarsely chopped
  • 1/2 C. chicken or vegetable broth
  • 1 t. ground coriander
  • 1/2 t. ground cumin
  • 1/4 t. garam masala
  • 1/4 t. salt
  • 1 15 oz. can chickpeas, rinsed
  • 1 sweet potato, diced and roasted for 30 minutes with olive oil and salt and pepper (optional)
Heat oil in a Dutch oven over med heat.
Add the garlic and cook, stirring, until fragrant, about 30 seconds
Add kale and cook, tossing with 2 large spoons, until bright green, about 1 min
Add broth, coriander, cumin, garam masala and salt
Cover and cook, stirring occasionally, until the kale is tender, 8 to 10 min
Stir in chickpeas, cover and cook until the chickpeas are heated through, 1 to 2 min
Add the sweet potato and toss to combine

Grapefruit Souffle

Ha ha! Success! Well, sort of. Look at how beautifully my souffle rose....


But then about half a minute later, it sank.


I finally went out and bought two 6-oz ramekins made especially for souffle. I almost followed Martha Stewart's Grapefruit Souffle with Ginger except that I didn't have ginger and I didn't want 6 portions of souffle (which must be eaten immediately.) So I tried to third the recipe and ended up with 1 grapefruit, 3 tablespoons sugar, 1 teaspoon corn starch, 1 teaspoon flour, 1 egg yolk and 2 egg whites with some salt and cream of tartar.

What could it be? Was it because I didn't beat egg whites long enough? I whipped it to soft peak. Maybe I need a stiffer peak. Or was it because I didn't have enough egg white to hold all the filling?


Anyway, I will try again with Mark Bittman's chocolate souffle next weekend.

At least, this time I got a much better result than last week. At this rate, I'll be souffle god whose souffle has a staying power for more than one minute by Christmas!

100% Whole Wheat Bread

I'm loving this. Usually when I bake bread at home, I get full-sized loaf which either goes stale within a couple of days or disappears into my belly too fast. The idea, from Artisan Bread in Five Minutes a Day, is that I make a lot of bread dough, keep in the refrigerator and bake a small portion a day. This way I have well-portioned fresh bread every day. As a bonus, the bread dough develops more flavor the longer it stays in the refrigerator. (The book said not to keep for more than 5 days.)


This is the 4th loaf a got from the batch - baked in a preheated dutch oven, NYTimes no-knead bread style. The loaves are not as airy as oat bran bread which was made from all-purpose flour. This one has beautiful crust and nutty and a bit sour flavor. My first loaf which was baked about 10 hours after I mixed the dough came out a bit bitter. But the bitterness was gone in the second loaf baked the next day.


Here's the recipe which I adjusted a little bit from the book. Why the adjustment? I think that bread is not as delicate as what people said especially those that get to ferment for many many hours. As long as the ratio of flour per liquid is about right and salt + yeast are added, there will be bread. Measuring flour by weight instead of by volume is just convenient for me. I rounded yeast and salt to a tablespoon because I couldn't find my other measuring spoons. So there.

Ingredients
  • 800 grams whole wheat flour

  • 1 1/2 cups lukewarm water

  • 1 1/2 cups lukewarm soy milk

  • 1/4 cup light tasting olive oil

  • 1/2 cup Agave nectar

  • 1 tablespoon salt

  • 1 tablespoon instant yeast

Directions
  1. Mix flour, salt and yeast in a large bowl. Mix all the other ingredients into the bowl with a wooden spoon. When all the flour is nicely combined and wet, cover with a towel and let rise for a few hours until the dough falls. (I mixed the dough at night and just leave it overnight.)

  2. To bake, with wet hands take a grapefruit-size ball and shape into round by gathering its surface at the bottom and let rise on floured surface covered with a towel or plastic wrap until it's about one and a half size the original ball. (I lined a bowl with parchment paper. Rise my dough on it. And later just placed the paper with the dough on top into preheated dutch oven.) When the dough is at room temperature, it took me about one hour. But with refrigerated dough, I let it sit (covered) in a cool oven for about 2 hours to get to room temperature. Then shape and let rise for about 1 more hour.

  3. Preheat the oven to 450 minutes with a dutch oven and its cover inside for about 30 minutes.

  4. Flour the surface of the dough, slash (or not - I forgot with this loaf and I kind of like the way the loaf exploded.) Dump the dough onto the piping hot dutch oven, cover and bake for 20 minutes. Remove the cover and bake for 10 more minutes or until the bread browns.

  5. Let cool on a cooling rack for at least one hour before cutting.

Saturday, November 21, 2009

Hummus Pita - Hummus Pita Sandwich Recipe


Make the best Hummus Pita Sandwiches with this easy & tasty recipe. Hummus, made of mashed, cooked garbanzo beans, has Mediterranean origins. Although hummus is used as a protein-packed sandwich spread in this recipe, it is also a healthful dip for crudites or wedges of toasted pita bread.

Makes 4 servings

Ingredients

2 tablespoons sesame seeds
1 can (15 ounces) chickpeas, undrained
1 to 2 cloves garlic, peeled
1/4 cup loosely packed parsley sprigs
3 tablespoons fresh lemon juice
1 tablespoon olive oil
1/4 teaspoon black pepper
4 rounds pita bread
2 medium tomatoes, thinly sliced
1 medium cucumber, sliced
1 cup alfalfa sprouts, rinsed and drained
2 tablespoons crumbled feta cheese

Method

Toast sesame seeds in small nonstick skillet over medium heat until lightly browned, stirring frequently. Remove from skillet and cool. Drain chickpeas; reserve liquid.

Place garlic in food processor. Process until minced. Add chickpeas, parsley, lemon juice, olive oil and pepper. Process until almost smooth, scraping sides of bowl once. If mixture is very thick, add 1 to 2 tablespoons reserved chickpea liquid. Pour hummus into medium bowl. Stir in sesame seeds.

Cut pita breads in half. Spread about 3 tablespoons hummus in each pita bread half. Divide tomatoes, cucumber slices and alfalfa sprouts evenly among pita breads. Sprinkle with feta cheese.

More hummus recipes

Roasted Garlic Hummus
Reduced-fat Hummus Recipe
Roasted Red Pepper Hummus Recipe
Italian Hummus Recipe
Tofu Hummus

Save and share this recipe
Want to share this recipe with your family and friends? Click the button below to send them an email or save this to your favorite social network.

Roasted Garlic Hummus - Roasted Garlic Hummus Recipe


This roasted garlic hummus recipe is perfect for those who don't care for the tahini taste in hummus. The garlic adds a rich flavor that really compliments the chickpeas. Yummy Hummus Appetizer dish.

Try to serve Roasted Garlic Hummus to guests who have never had traditional hummus or to those who don't care for tahini in hummus. It has a rich garlic flavor that is not overwhelming - it's just right.

Preparation Time 10 minutes

Ingredients

1 can chickpeas/garbanzo beans (15 oz.)
2 tablespoons roasted garlic
1/2 tablespoon lemon juice
1 tablespoon olive oil
1/2 teaspoon oregano

Method

In a food processor, process beans, garlic, olive oil, lemon juice and oregano until desired consistency. If hummus is too thick, simply add olive oil in small increments(i/2 teaspoon) until desired consistency.

Serve roasted garlic hummus garnished with finely chopped parsley with hot pita bread, pita chips, or veggies. Roasted red pepper hummus goes very well with cubes of warm Italian bread.

Hummus can be prepared in advance up to two days if store in airtight container in the refrigerator. To serve, heat in microwave or on stove top.

More hummus recipes

Reduced-fat Hummus Recipe
Roasted Red Pepper Hummus Recipe
Italian Hummus Recipe
Tofu Hummus

Save and share this recipe

Want to share this recipe with your family and friends? Click the button below to send them an email or save this to your favorite social network.

Tofu Hummus - Tofu Hummus Recipe


Recipe for tofu hummus, a favorite vegetarian type of hummus. This tofu hummus recipe is super easy and absolutely delicious!

Tofu can add a lot of flavor and texture to hummus. This tofu hummus recipe is a favorite among those who love tofu. Try it out!

Preparation Time 10 minutes

Ingredients

1 15 oz. can chickpeas/garbanzo beans
8 oz. tofu
1 tablespoon tahini
1 tablespoon lemon juice
2 tablespoon olive oil
2 teaspoons garlic, minced
1/4 teaspoon cumin
1/4 teaspoon ground red pepper

Preparation

In a food processor, blend tofu, tahini, beans and olive oil. Add remaining ingredients and blend into a creamy, smooth dip.

Serve tofu hummus with fresh veggies or pita bread. Tofu hummus also makes excellent dip for falafel or as a spread for sandwiches.

Store hummus in an airtight container in the refrigerator for up to three days.

More hummus recipes

How to Make Hummus without Tahini
Reduced-fat Hummus Recipe
Roasted Red Pepper Hummus Recipe
Italian Hummus Recipe

Save and share this recipe

Want to share this recipe with your family and friends? Click the button below to send them an email or save this to your favorite social network.

Italian Hummus - Italian Hummus Recipe


Recipe for another verion of hummus, taste Italian hummus and Serve warm or cold with pita as a party appetizer, or put on French bread and run under the toaster oven for a great snack or light lunch.

Ingredients

1 cup non-fat cottage cheese
1 (15.5 ounce) can cannellini beans, drained
1 bunch fresh basil, chopped
1 pint grape tomatoes, coarsely chopped
1 clove garlic, minced
salt and pepper to taste

Method

In a blender or food processor, blend the cottage cheese, beans, basil, tomatoes, garlic, salt, and pepper until smooth.

More hummus recipes

Easy Hummus Recipe

Hummus & falafel on Pita Bread

How to Make Hummus without Tahini
Reduced-fat Hummus Recipe
Roasted Red Pepper Hummus Recipe

Save and share this recipe

Want to share this recipe with your family and friends? Click the button below to send them an email or save this to your favorite social network.

Roasted Red Pepper Hummus - Roasted Red Pepper Hummus Recipe


Recipe for a spicy version of hummus made with roasted red peppers. Roasted red pepper hummus make an excellent middle-eastern appetizer.

This hummus can be made 1 day ahead. Keep it refrigerated, and bring to room temperature before serving. Tahini is a paste made from sesame seeds and can be found in many grocery stores.

Ingredients

2 cloves garlic, minced
1 (15 ounce) can garbanzo beans, drained
1/3 cup tahini
1/3 cup lemon juice
1/2 cup roasted red peppers
1/4 teaspoon dried basil

Method

In an electric food processor, combine garlic, garbanzo beans, tahini, and lemon juice. Process until the mixture is smooth. Add roasted peppers and basil; process until the peppers are finely chopped. Season with salt and pepper. Transfer hummus to small bowl, cover and chill until you are ready to serve.

More hummus recipes

Easy Hummus Recipe

Hummus & falafel on Pita Bread

How to Make Hummus without Tahini
Reduced-fat Hummus Recipe

Save and share this recipe

Want to share this recipe with your family and friends? Click the button below to send them an email or save this to your favorite social network.

Thursday, November 19, 2009

Fresh Cranberry Sauce


Here is my contribution for Thanksgiving. I always thought I didn't like cranberry sauce. I usually don't care for something that retains the shape of the can it came from. Then one year at Mark's mom's Thanksgiving Dinner, his step-mom brought this (don't even try to figure that out). It is so different from stuff you slice from the can. Now I really like Cranberry Sauce, and best of all...its easy! This is the only picture I could find.

2 juicy oranges (Buy a couple extra, they need to be JUICY)
1 bag cranberries
1/3 cup sugar (This is just to start with. You may need to add more according to taste since cranberries are really tart. No matter how much you add it won't be as much as the stuff you buy.)

Process the oranges and cranberries in a food processor (or a blender) until desired consistency. I like mine a little chunky. Then add the sugar until you get the desired sweetness.

You can also play with this and add spices like cinnamon or cloves. You can also add a little orange juice, or whatever you want.

This will also keep in the fridge for a long time.

HAPPY THANKSGIVING!

Mexican Chicken and Rice Recipe


Tasty & easy recipe of Mexican chicken and rice. This is an authentic Mexican recipe. If you like Chicken and rice, try this yummy recipe.

Ingredients

2 pounds boneless skinless chicken breasts, cut into 1-inch pieces
1 medium green pepper, chopped
1 small onion, chopped
2 tablespoons canola oil
1 can (8-3/4 ounces) whole kernel corn, drained
1 cup chicken broth
1 cup salsa
1/2 to 1 teaspoon salt
1/2 to 1 teaspoon chili powder, optional
1/4 teaspoon pepper
1-1/2 cups uncooked instant rice
1/2 to 1 cup shredded cheddar cheese

Directions

In a large skillet, saute the chicken green pepper and onion in oil until chicken is no longer pink and vegetables are crisp-tender. Add the corn, broth, salsa, salt, chili powder if desired and pepper; bring to a boil.

Stir in the rice; cover and remove from the heat. Let stand for 5 minutes. Fluff with a fork. Sprinkle with cheese. Cover and let stand for 2 minutes or until cheese is melted. Yield: 6 servings.

Nutrition Facts: 1 serving (1 cup) equals 381 calories, 11 g fat (4 g saturated fat), 94 mg cholesterol, 782 mg sodium, 29 g carbohydrate, 3 g fiber, 36 g protein.

Mexican Chicken and Rice published in Country Woman September/October 2001, p39

tasteofhome

More Mexican rice Recipes

Mexican Rice with Chicken Recipe
Mexican Red rice
Mexican Fried Rice
Cajun-style chicken with Mexican rice

Save and share this recipe

Want to share this recipe with your family and friends? Click the button below to send them an email or save this to your favorite social network.

Mexican Rice with Chicken Recipe


Delicious traditional mexican rice recipe with chicken. Enjoy the Mexican way of cooking rice and chicken. Yummy recipe! Enjoy

Ingredients

1 package (6.4 ounces) Mexican-style rice and pasta mix
2 tablespoons butter
1-3/4 cups water
1 can (14-1/2 ounces) diced tomatoes with onions, undrained
2 cups cubed cooked chicken
1 jalapeno pepper, seeded and chopped

Directions

In a large skillet, cook and stir rice and pasta mix in butter until lightly browned, about 5 minutes. Add the water, tomatoes and contents of rice seasoning packet. Bring to a boil. Reduce heat; cover and cook for 10 minutes.

Add chicken and jalapeno. Cover and cook for 8-10 minutes or until rice is tender and liquid is absorbed. Yield: 4 servings.

Editor's Note: This recipe was tested with Rice-a-Roni rice and pasta mix. When cutting hot peppers, disposable gloves are recommended. Avoid touching your face.

Nutrition Facts: 1 serving (1-1/2 cups) equals 385 calories, 12 g fat (5 g saturated fat), 79 mg cholesterol, 1,217 mg sodium, 42 g carbohydrate, 2 g fiber, 25 g protein.

Mexican Rice with Chicken published in Quick Cooking September/October 2004, p49

tasteofhome

More mexican rice recipes
Mexican Red rice
Mexican Fried Rice
Cajun-style chicken with Mexican rice

Save and share this recipe

Want to share this recipe with your family and friends? Click the button below to send them an email or save this to your favorite social network.

A Lemon and a Lime Walk Into a Bar...


I had a bunch of lemons and limes left over from our dinner party last weekend, so instead of watching them go bad I decided to use them up by making Lemon Bars.

This recipe is from the Tartine cookbook by Elisabeth Preuitt and Chad Robertson, owners of the lovely Tartine bakery and Bar Tartine restaurant here in San Francisco. It's the kind of place that people from all over rave about, and will stand in line for no matter what the weather or season, and with good reason - the baked goods are fantastic.


The crust on these lemon bars is what sets them apart - as the title indicates, it's like a crisp shortbread cookie with lots and lots of butter, that you bake until it is browned and flaky. I had problems with it sticking to my baking pan, so next time I will use a non-stick pan or line it with parchment paper. Nonetheless, these were wonderful, with a pleasingly tart curd, and I love the suggestion on the recipe page that you can make the curd with a fresh Bergamot orange - that would be amazing. The recipe calls for just lemons, but since I had some of each I just used both lemons and limes. I did not have pine nuts in my pantry, but would definitely give that a try next time.

It looks like a lot of directions, but it's actually very simple.

Lemon Bars on Brown Butter Shortbread

Crust:
  • 1/2 C. confectioners' sugar
  • 1 1/2 C. all purpose flour
  • 3/4 C. unsalted butter, at room temperature
  • 1/2 C. pine nuts (optional)

Filling:
  • 1/2 C. all purpose flour
  • 2 1/4 C. sugar
  • 1 C. + 2 T. Lemon Juice (or mix of citrus)
  • Lemon Zest, grated, from 1 small lemon
  • 6 large whole eggs
  • 1 large egg yolk
  • pinch of salt

  • Confectioners' sugar, for topping
Preheat oven to 350. Butter a 9 X 13 in. baking pan
To make the crust, sift the confectioners' sugar into the bowl of a stand mixer fitted with the paddle attachment. Add the flour and stir to mix.
Add the butter and pine nuts (if using) and beat on low speed just until a smooth dough forms.
Transfer the dough to the prepared pan and press evenly into the bottom and 1/2" up the sides of the pan. It should be about 1/4" thick. To help even out the crust, use the flat bottom of any type of cup, pressing down firmly. Line the crust with parchment paper and fill with pie weights (Note: I actually skipped this step and it worked fine - who has pie weights?) Bake the crust until it colors evenly to a deep golden brown, 25 - 35 min. Rotate the pan 180 degrees if the crust appears to be baking unevenly.

While the crust is baking, make the filling: Sift the flour into a mixing bowl.
Add the sugar and whisk until blended.
Add the lemon juice and zest and stir to dissolve the sugar.
In a separate mixing bowl, whisk the whole eggs and egg yolks with the salt.
Add the eggs to the lemon juice mixture and whisk until well mixed.

When the crust is ready, pull out the oven rack holding the crust and pour the filling directly into the hot pan (it's easiest to pour the custard into the pan if the pan is in the oven).
Reduce the oven temperature to 300 and bake just until the center of the custard is no longer wobbly, 30 - 40 min.

Let cool completely on a wire rack, then cover and chill well before cutting into 12 squares with a sharp knife.

Dust the tops of the squares with confectioners' sugar.

Tuesday, November 17, 2009

Raised Potato Doughnuts

This recipe is from Sam Dyreng. They are fantastic. I don't usually like doughnuts, but I could not get enough of these. I have scaled it down. The original recipe makes 100, but 50 were plenty for us, the neighbors, and the Saturday morning flag football group (rave reviews all around), and so I have scaled it down to 50, and of course, added my notes because I like to share my opinions on things. Be sure and eat them fresh (like within the first hour). They are not the same the next day.

Raised Potato Doughnuts
1-1/2 cup milk
1/2 cup shortening (I used half butter half shortening because that's all I could scrape out of my 4 year old can of Crisco. Next time I'll try all butter.)
1/2 cup sugar
2 tsp salt
1 cup mashed potatoes (Sam actually made mashed potatoes with real potatoes and milk and stuff. I used potato pearls. Both were good.)
1/2 cup warm water
1 tablespoon dry yeast
3 eggs beaten
1 tsp lemon juice
1 tsp grated lemon zest
1/4 tsp nutmeg
6-7 cups flour (I needed a little more to get a workable dough.)
Combine milk, shortening, salt, sugar, mashed potatoes, and heat to lukewarm. (Instead of heating it all together I just warmed my milk in the microwave, made sure my potatoes were still warm and threw it all in the mixer. Saved myself a pot.)

Add beaten eggs and yeast that has been dissolved in the warm water.

Add half of the flour and beat until well blended and smooth. Add lemon juice, zest, and nutmeg.

Add remaining flour to make a soft but firm dough (firm enough to roll at least). Knead until smooth.

Let raise until doubled in bulk. Roll out to 1/2 inch thickness. Cut into doughnuts. Let raise again until doubled (30-40 minutes). (I just realized I totally skipped the second raising. They turned out great anyway.)

Deep fry in fat at 375 degrees until golden on each side. Drain on paper towels then dip in prepared glaze.

Glaze

2-1/2 cups powdered sugar
2 tablespoons softened butter
1 teaspoon vanilla (you can also substitute maple flavoring)
3 to 5 tablespoons of milk

With a mixer mix sugar and butter. Add vanilla and milk to desired consistency.

Apple Cherry Tart

We seem to be lacking in recipe postings lately, especially since it's coming up on Thanksgiving. So here is a call out for all of your Holiday Favorites.

We are very basic in our Thanksgiving meal. Pretty much the same thing every year. The only place that I get to experiment is with the dessert. I'm not a huge fan of making pies. I think they take a lot of work. In my opinion, you can have a great crisp or cobbler - it takes less time, and usually turns out better. My Mom would completely disagree with this statement, because she is a huge fan of Pie Crust. This recipe works for both of us.

Because this is a Pampered Chef recipe, it is made on a 13" stone, but I'm pretty sure you could make this on a cookie sheet just fine. I will try and make it soon so I can add a photo.

Crumb Topping:
2/3 c flour
1/2 C brown sugar
1/2 tsp cinnamon
1/3 C butter, softened
1/2 C pecans, chopped

Tart:
1 Pie Crust*
1 can (21 oz.) cherry pie filling, divided
2 lg. Granny Smith apples - pealed, cored and sliced thin

Preheat oven to 400.
Combine flour, brown sugar, cinnamon and butter. This can be done with a pastry blender or possibly a fork. You are looking for a nice crumbled mixture. Then mix in the pecans. Set aside.
(I've done this step using completely melted butter, so that I don't have to use a pastry blender, and it turned out a little different, but still great.)

Roll pie crust into a 13" circle and place on greased stone/sheet. Layer apples evenly over crust to within 1 inch of the edge of the crust. Spread at least 1/2 C of the pie filling over the apples. (I always use more.) Sprinkle crumb topping over cherries. Fold outer edge of pastry over the very edges of the filling to form a rim. Bake 30-35 minutes or until crust is golden brown.

I like this best served warm, with ice cream. You can top the ice cream with the left over cherries.

* I have always made this with a store bought pie dough - you have to roll it out a little to get it to make 13". I am sure that it is so much better with a homemade dough.

Monday, November 16, 2009

Left Over but Not Forgotten

I hate leftovers. Perhaps I have talked about this before, but it bears repeating because I really do hate them. Part of it is that I have a very low boredom threshold, and therefore need a lot of variety in my diet (hello, 875 Yelp reviews - sigh). Part of it is that the next day's re-heated meal can never match the beauty and taste of the original presentation. It will always be a little wilted, dried out, soggy, browned, whatever. Leftovers just look sad to me, like bum clothes - once lovely, now soiled and tattered, shadows of their former selves.

The thing is, I also hate to throw out food.

So this just forces me to be creative with leftovers. I am pleased to say that all of my meals today were made with leftovers from Saturday night's dinner, and they were all good!

Sweet Potato Pancakes with raisins for breakfast:


Seared Ahi on Arugula with Lemon Vinaigrette for lunch:


Chili-Lime Pork Tacos for dinner:

Hummus - Reduced-fat Hummus Recipe


Simple and delicious Reduced-fat hummus recipe, Serve with carrot and celery sticks. It's a vegetarian hummus dip recipe. Enjoy middle-eastern hummus as an appetizer dish, It's amazing and super easy.

Preparation Time 10 minutes
Makes about 450g (1 cup)

Ingredients

1 x 400g can chickpeas, rinsed, drained
60ml (1/4 cup) fresh lemon juice
2 tbs tahini
2 tbs water
1 tsp ground cumin
1/2 tsp ground coriander
1 small garlic clove, crushed
Salt & freshly ground black pepper
Sweet paprika, to garnish
Carrot & celery sticks, to serve

Method

Place chickpeas, lemon juice, tahini, water, cumin, coriander and garlic in the bowl of a food processor and process until a smooth paste forms. Taste and season with salt and pepper. (Add a little extra lemon juice or water if the hummus is too thick.)

Transfer hummus to a bowl. Sprinkle with paprika to garnish. Serve with carrot and celery sticks.

Source
Good Taste - February 2005, Page 119
Recipe by Jan Purser

More hummus recipes

Easy Hummus Recipe

Hummus & falafel on Pita Bread

How to Make Hummus without Tahini
Hummus Dip - Hummus with Tahini

Save and share this recipe

Want to share this recipe with your family and friends? Click the button below to send them an email or save this to your favorite social network.

Hummus Recipe - Easy Hummus Recipe


Easy & delicious middle-eastern hummus recipe. Learn the easy way of making best hummus. Just mix ingredients in a food processor, Place hummus in a bowl, and serve with toasted Turkish bread.

Makes about 3 cups

Ingredients

600g canned chickpeas, drained, rinsed
3 garlic cloves, crushed
100ml olive oil
2 tbs tahini paste*
1 tsp ground cumin
Juice of 1 lemon
Toasted Turkish bread, to serve

Method

Place the chickpeas, garlic, olive oil, tahini paste, cumin and lemon juice in a food processor and process until combined. Add 1/4 cup (60ml) of water and process again until quite smooth.

Place hummus in a bowl and serve with toasted Turkish bread.

Notes & tips

* From health food stores and selected supermarkets.

Source
delicious. - June 2004, Page 107
Recipe by Valli Little

More hummus recipes

Hummus & falafel on Pita Bread

How to Make Hummus without Tahini
Hummus Dip - Hummus with Tahini

Save and share this recipe

Want to share this recipe with your family and friends? Click the button below to send them an email or save this to your favorite social network.

Middle Eastern Rice - Middle Eastern Rice & lamb salad


Enjoy middle eastern rice & lamb backstraps salad, delicious and easy to prepare rice dish.

Ingredients (serves 4)

1/4 cup Moroccan spice mix
2 tablespoons olive oil
600g lamb backstraps
2 cups jasmine rice, rinsed
pinch of saffron
1/3 cup currants
1/2 cup dried apricots, chopped
1/3 cup Sunbeam slivered almonds, toasted
1/4 cup flat-leaf parsley leaves, chopped

Orange dressing
2 oranges, juiced
2 tablespoons olive oil
1 tablespoon honey
1 tablespoon red wine vinegar
1 teaspoon cumin seeds

Method

1. Combine spice mix and oil in a ceramic bowl. Add lamb and turn to coat. Cover and refrigerate for 1 hour, if time permits. Meanwhile, cook rice following absorption method on packet. Remove from heat. Combine saffron and 1 tablespoon hot water in a cup. Add to rice and stir in with a fork. Cover and set aside to cool.

2. Make orange dressing: Place 1/2 cup orange juice, oil, honey, vinegar and cumin seeds in a screw-top jar. Secure lid and shake to combine.

3. Preheat barbecue grill on medium-high heat. Drain lamb. Grill for 3 to 4 minutes each side for medium or until cooked to your liking. Transfer to a plate. Stand, covered, for 5 minutes. Thickly slice lamb.

4. Spoon saffron rice into a bowl. Add currants, apricots, almonds, parsley and lamb. Pour over orange dressing and toss gently to combine. Serve.

Source
Super Food Ideas - December 2006, Page 66
Recipe by Alison Adams

Save and share this recipe

Want to share this recipe with your family and friends? Click the button below to send them an email or save this to your favorite social network.